How to Paint Cockatoos in Watercolour
Techniques and Tips for Success
I want to share a process that has helped me take my watercolour paintings to the next level. Before I start many of my paintings, I like to do studies. I'll sometimes do a graphite study and then I’ll do a colour study to experiment with the colours I'm planning to use. Here is how I used this process to create a watercolour painting of two cockatoos.
My Inspiration
One morning I came down to my studio, and before I started working, I decided to water the new plants in the garden. While I was doing that, a cockatoo landed on the roof of the studio behind me. I had my phone in my pocket, so I quickly took some video before he flew away.
I kept watering but he didn't seem to want to fly away. He just sat there and watched me and I noticed that he kept glancing over towards the bird bath. I realised he wanted a drink and I was in his way so I turned off the hose and I went inside and grabbed my camera.

Cockatoo sitting on the birdbath

Cockatoo sitting on the roof
I stood away from the bird bath so that he could have a drink and then I noticed his mate was in the tree behind him, waiting as well. After a little while she too flew down, wandered through the garden to the bird bath and had a quick drink as well.
I had intended to paint something completely different that day, but these two visitors changed my mind. I ended up using two of the photos I took as reference for this painting.
Studies
Before I did the main painting, I did a quick graphite sketch and I then made a detailed colour study.
I made the graphite study for two reasons. The first was so that I could have a play with the background. Because these are white birds, I felt that I needed some colour on the background to enhance them.
The second reason was because I wasn't sure how much feather detail I wanted to include and by using the graphite I could draw it on and then erase it and play around with it until I was happy.
Then I did the colour study and with that I was able to try out different colours, experiment with the background and try different things. By doing a colour study, I find that I can limit my colour palette to just a few essential colours. On my main painting I ended up eliminating one of the colours I used on the colour study.
The graphite sketch and colour study took me a whole day to do but it was worth the time that I spent because the next day I started my main painting with confidence. This allowed me to relax and enjoy the day painting.
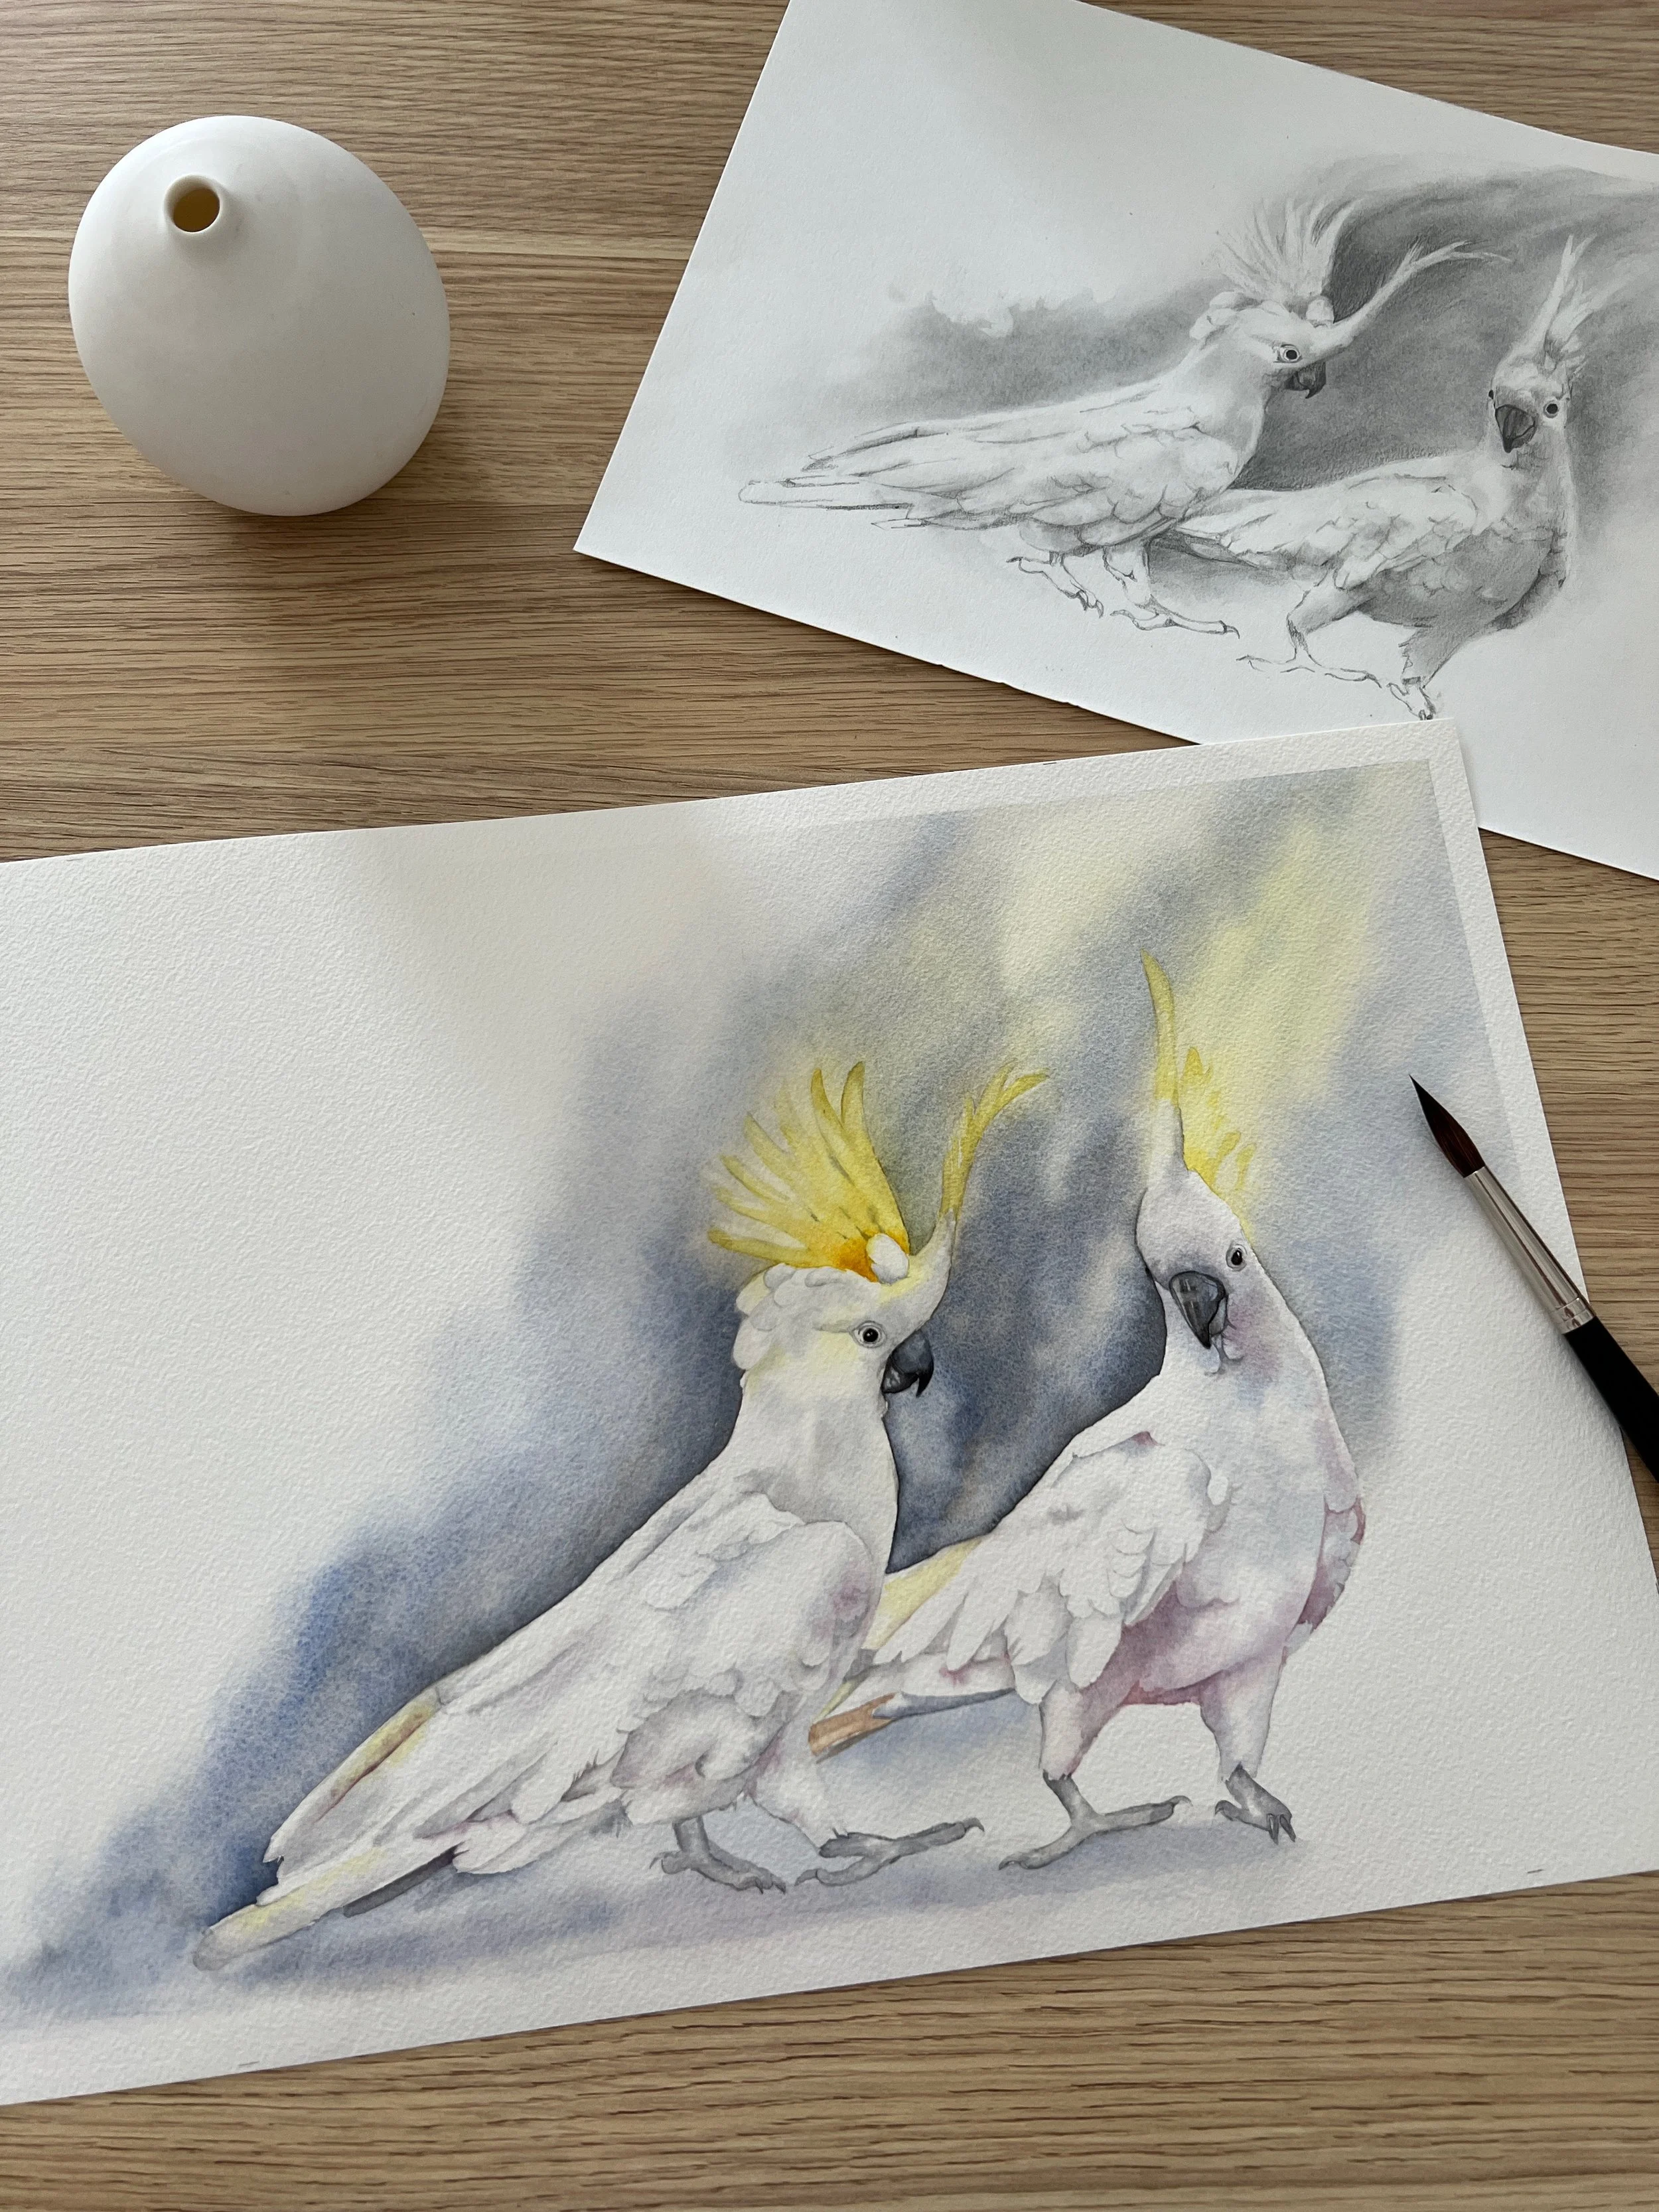
My graphite and colour studies
The main painting however, did not go without a hitch.
I thought it would make painting the background splash easier if I used masking fluid. So I painted some masking fluid around the edges of the birds with an old flat brush and proceeded to paint in the background area. After my background splash had dried I removed the masking fluid and I discovered that it had left a yellow stain on my paper all the way around the edge of the cockatoos…..insert frustrated sigh here.

Masking fluid applied

With masking fluid removed
If you look closely in the photo above you can see the ugly yellow stain around the edge where the masking fluid sat. It looked awful and I came really close to ripping the painting off my board and starting again. I should have known better. I always tell all my students to test the masking fluid on the edge of the paper before using it to make sure it doesn't discolour or tear the paper when removing it.
I should have listened to my own advice but I did manage to fix it and below I’ll show you how.
Materials
The paper I used for this painting was Fabriano Artistico soft pressed watercolour paper. Paints and some brushes that I use are listed below. These are affiliate links to Jackson’s Fine Art Supplies. I receive a small amount with each purchase and if you are a new customer with Jackson’s you will receive a 10% discount on your first order if you make an account with them and use the links below.
French Ultramarine
Burnt Sienna
Transparent yellow
Daniel Smith
Brushes
Da Vinci
The background
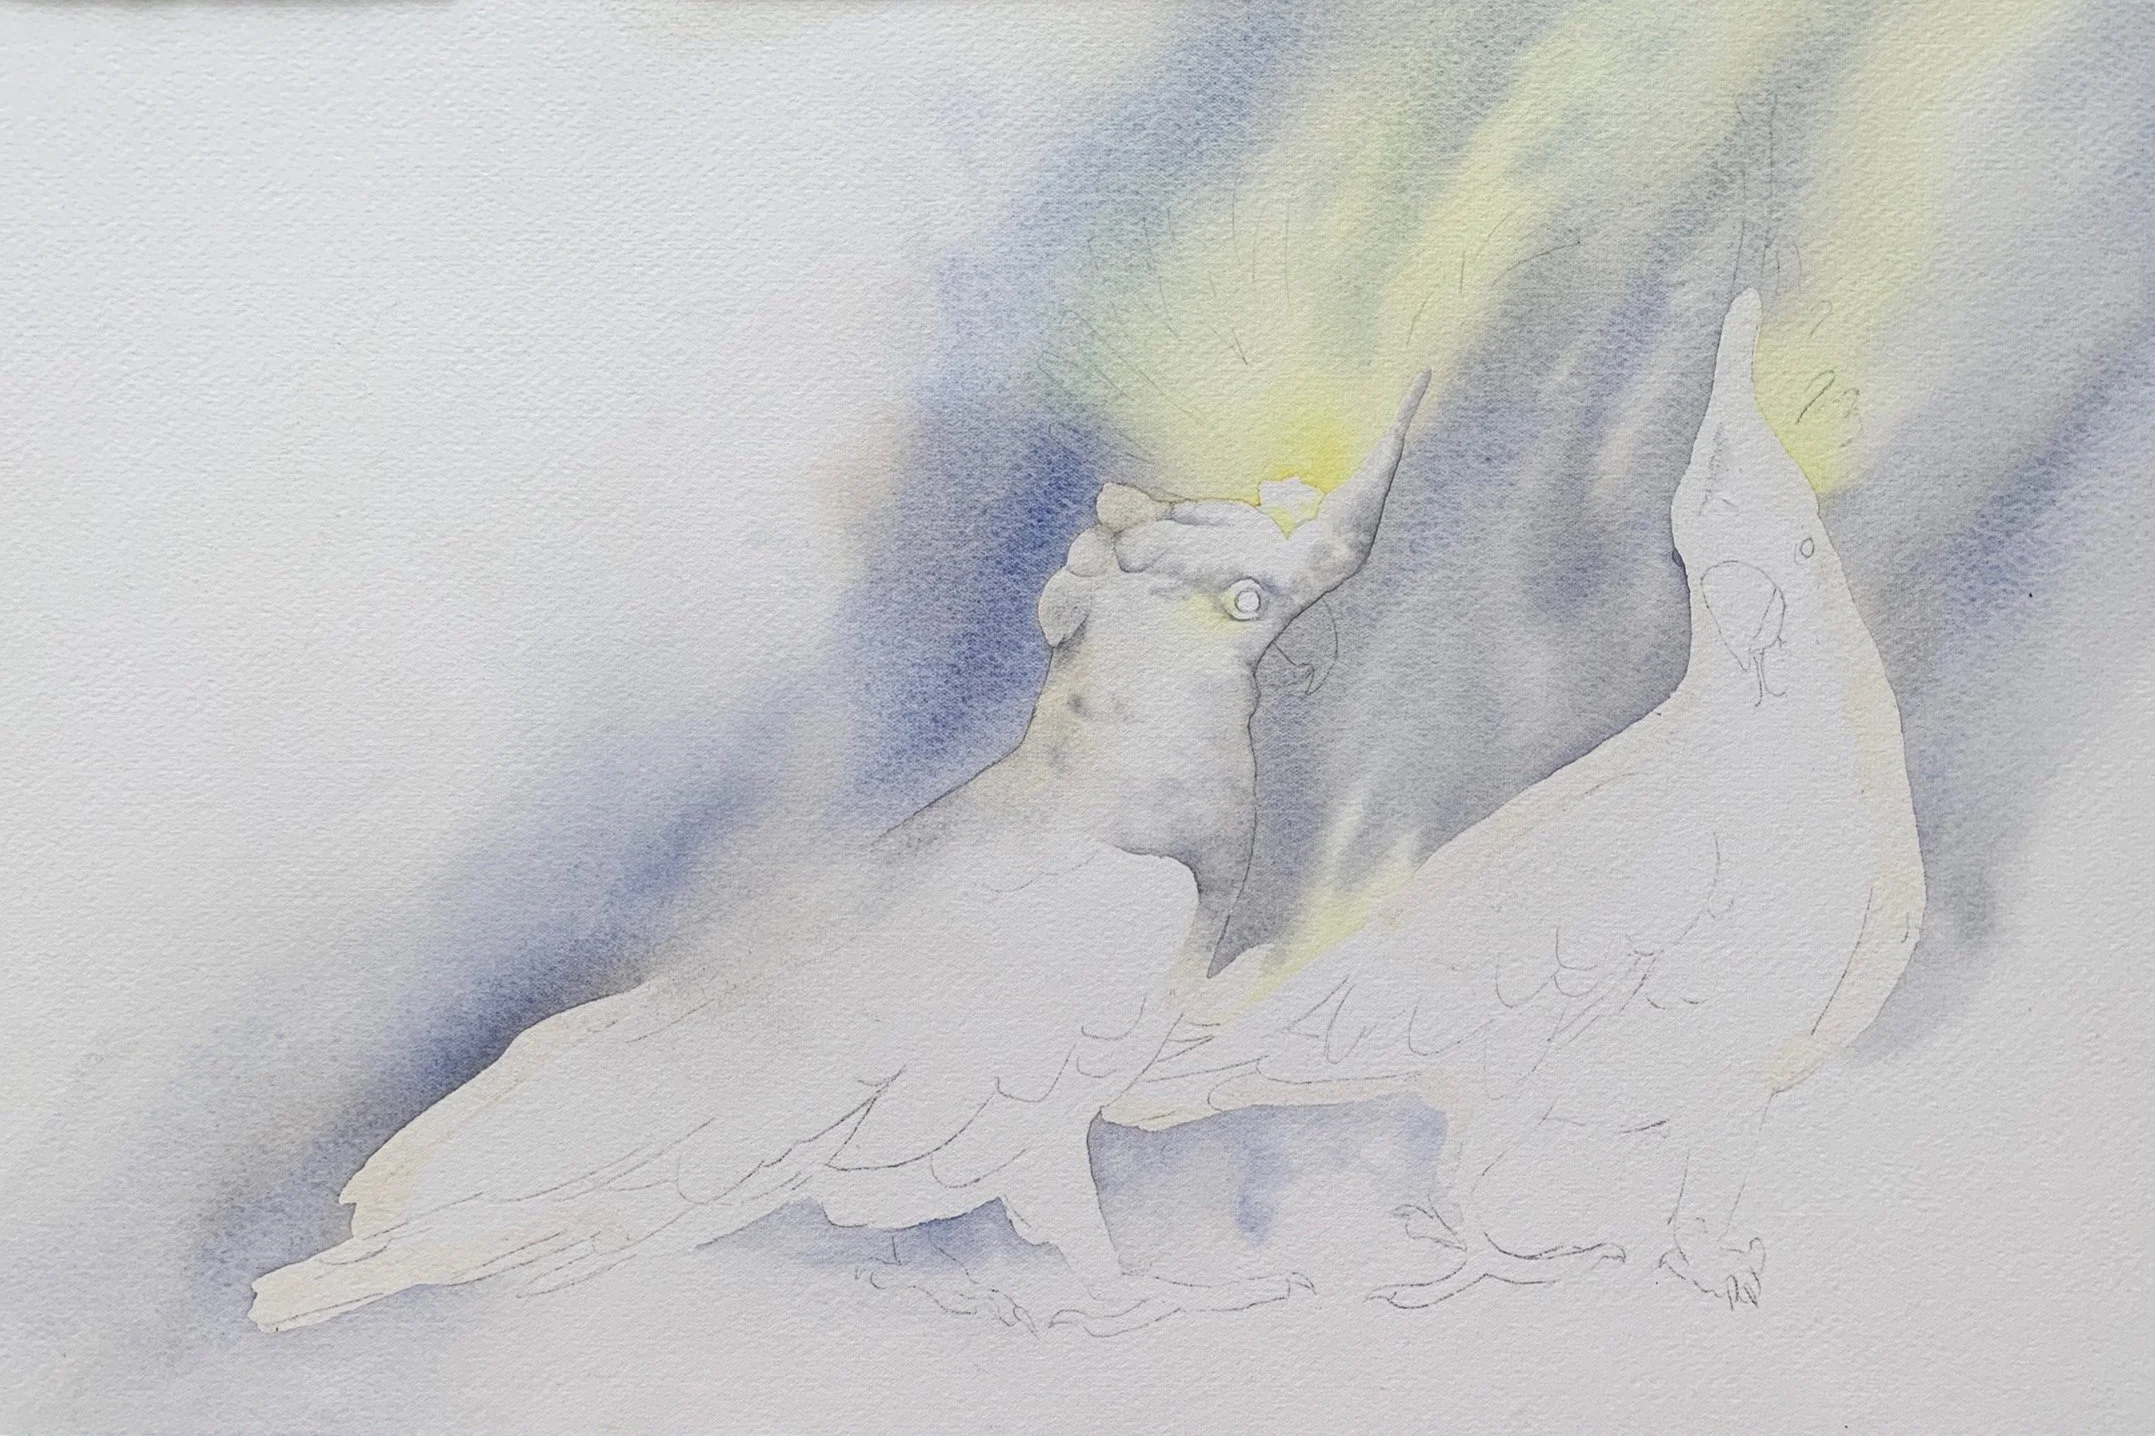
For the background, I picked up some Transparent Yellow on my mop brush and I washed that over the crest area on wet paper. I wanted to leave some lost edges on the crest feathers when I went to paint them, so I needed to wash the yellow all over that area loosely.
While it was wet I tilted my board up to the top right corner so that the paint would drift up that way.
I needed some yellow on the feathers at the back of the cockatoo, so I painted some Transparent Yellow there as well.

Mixing French ultramarine and burnt sienna
The blue/grey colour I used on the background was a mix of French Ultramarine and Burnt Sienna.
I wet the paper and painted on some of the grey paint that I used on the background onto the birds to try to disguise the yellow stain around the edge from the masking fluid.
That wasn’t enough to disguise it though so I also got out some Daniel Smith’s Buff Titanium and painted that on to the birds here and there. Buff Titanium is a similar colour to the stain, so it worked well on the white feathers and I was able to disguise the ugly yellow edge.
I was relieved that I didn't have to start over…….phew!
The Beaks
I needed some black for the beak, so I mixed more French Ultramarine and Burnt Sienna together. I like to use freshly squeezed paint when I mix really dark colours and a brush that is only slightly damp to pick the paint up. That way I can get the colour super dark. When the paint has dried on the palette I pick it up with a wet brush and that dilutes the intensity of it. When I use freshly squeezed paint however, I don’t have to pick the paint up with a wet brush because the paint is soft and gooey and it’s at its full intensity.
The beak on the cockatoo on the left had a grey wash over it from the background so I rewet the beak with water and then, when I painted the black paint onto the darkest areas, I let the grey wash from the background show through on the lightest areas of the beak. I did the same thing on the bottom beak.

Beaks, crest and eyes painted

A close up
The Crests
The reference photo doesn't show a great deal of tonal variation on the crest feathers of both of the birds so to make them look more interesting, I didn't refer to the photo when I painted the main painting. With these feathers I used Transparent Yellow to define some of the edges. I painted them on dry paper and then I used my damp brush to soften paint edges. I tried to leave a few lost edges as well.
The Bodies and Wings
The muted violet on the study is a mix of Scarlet Lake and French Ultramarine but when I finished the study, I decided that I didn't really like it and it wasn't needed so on my main painting I didn’t use it. That allowed me to limit my palette further which was good.

Colour study showing violet on the right hand bird
I continued to use Buff Titanium here and there on the bodies to further disguise the ugly edge that the masking fluid left and then I painted some grey here and there as well on wet paper.
When I painted the bodies and the wings, most of it I painted loosely because I didn't want to get lost in the detail of the feathers. I waited until that area was dry and then I painted in a little bit of detail on dry paper.
I tried to paint a variation of different edges: soft, hard, and even some lost edges here and there.

Left hand bird almost complete
I try as much as I can to not labor over my paintings as much as I used to. I used to try to get the paint to do what I wanted it to do because I had a fixed idea in my head and that led me to often battle with the paint to make it conform. Now I know better. Now I know that if I am struggling, I’m off course. These days, I'm beginning to accept what the paint gives me, and I'm comfortable knowing that I can't always control it. Sometimes I've got to let go and enjoy those happy accidents that occur!

Finishing the right hand bird

Finishing touches and ready to paint the feet and shadow
The Finished Painting
When I had finished painting the birds I painted a light grey wash under them on wet paper to ground them. When that was dry, I took the tape off from around the edges of the painting, cut it from the board…………….. and here it is.
Reveal of the finished painting
Final thoughts
I don't always do studies, but when I do I'm glad that I took the time. I really feel that my skills have progressed since I started doing them.
If I'm super confident with a subject I'll go straight in and start painting without doing a study, but if I don't really know what to do with the background or I'm not sure what colours I'm going to use, a study will always allow me to get to know my subject and it allows me to begin painting the main painting with confidence.
You can watch the video on YouTube and I'm going to make a full length tutorial of this painting for Patreon later this year. If you're eager to learn more about painting in watercolour, I've got over 150 tutorials on Patreon now, so there's plenty there to learn from. You can see all of the tutorials here.