How to Paint Hard and Soft Edges in Watercolour

A successful painting will often make use of both soft and hard edges.
A question I frequently encounter revolves around how to master the control of a watercolour edge. Effectively managing both hard and soft watercolour edges is crucial, as it significantly influences the overall texture and depth of your artwork.
If you’re venturing into the enchanting world of watercolours, or even if you’re looking to refine your skills, today’s blog post is tailored just for you, as we’re diving deep into one of the most pivotal aspects of watercolour painting.
Are you on the edge of your seat about controlling your watercolour edges? Fear not, I have all the answers.
Understanding Watercolour Edges
In any watercolour painting, the mastery of soft and hard edges - is crucial. These techniques help in defining the character and depth of your painting. There are several different types of edges that you can use in your watercolour paintings, and sometimes they are referred to as 'lost and found' edges.
hard (found)
soft (lost)
lost (lost)
broken (found)
Here’s a breakdown of how you can manipulate these edges effectively:
Hard Edges
Hard edges are referred to as found edges because they are easy to see. Hard edges are clear, defined lines that occur when paint is applied to dry paper. For instance, when you paint a watery wash on dry, cold press watercolour paper, it naturally forms hard edges around the perimeter of the wash.

A hard watercolour edge is painted with wet paint on dry paper.
This technique is great for adding definition and detail where you need attention drawn, such as around the focal point of your subject. Incorporating hard edges alongside soft edges enhances contrast in your painting. This contrast can add visual interest, guide the viewer's eye, making the painting more dynamic and engaging.
How to paint hard edges in watercolour
To paint hard edges using the wet-on-dry technique, start with a dry surface. Your brush should be fully loaded with fluid paint when you aim to create a hard edge. Since the paper is dry, the paint will dry with hard, well-defined edges.
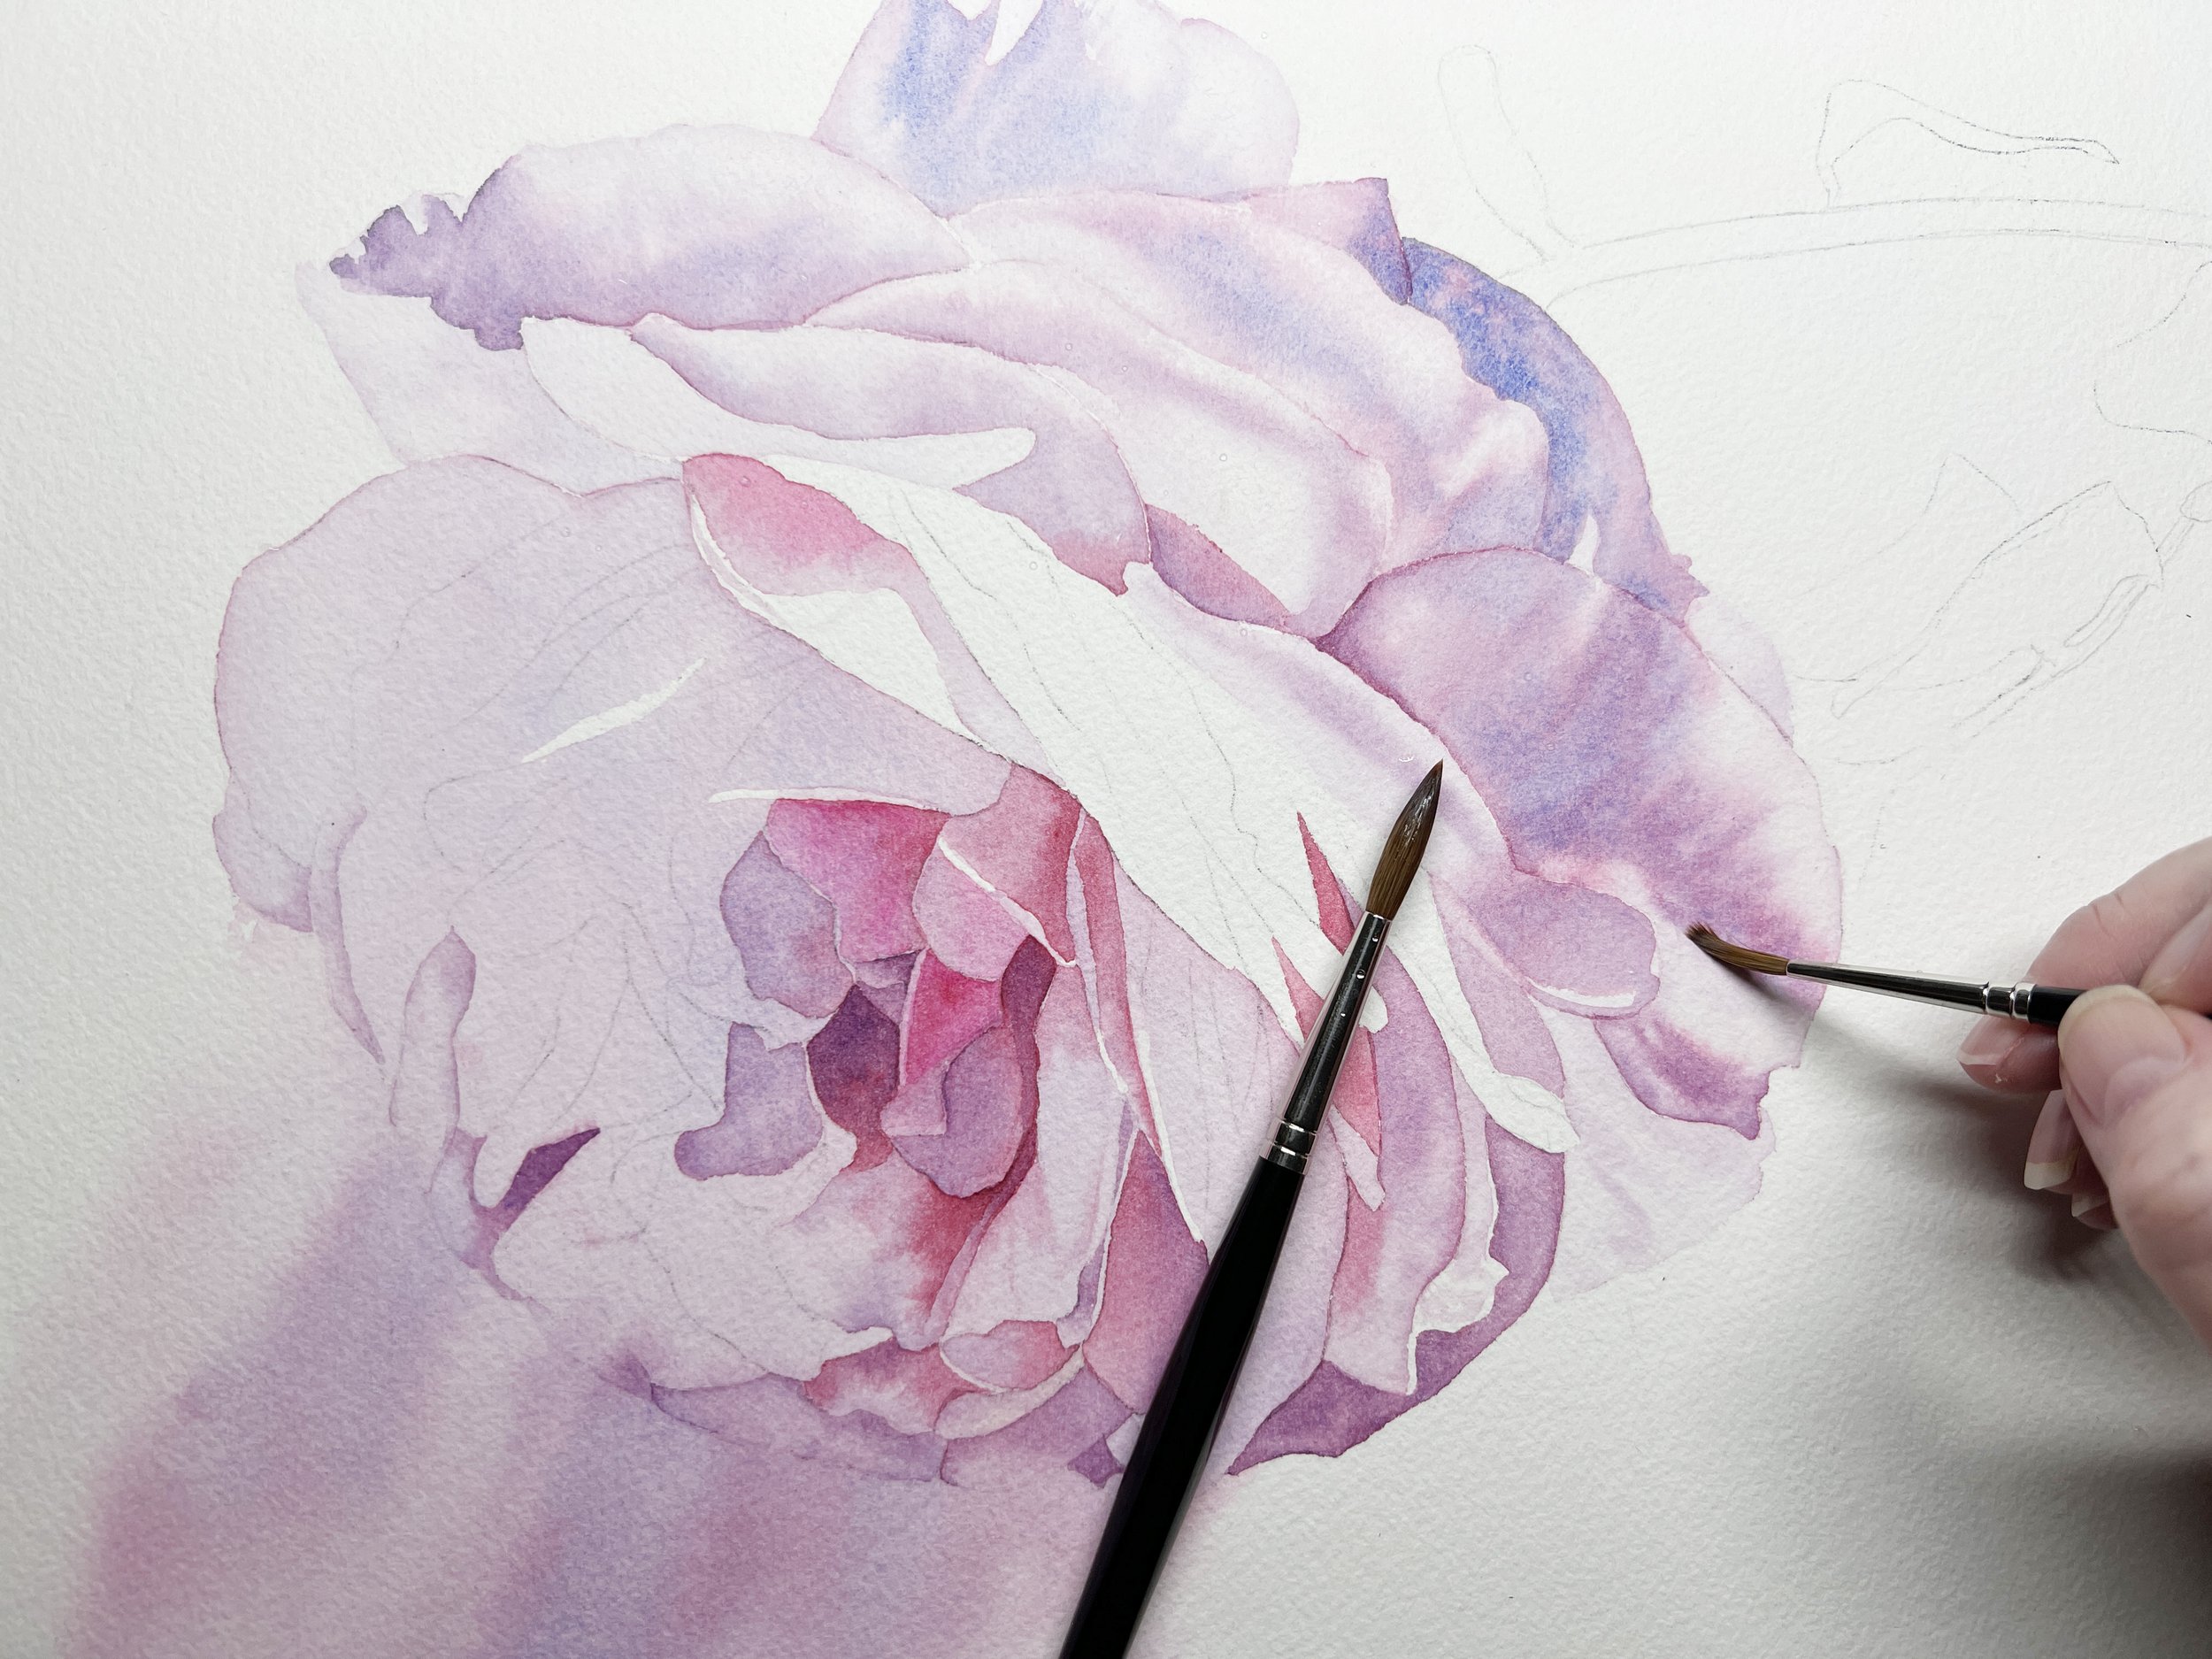
This petal has hard edges that are clearly defined. I'm washing it in on dry paper with very pale 'Rose of Ultramarine' watercolour paint.
Soft Edges
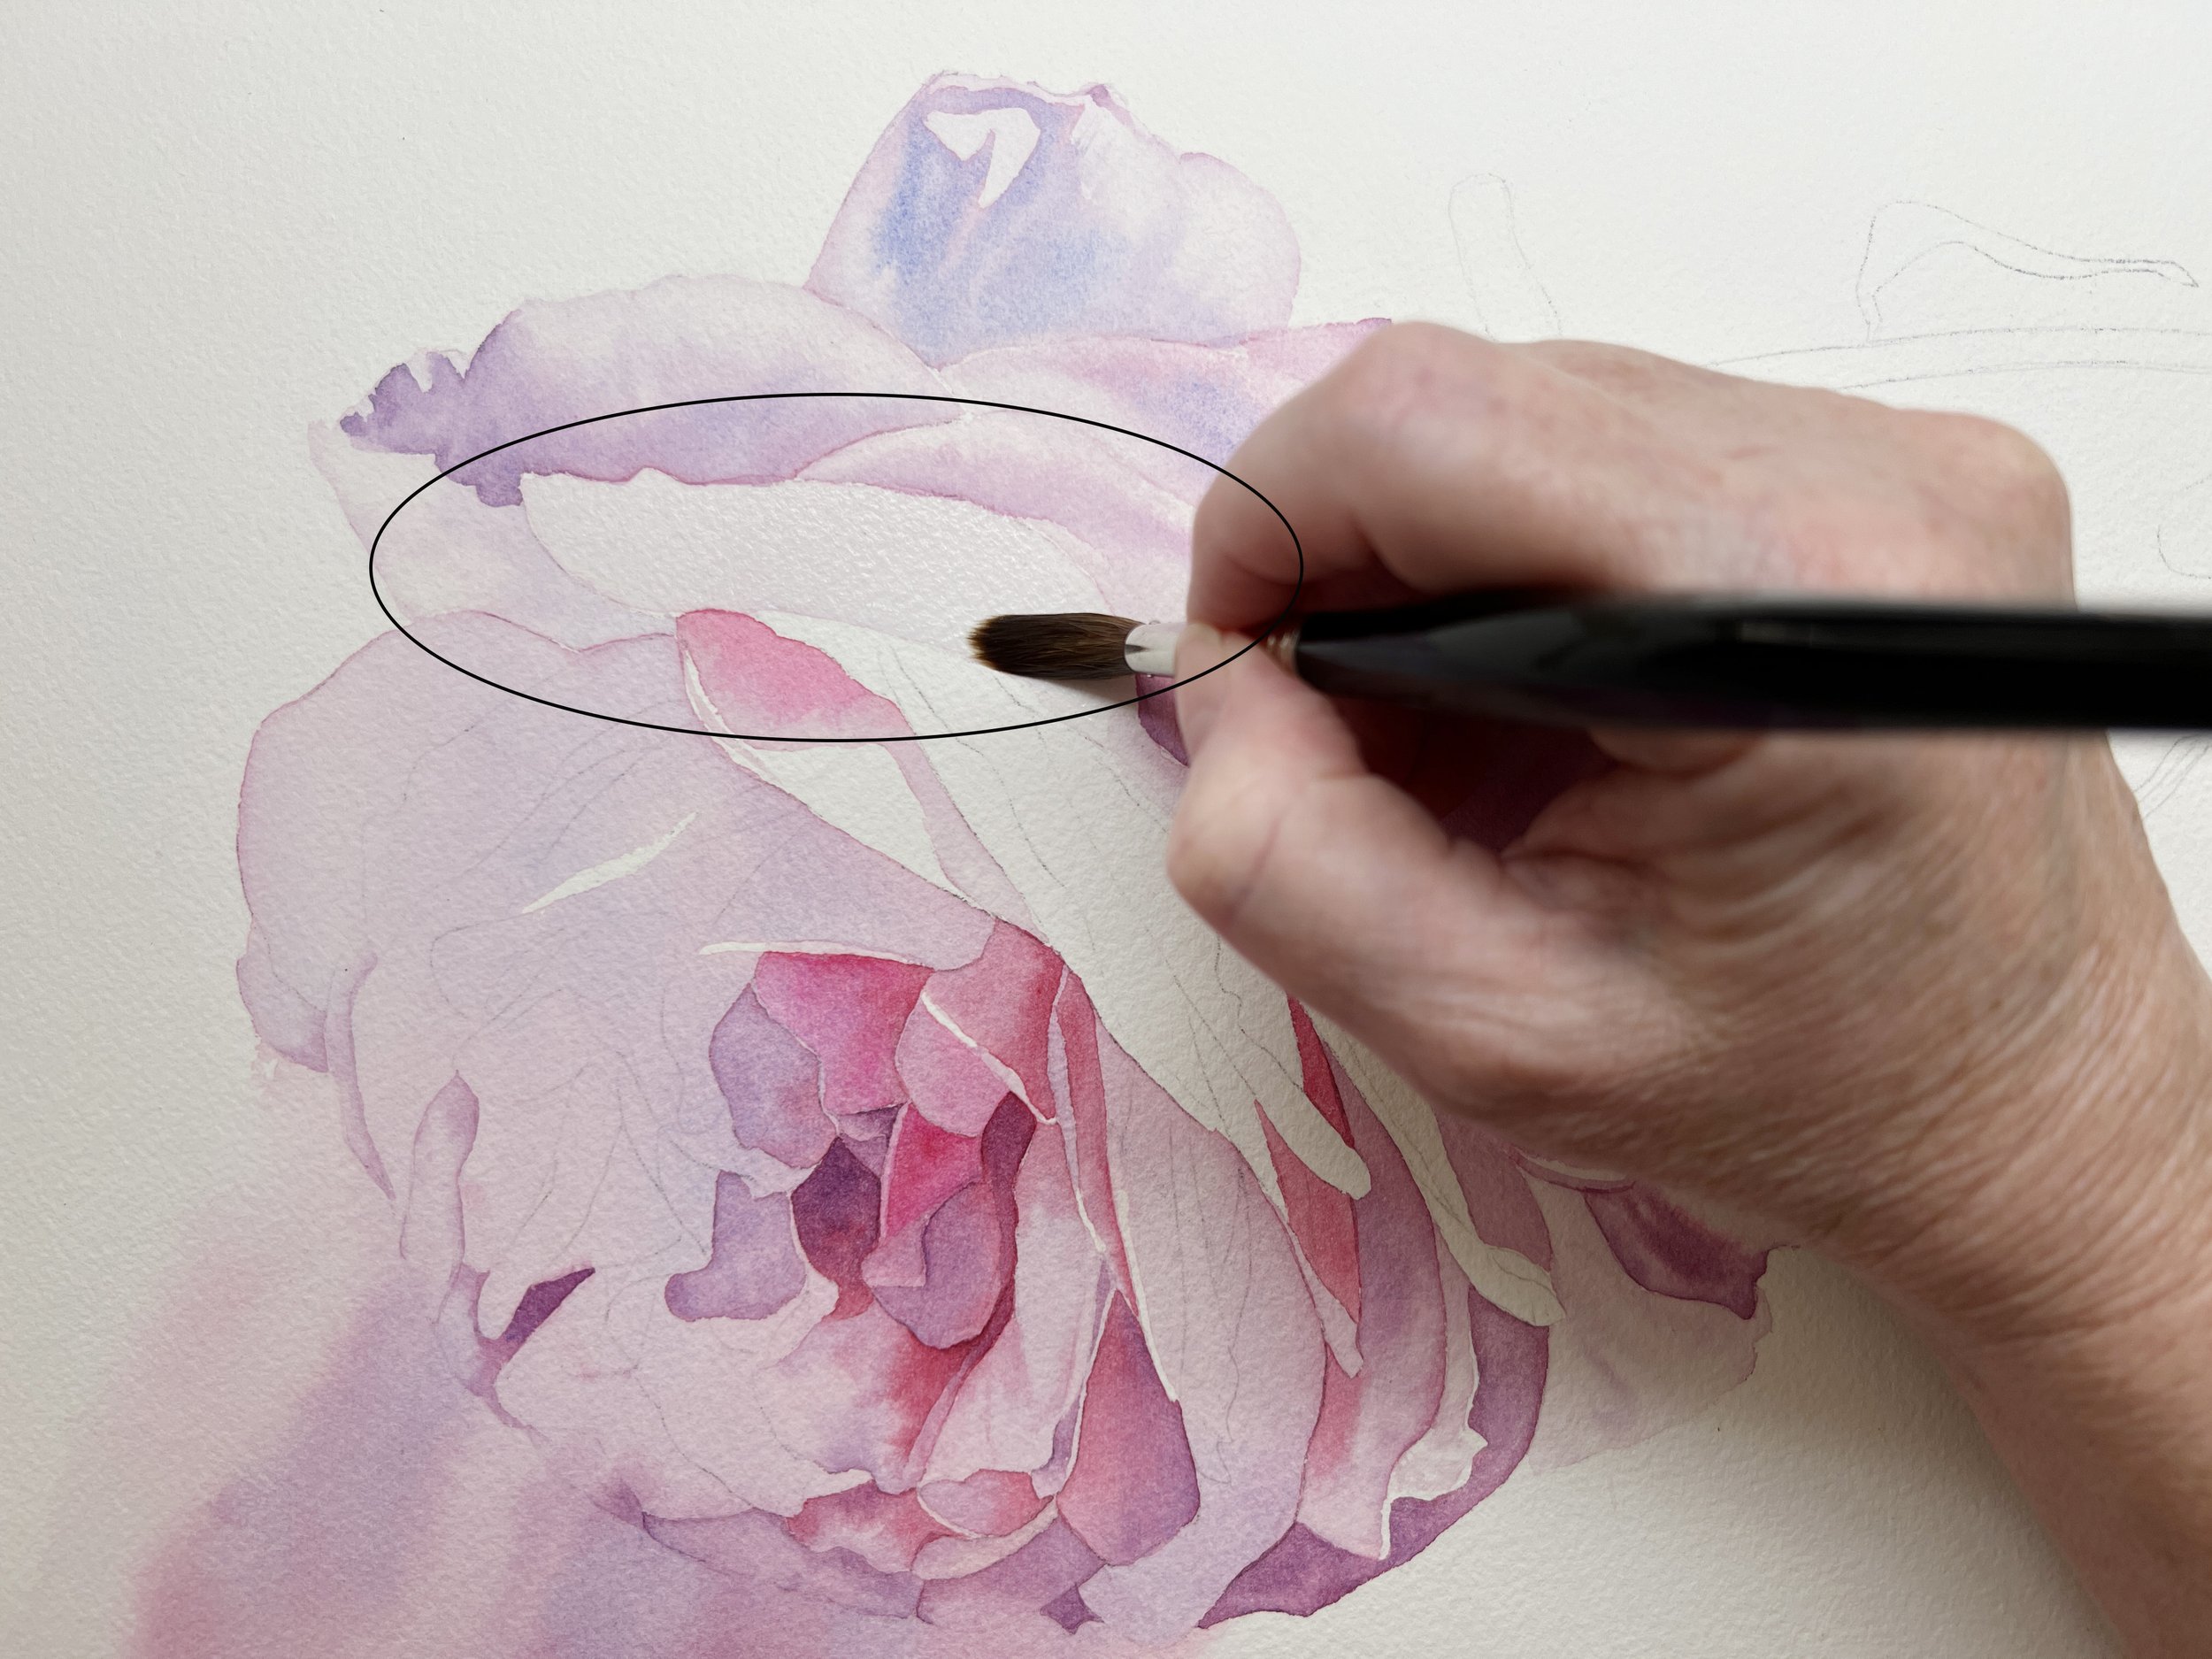
Soft edges are referred to as lost edges because it's harder for the eye to determine where the edge is. Soft edges are less defined, blending smoothly into the paper. This effect is achieved by dampening the paper first with clean water before applying the paint. The moisture helps the wet paint diffuse into the paper, creating gentle, fading transitions.

Here I'm painting on wet paper to create a shape with a soft edge all the way around.
Soft edges are a key technique for capturing atmospheric effects or portraying objects with gentler contours, such as clouds, foliage, or something with a curved edge. These edges lend a sense of softness and fluidity to your painting, and their suggestive nature is ideal for adding depth or infusing your work with a dreamy, ethereal quality. By using soft edges, you can subtly guide elements to recede, effectively pushing them into the background, creating depth, and enhancing the spatial dynamics of your composition.

The soft edges of the pink paint dispersing in the water were achieved by painting on wet paper.

The feathers on the front of the Kookaburra were painted on wet paper to create the softness I was looking for.
How to paint soft edges in watercolour
There are two effective methods to achieve soft edges in watercolour painting. The first is the wet-on-wet technique, where you apply paint to wet paper. This method allows the paint to spread across the moist surface, naturally creating a soft edge as it disperses. You can apply this technique to paper that's visibly wet and shiny or to paper that's merely damp, after the initial sheen has faded.

Here I'm wetting a section of the petal with water.

I apply the wet paint to the area that is wet and that leaves me with soft edges in the wet area.
For optimal results with the wet-on-wet approach, it's crucial to moisten the paper beyond the area you plan to paint. This precaution helps avoid unintended hard edges where the paint meets the edge of the water.
The second method is to paint wet-on-dry and then gently soften the edges with a brush while the paint is still wet. I demonstrate this technique, a very important skill in your painting process, in many of my tutorial videos, showing how to skilfully blend and soften edges to achieve the desired softness in your painting.
Lost Edges
I refer to a lost edge as an edge that is absent. A lost edge is painted by allowing the adjacent colours or values to blend or bleed into one another. If the area, you are painting has no colour, and you have included no colour on the background, you can leave an edge unpainted.
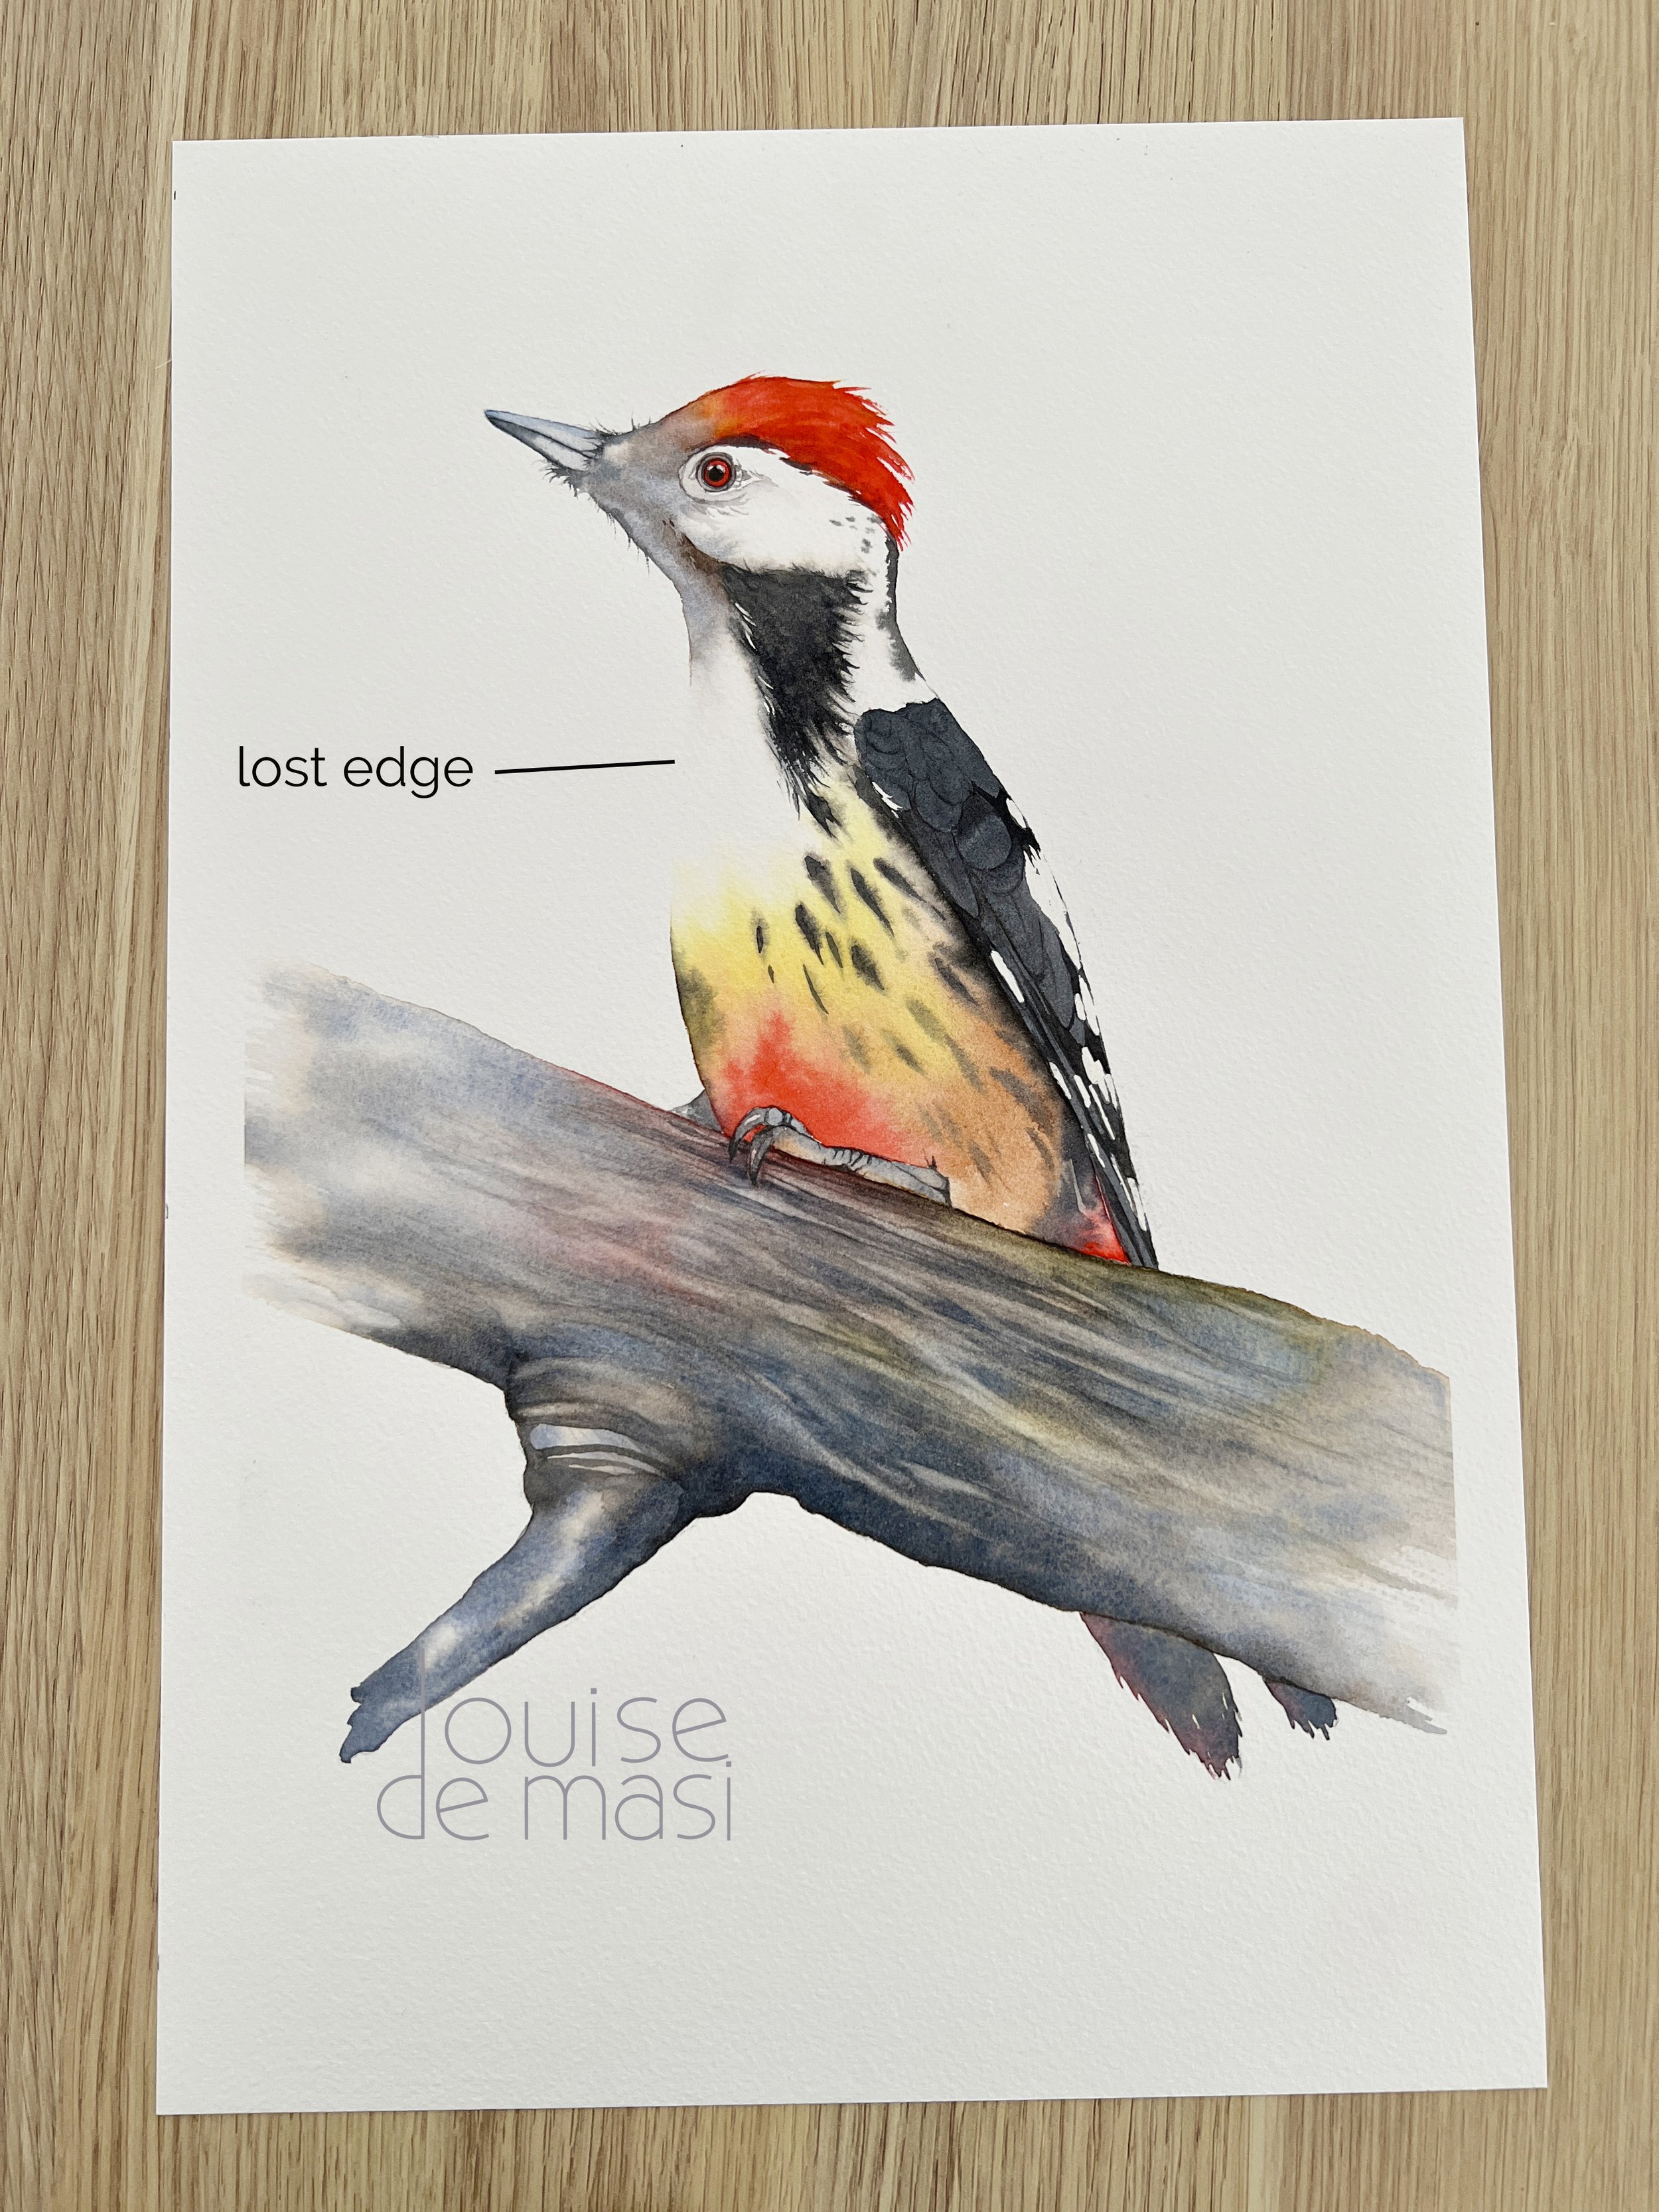
I haven't painted an edge in where the white feathers on the chest meet the white of the background.

I've left some lost edges where the colour of the petals and leaves are the same as the background. Can you find some more lost edges?
Lost edges are a fantastic tool for adding a touch of mystery to your painting, inviting viewers to use their imagination to fill in the blanks. They also enhance the form and structure of the subject, adding depth and interest.
In scenes bursting with action, such as cascading water or galloping animals, lost edges help convey motion. By letting these edges merge and flow, you can effectively capture the dynamic energy and fluidity of the scene.
How to paint lost edges in Watercolour
Lost edges, where the edge itself disappears, can be created by letting adjacent colours or values seamlessly blend into one another. Alternatively, you can achieve this effect by simply not painting the edges, as demonstrated in my Seagull and Woodpecker paintings, where the edges are left undefined to enhance the sense of integration and unity within the artwork.

My seagulls painting has a few lost edges. Can you spot them all?
Broken Edges
Broken edges are wonderfully effective for conveying texture and adding a layer of visual intrigue to a painting. They breathe life and movement into your subjects, particularly when depicting rough textures like rugged surfaces and lush foliage. A hard edge in these instances might seem too stiff or artificial. Instead, broken edges introduce a delightful spontaneity and a casual, lively feel to the artwork, making it feel more dynamic and engaging.
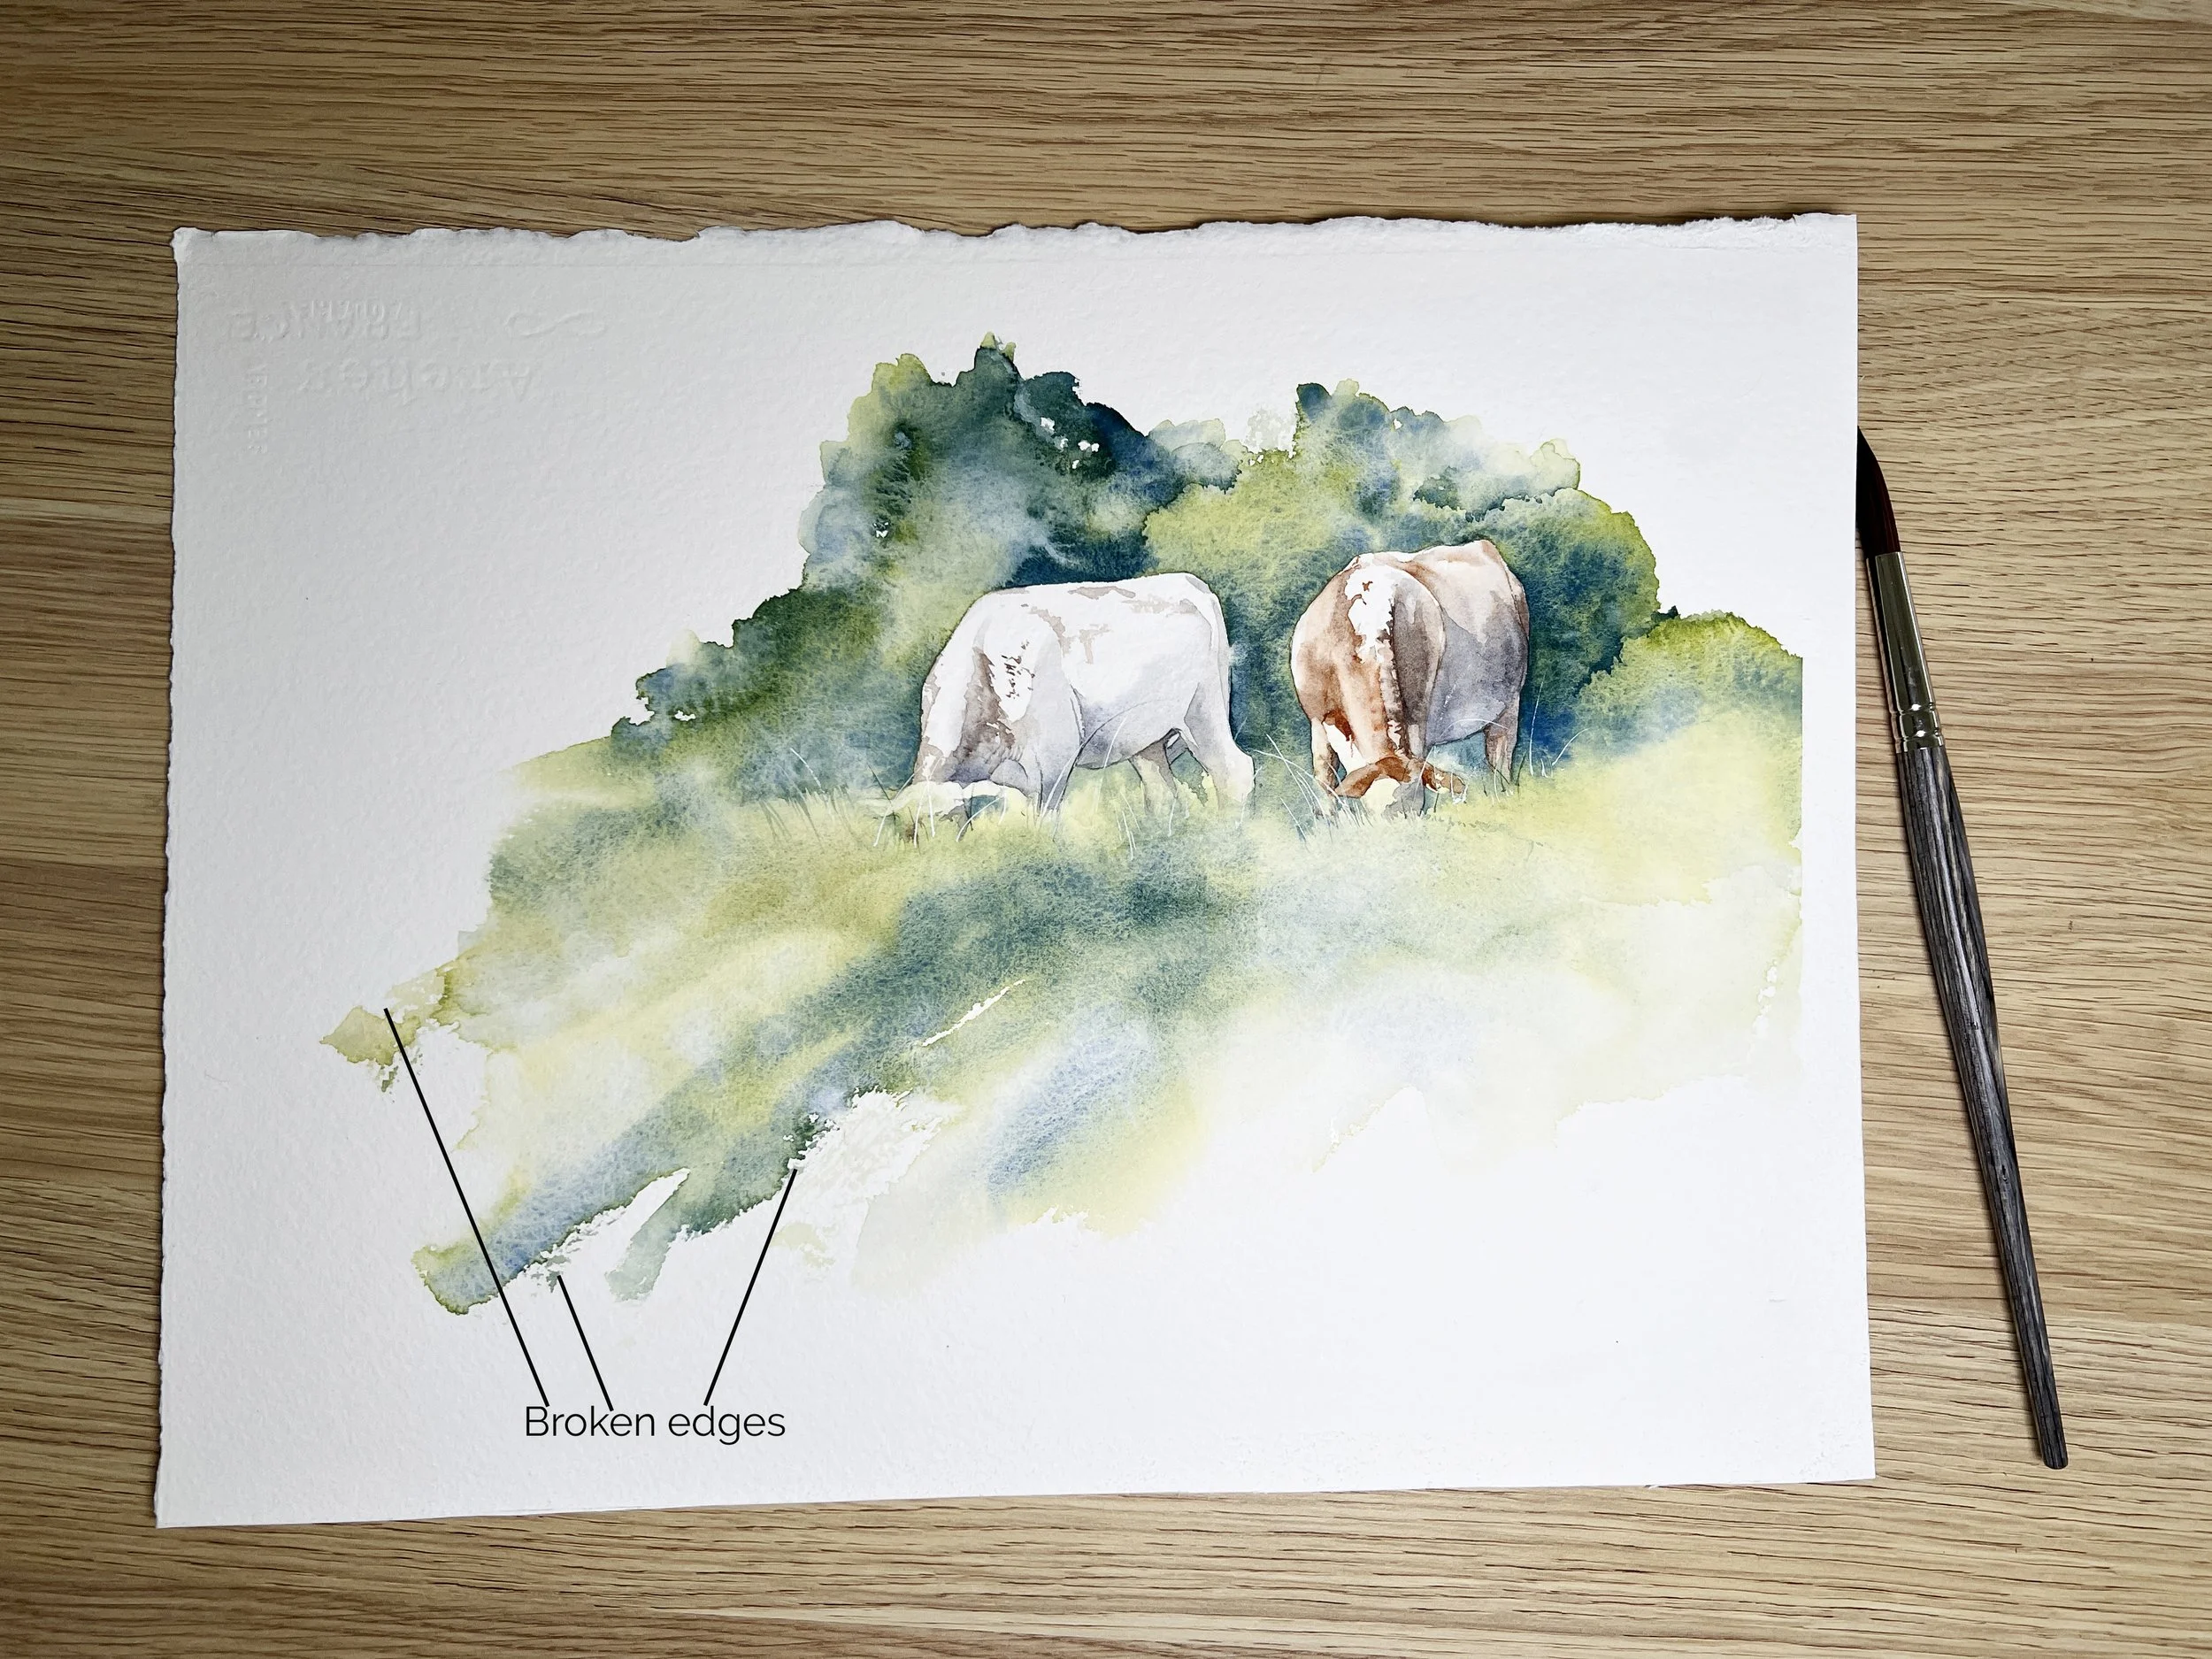
Broken edges were included on the grassed area in front of the cows on this painting.
How to paint broken edges in watercolour
Broken edges are painted on dry paper with a brush that is damp. They are usually painted with a small amount of paint in the brush. You can use a flat brush or a round brush. When I use a round brush, I use the side of the brush to apply the paint.

Broken edges painted with a damp brush and a small amount of paint. I use the side of the bristles and I move the brush quickly and confidently over the dry paper.
Practical Demonstrations and Tips
Let’s look at some practical applications using examples from my own work:
Galah Painting
Here, I manipulated the edges underneath the feather detail to transition from hard to soft by first painting on dry paper and then softening the edge with a damp brush. This technique is crucial when you want to maintain control but need a subtle, softer finish.

Castle Door
In my painting of a castle door with textures, I used the broken edge or dry brushing technique to create distinctive marks on the paper. The paint sits on higher areas and selectively skips over lower areas, creating a textural contrast.

Cockatoos
I left some lost edges on the crest feathers when I went to paint them, so I needed to wash the yellow all over that area loosely. I tried to paint a variation of different edges: soft, hard, and even some lost edges here and there on the bodies and the wings.

Key Techniques to Remember
Immediate Softening
If you’re painting on paper that is dry but you desire a soft edge, you must act quickly. Use a damp brush to gently soften the edge before the paint dries.
Avoiding Unwanted Hard Edges
When working with soft edges, make sure your paint does not extend beyond the wet boundary you’ve created. This ensures that the edge remains soft and does not form an unwanted hard line.
Using Two Brushes
Sometimes, it helps to have two brushes at hand: one for applying the paint and another, slightly damp, to blend edges immediately after.
Sometimes I use two brushes when I am manually softening paint edges - one to apply the paint and the other, slightly moist, to soften the paint edge.
Troubleshooting Common Issues
Watercolour painting can be unpredictable, and sometimes issues arise, like paint drying darker around the edges. This often happens when there’s excess water pushing the pigment towards the edges, creating a darker outline.

I've used too much water here and the excess water is causing the pigment to accumulate around the edge of the shape.
To mitigate this:
Ensure your wash is even and refrain from overworking it with your brush.
Make sure you don't have puddles of water sitting above the surface of your paper before you start painting.
Use high-quality, 100% cotton watercolour paper like Arches, which offers a slower absorption rate and gives you more time to work with your washes.
Final Thoughts
Watercolour painting is as much about embracing the medium’s fluidity as it is about controlling it. Each piece you work on is a chance to experiment with these different techniques, and over time, managing these watercolour edges will become an intuitive part of your creative process.
Every artist’s journey is unique, and the beauty of watercolour paints lies in its spontaneity and the personal touch you bring to your work. Keep practicing, stay curious, and don’t forget to enjoy the process of creating something truly beautiful.
And remember, when it comes to mastering your watercolour techniques, don't be afraid to live on the edge - push your boundaries and watch your art flourish!
Stay tuned for more, and happy painting!
If you are interested in learning to paint in watercolour, I have over 170 online, voiced over watercolour tutorials for all skill levels.