Watercolour for Beginners: Basic Brush Strokes to Practise
Practice painting with just the tip of the brush to produce thin lines and push down on the bristles to create thick lines
Watercolour painting is a medium that has captivated artists for centuries with its unique characteristics and delicate beauty. Unlike other forms of painting, watercolour relies on the transparency of the pigments and the interaction between water, paint, and paper.
Learning the basics of watercolour, particularly mastering essential brush strokes, becomes the foundation upon which you can confidently build your skills and create captivating watercolour paintings.
In this guide, we will delve into some fundamental brush strokes that every watercolour enthusiast should practice. These strokes serve as the building blocks for more complex techniques and pave the way for the development of a personal artistic style.
Loading Your Round Brush
When loading a round brush I immerse the brush fully in the watercolour paint puddle.

Lay the brush down in the paint on the watercolor palette.
Sometimes I'll give it a twirl in the paint puddle to reform the point.

I twirl it in the paint to reshape the point.
Now my brush is fully loaded with paint. If I think I may have too much paint on the brush I give it a light tap on a towel to remove a small amount of the paint and water before I place it on the watercolour paper.

Excess water or paint in the brush can be removed on a towel.
Things That Affect Brush Strokes
Before you start practicing there are several factors that can affect the outcome and quality of your brush strokes in watercolour painting. Here are some key elements to consider:
Watercolour Brush Type and Quality: The type and quality of the brush significantly impact the brush strokes. Different brushes, such as round, flat, or filbert, produce distinct effects. High-quality brushes with well-shaped bristles tend to hold water and pigment more effectively.
Watercolour Paper Texture and Weight: The texture and weight (thickness) of the paper influence how the paint is absorbed and how the brush moves across the surface. Rough paper can create more texture, while smoother paper allows for finer details. 100% cotton watercolour paper will accept the paint better than wood pulp paper.
Water-to-Paint Ratio; Paint Consistency: Adjusting the ratio of water to paint on your palette affects the consistency and transparency of the paint. Experimenting with different ratios allows you to achieve various effects, from bold and saturated strokes to delicate washes.
Be aware of how much water you have mixed into your paint mixture. Thicker paint may result in more textured strokes, while thinner paint creates smoother, more translucent effects. When you are practicing brush strokes like those demonstrated in this blog post, you want the paint brush to glide over the paper so your paint mixture needs to be fluid and not too thick.

Water brush stroke practice.
Paper Wetness: The wetness of the paper surface at the time of applying the brush stroke is crucial. Wet-on-wet techniques involve applying paint to a wet surface, creating soft and blended effects, while wet-on-dry techniques result in more defined strokes. You can practice brush strokes on both dry paper and wet paper.
Brush Pressure: The amount of pressure applied to the brush affects the width and intensity of the strokes. Light pressure is often used for delicate details, while heavier pressure can create bolder and broader strokes.
Brush Angle and Direction: Varying the angle and direction of the brush influences the character of the strokes. Experimenting with different angles allows you to create diverse textures and patterns.
How you Hold the Brush: The way you hold the brush is a critical factor that can greatly affect the quality and style of the marks you make on the paper.
Handle Position: Experiment with holding the brush closer to the bristles or ferule (metal part of brush) for better control in detailed work. Holding the brush farther from the bristles can provide a looser, more expressive feel, suitable for broader strokes.

Hold the brush closer to the ferrule for detailed work or when you want more control.
Hold the brush further up the handle when you want more freedom to create looser and more expressive brush marks.
Personal Technique and Style: Individual brush techniques and artistic style play a significant role in the final appearance of brush strokes. Practice and experimentation with different approaches will help you develop your unique brushwork.
Brush Techniques to Develop Brush Control Using a Round Brush
Explore these brush control exercises to refine your skills in creating various marks with a round brush. Consistent practice is key to diminishing any initial awkwardness and gaining confidence in maneuvering the brush seamlessly across the paper. Repeatedly engage in these techniques to develop an intuitive understanding of the brush's capabilities, paving the way for greater control and artistic finesse.
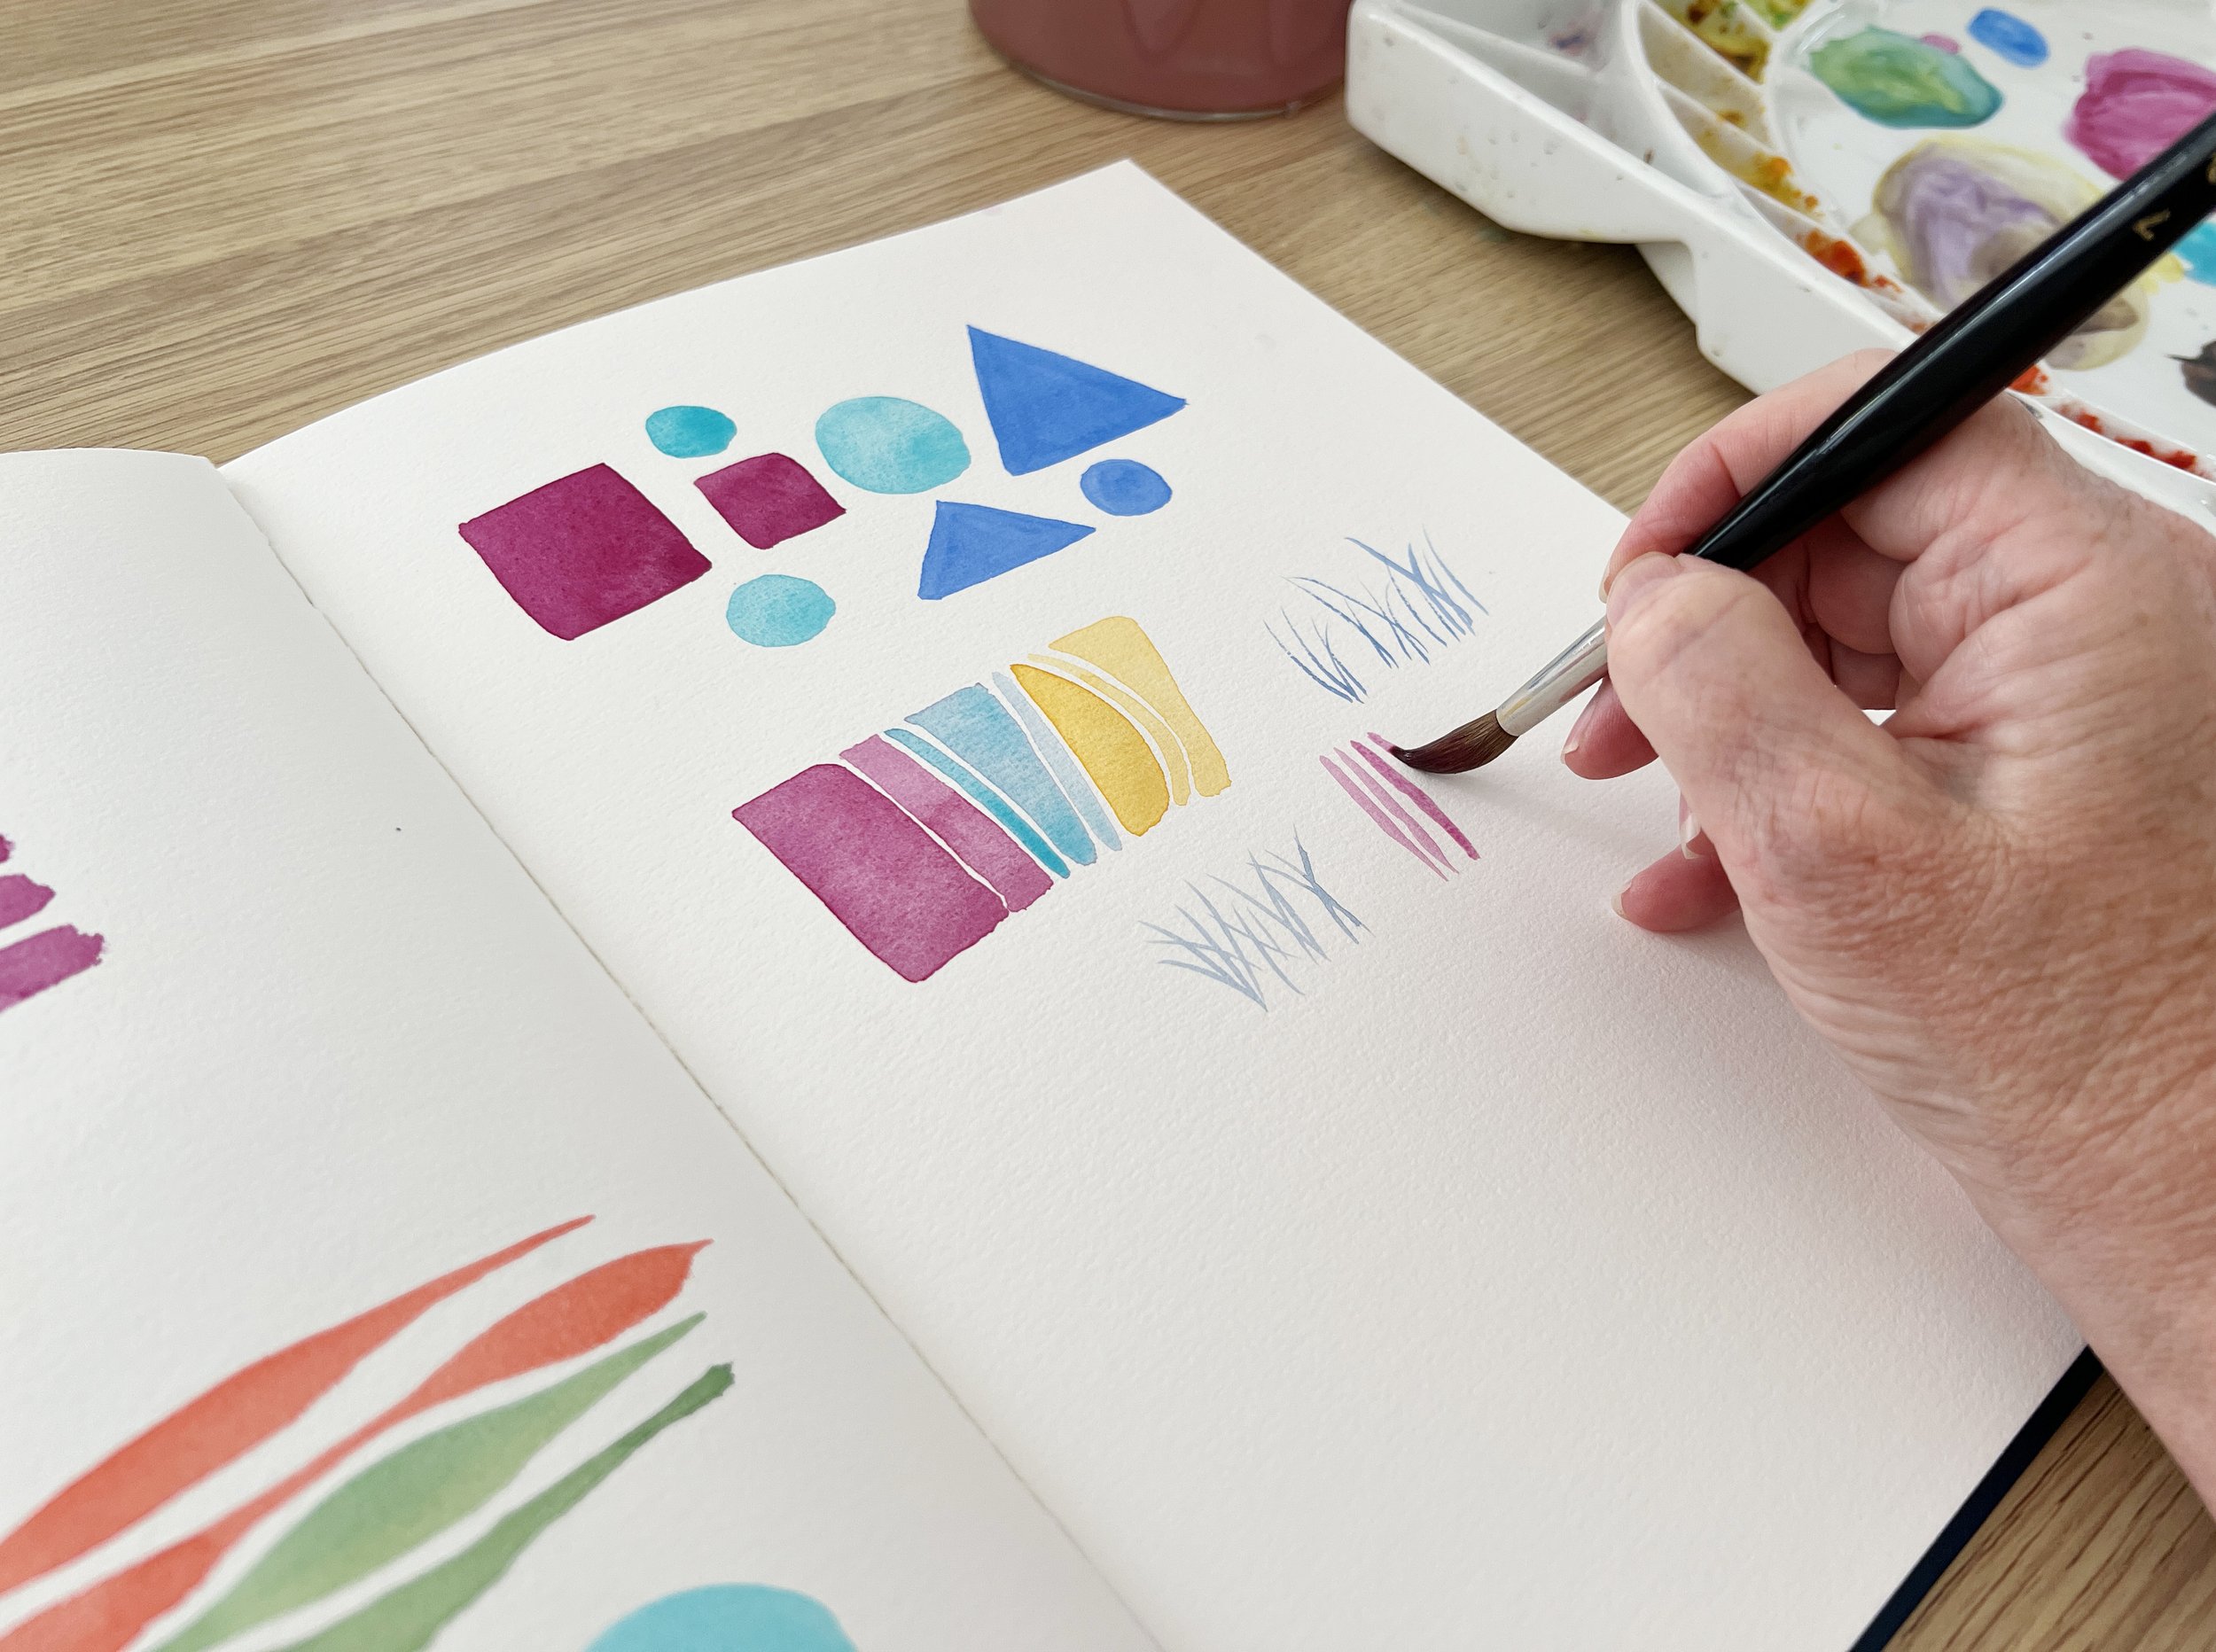
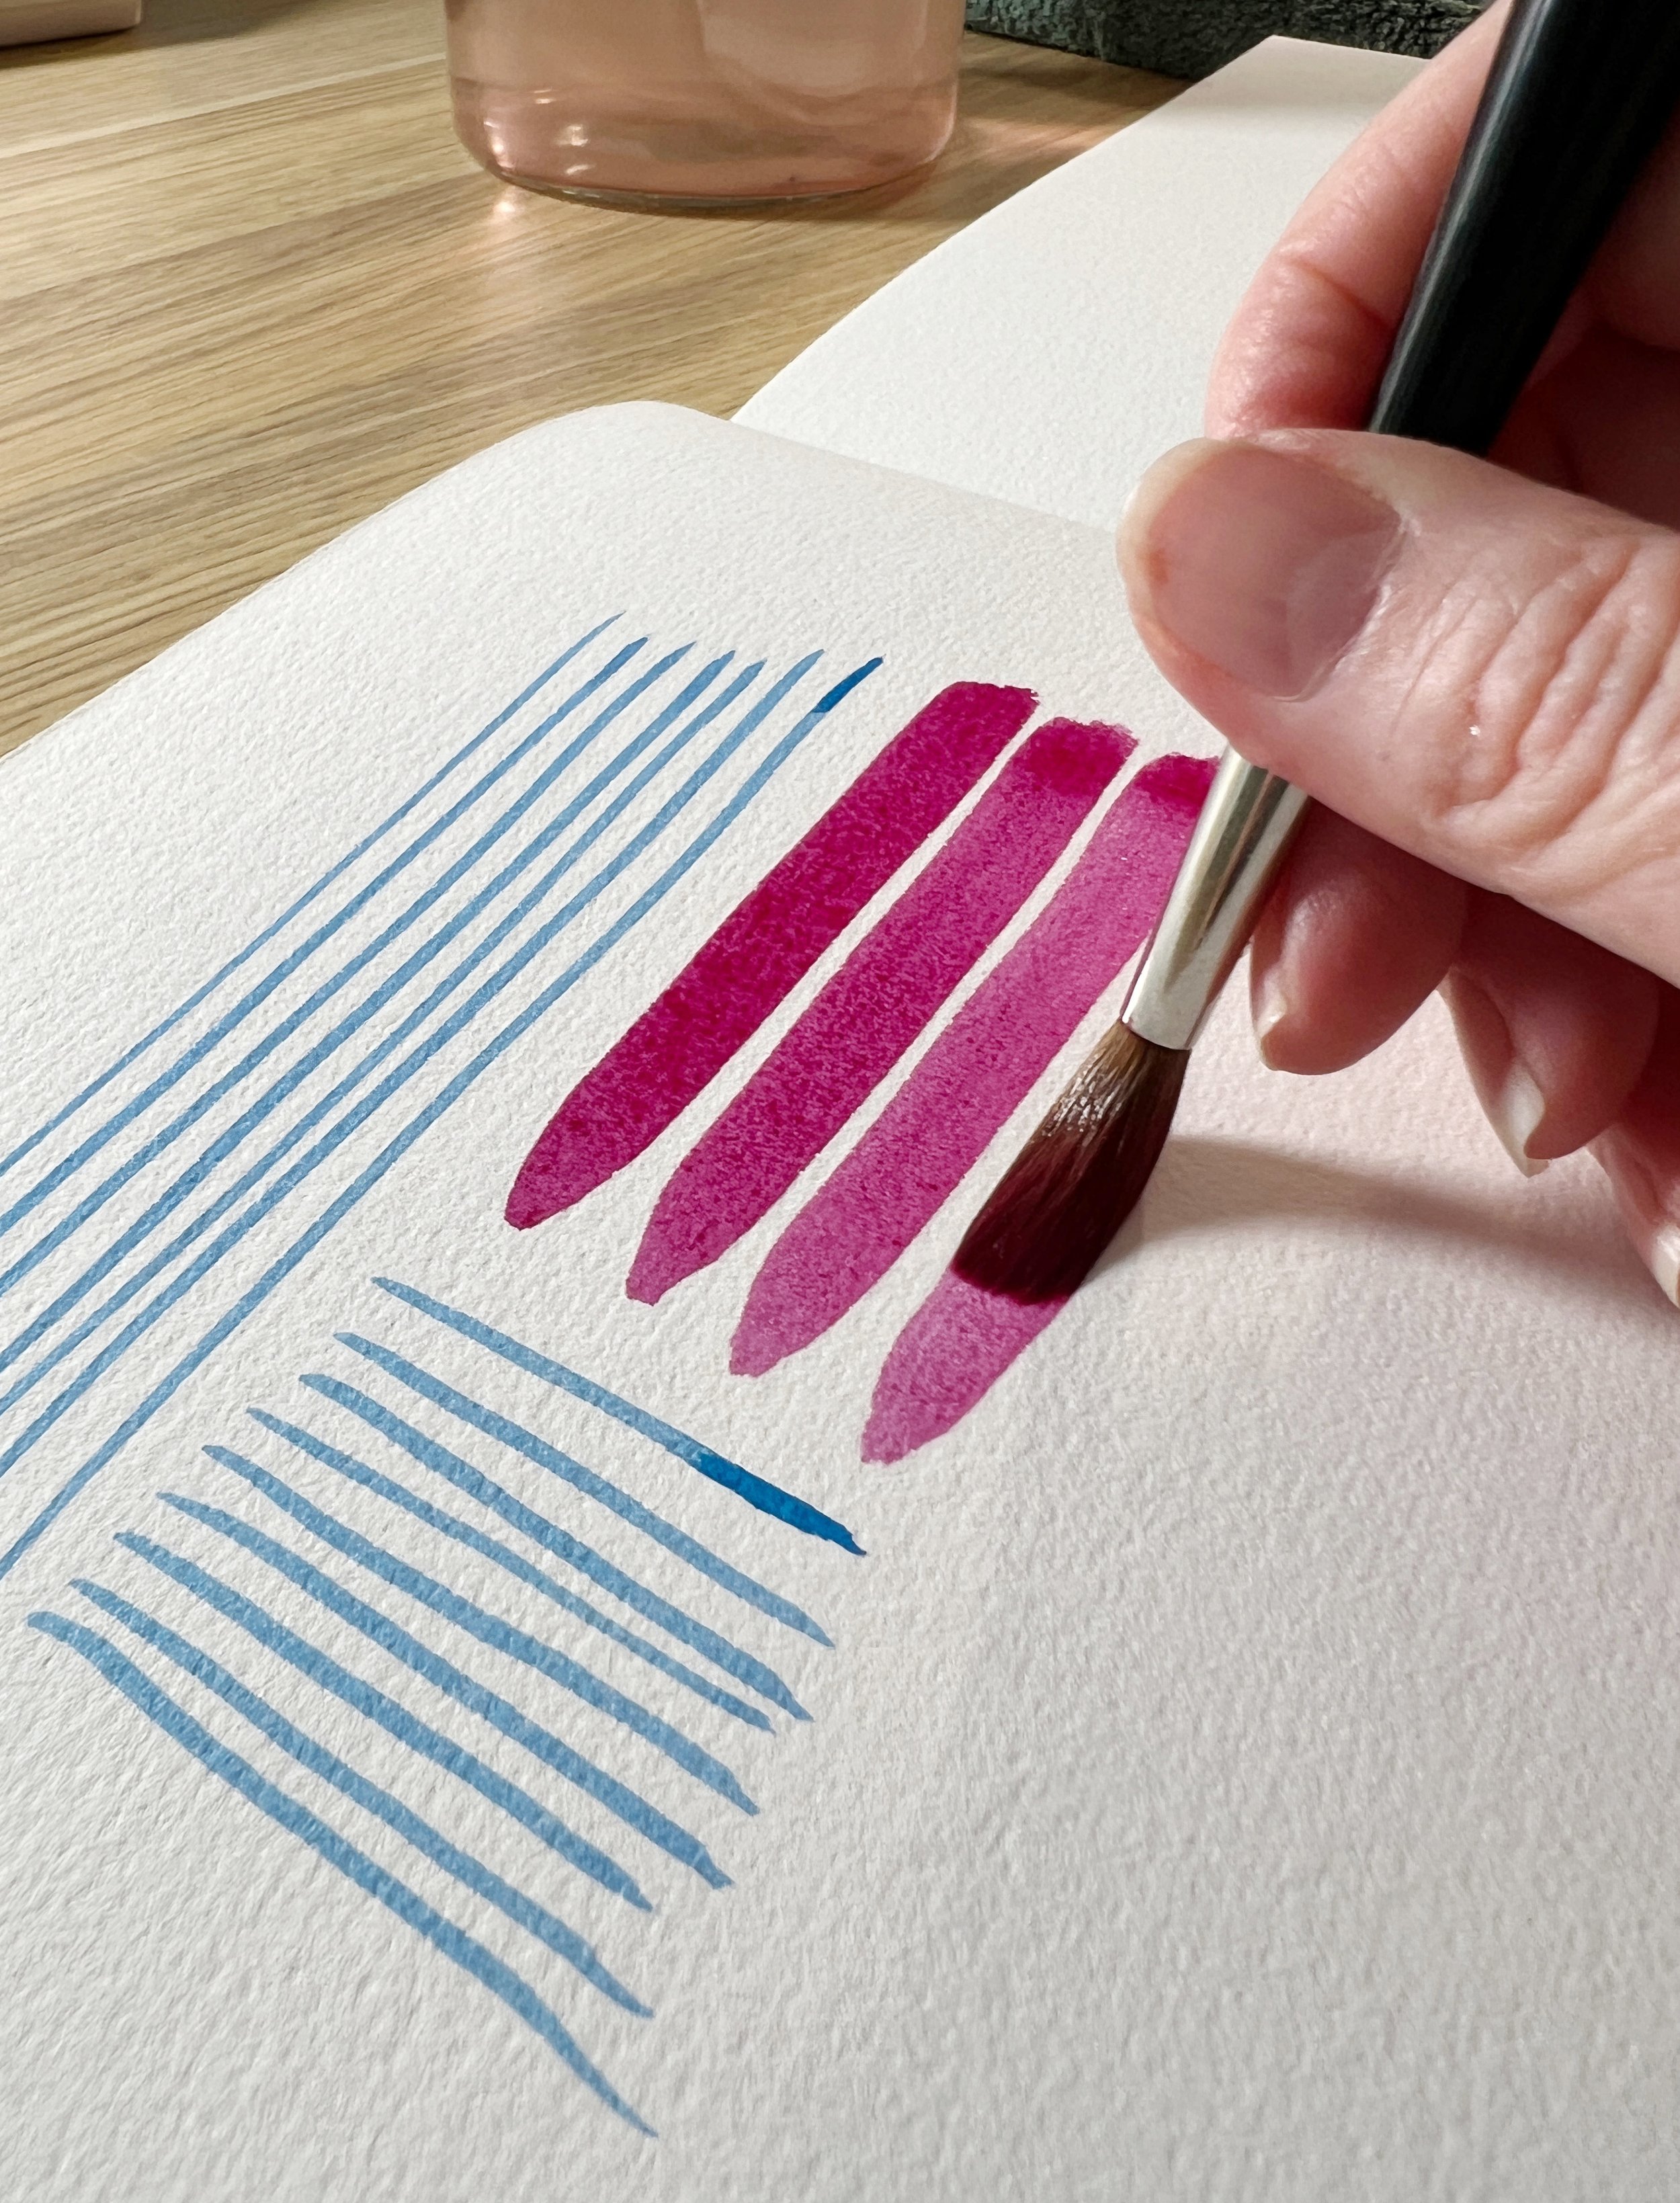
Single Stroke - Thin Straight Lines
In a watercolour journal or on a piece of watercolour paper paint some thin straight lines using the tip of the brush. Here I used a Da Vinci Maestro: series 35 brush, size 7.
To do this, load the brush fully in paint, reform the point in the paint puddle, hold the brush close to the ferrule and use the tip or point of the bristles. Try to move your whole arm, rather than just moving your wrist. Try to keep the paint lines a similar thickness.
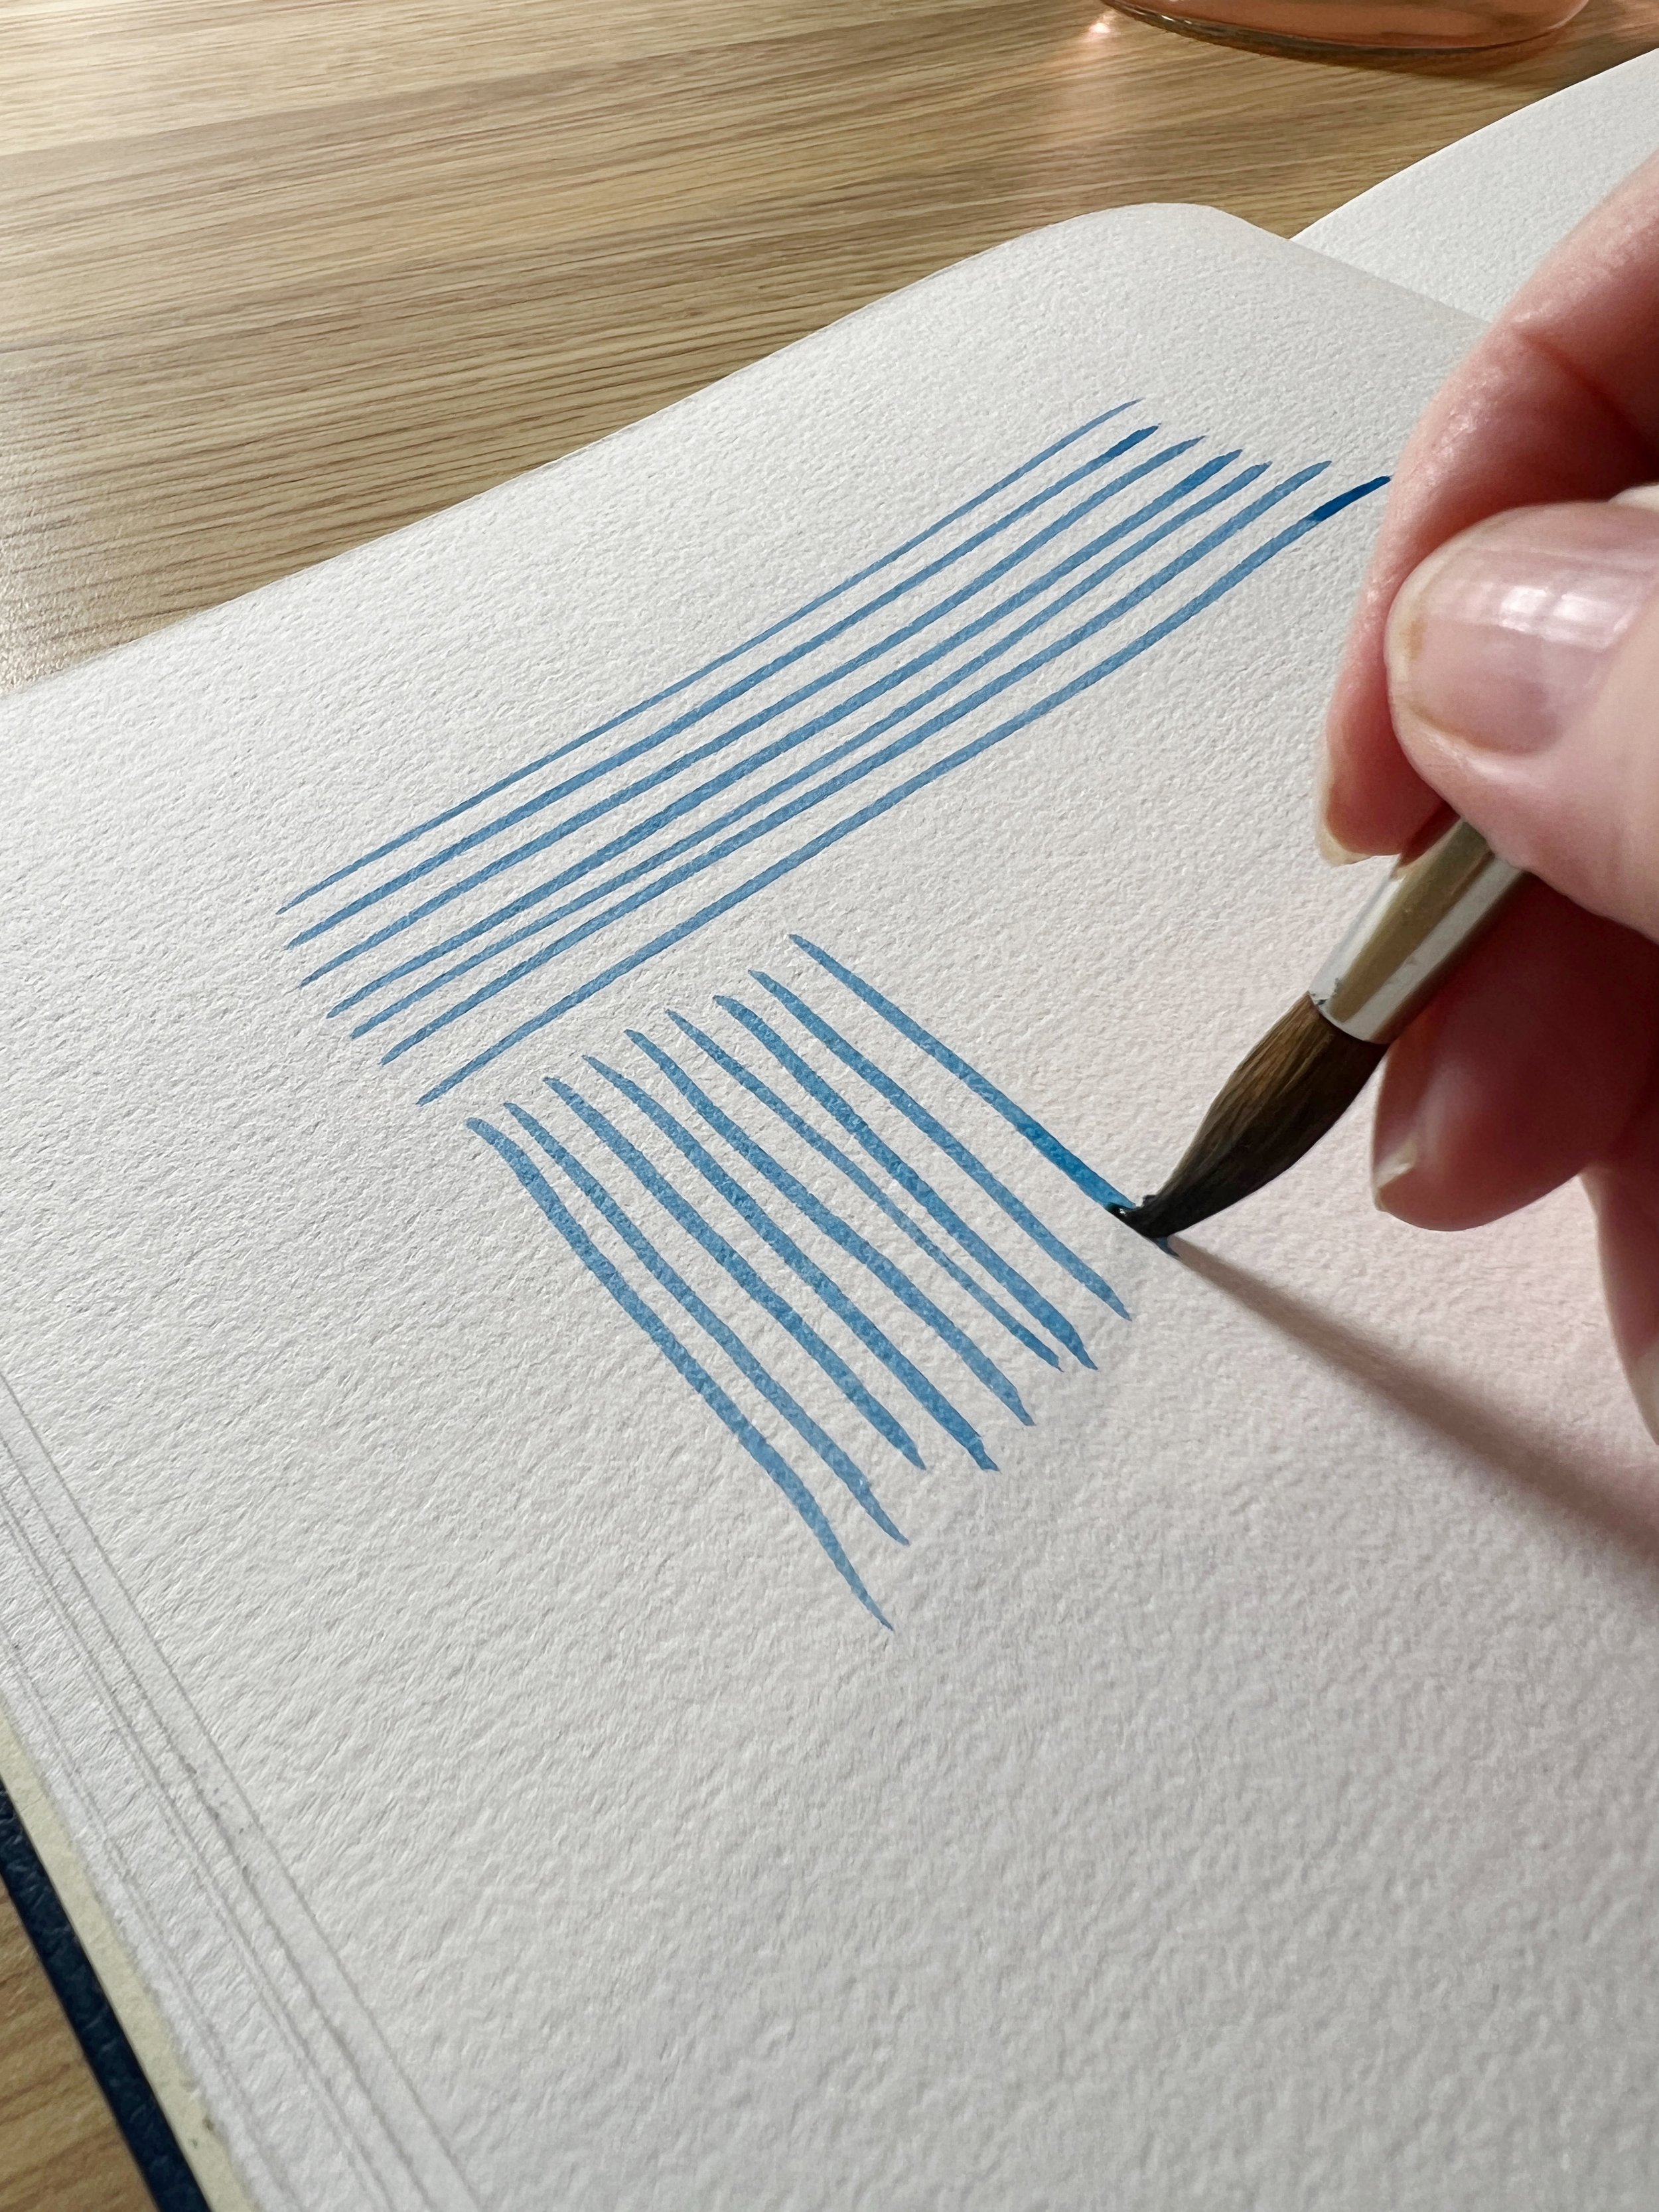
Making the same lines but vertical strokes. Pull the brush towards yourself.
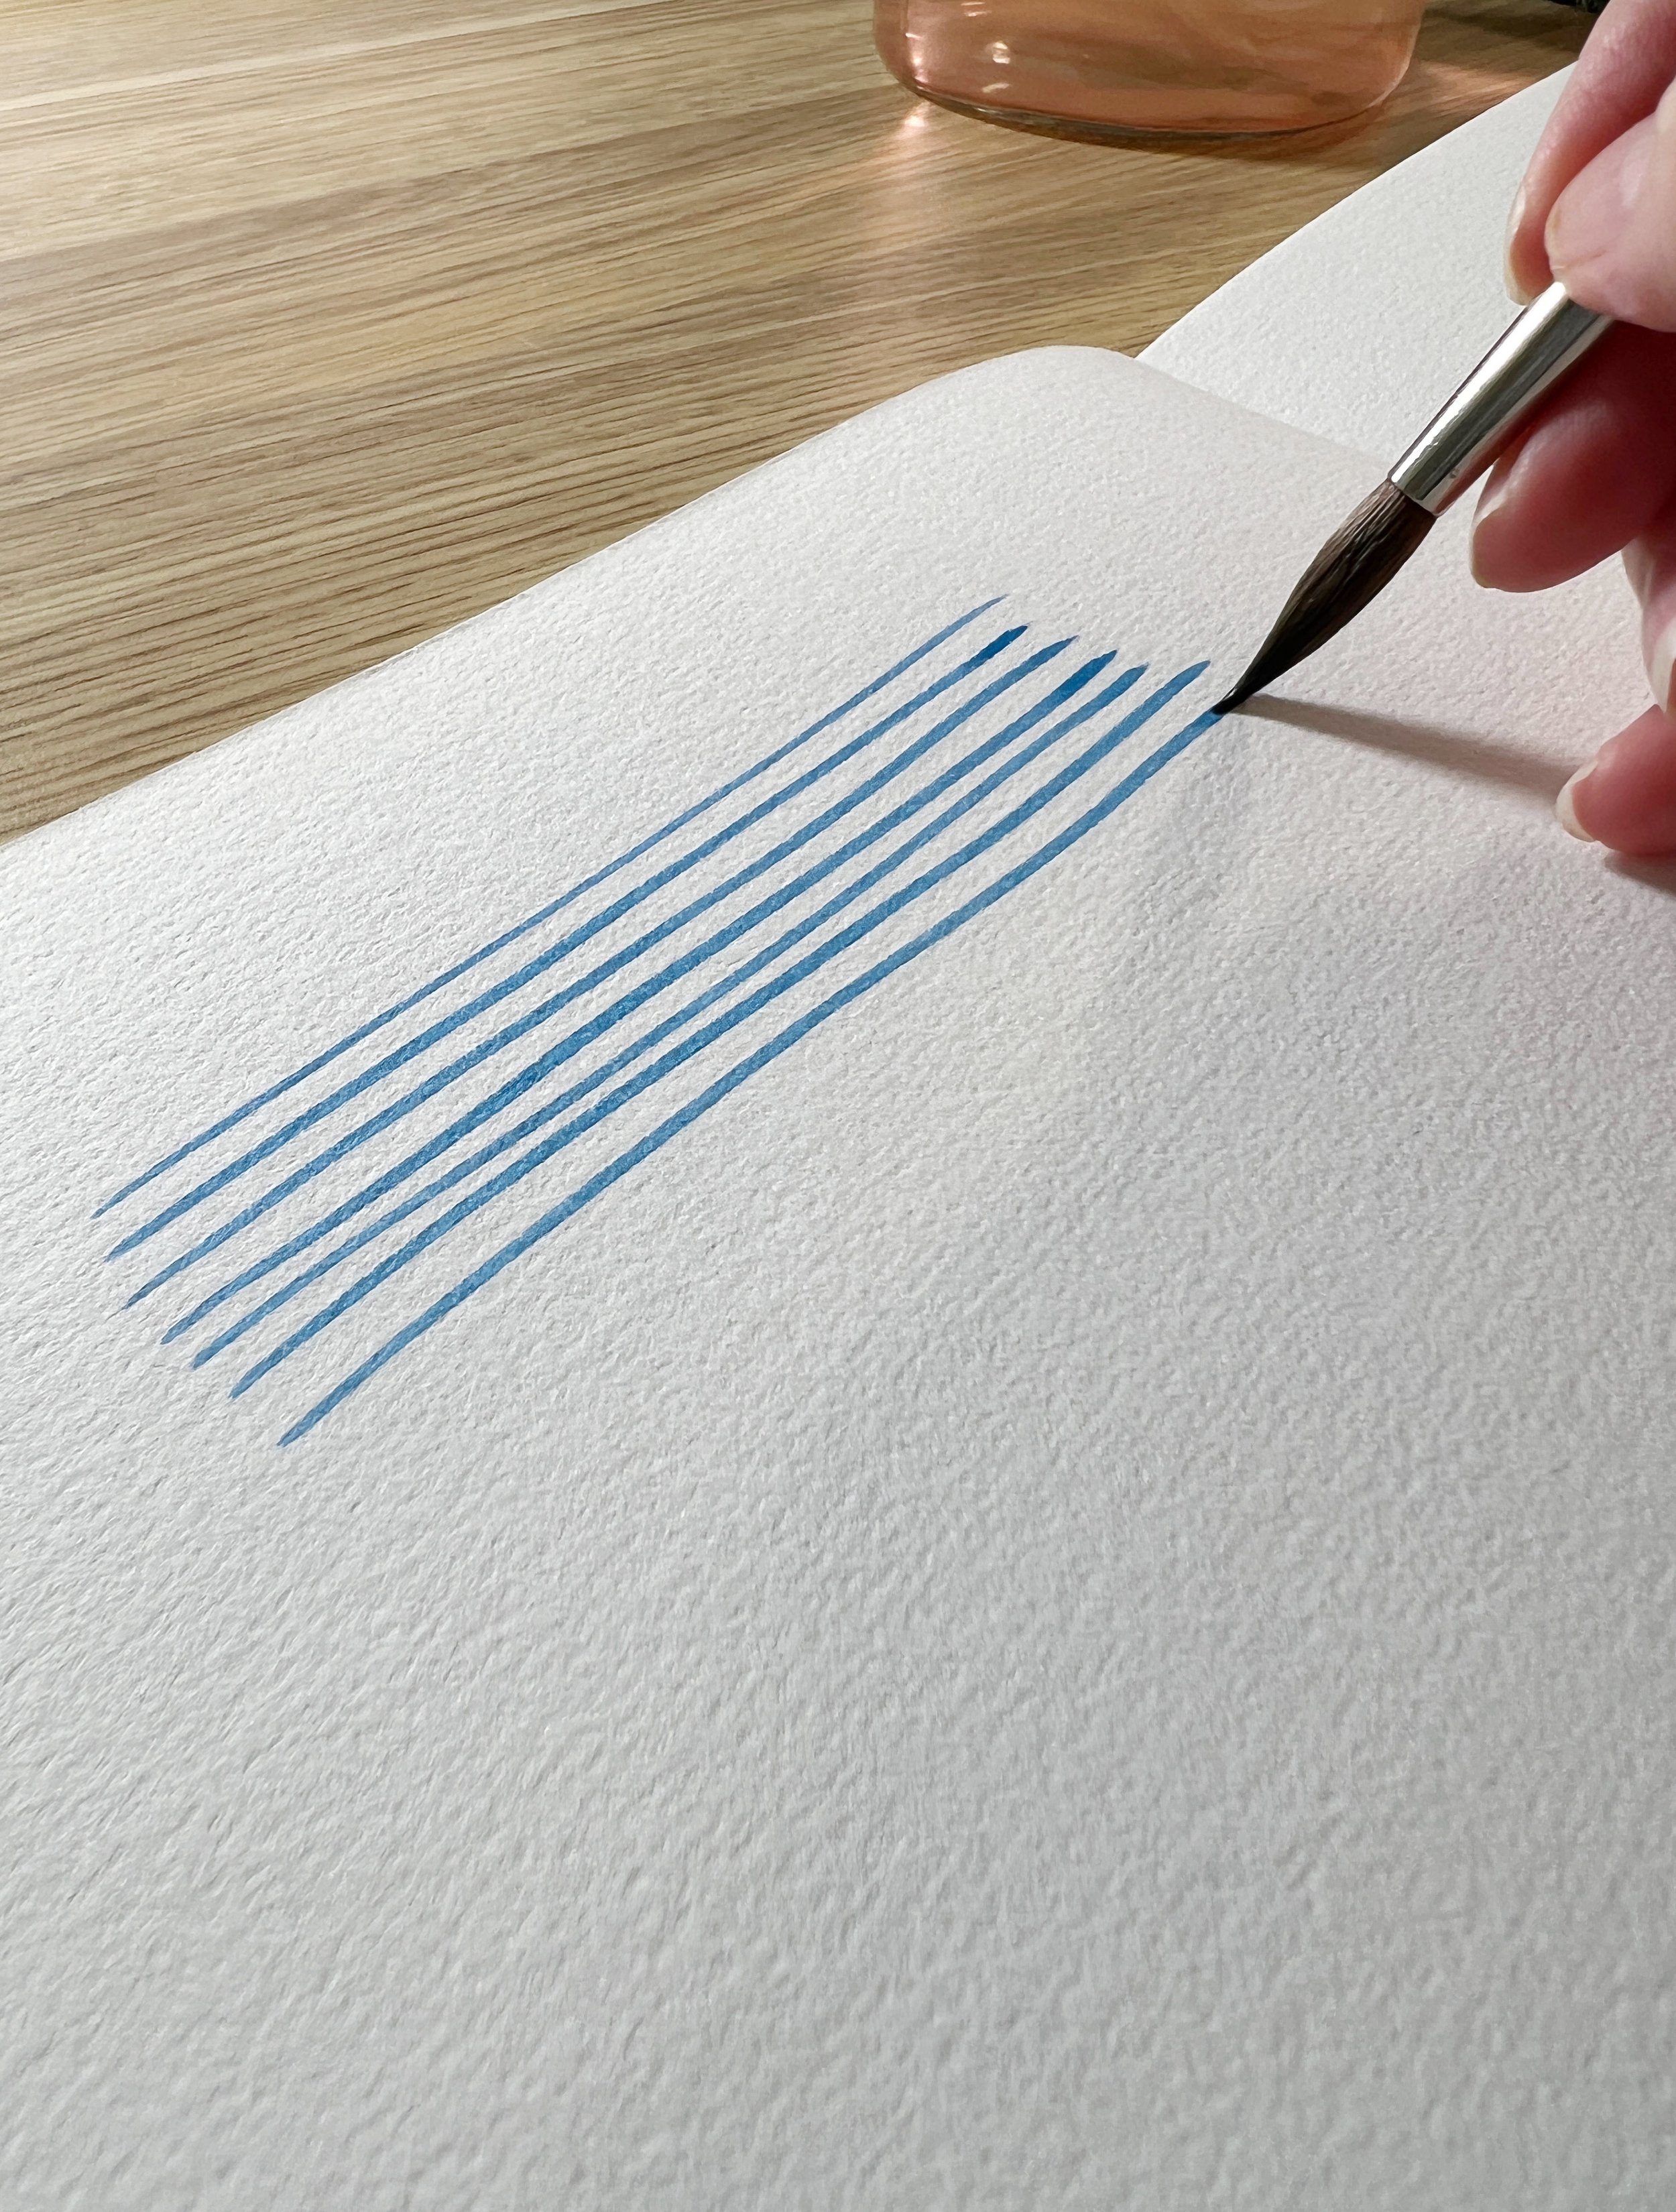
This a great exercise to begin with. Aim for consistency in thickness.
Do the same thing but paint vertical strokes. Pull the brush towards yourself.
Single Stroke- Thick Straight Lines
Paint thicker lines this time by pushing down on the bristles and using the brush at its full width rather than just the tip of the bristles. Again, try to move your arm rather than your hand. Keep your hand and wrist steady. Repeat this by painting vertical strokes towards yourself, the same way.
Paint thicker lines this time by pushing down on the bristles and using the brush at its full width rather than just the tip of the bristles.
Combine Thin Lines With Thick Lines

Now try combining the two. Start with your brush up on the tip - move your arm along the paper - then when you are ready, push down on the bristles to flatten them and make a thick mark then come back up on the point of the bristles. Keep moving your arm across the paper pushing down and pulling up on the bristles to alternate the thickness of the line. Try this horizontally across the paper first and then try painting them vertically.
Simple Leaf Shapes
Paint some simple leaf shapes using the same method as above. Start with the tip of the bristles - push down to flatten the brush out as you move the brush across the paper and then pull back up onto the tip of the bristles to finish the leaf shape.
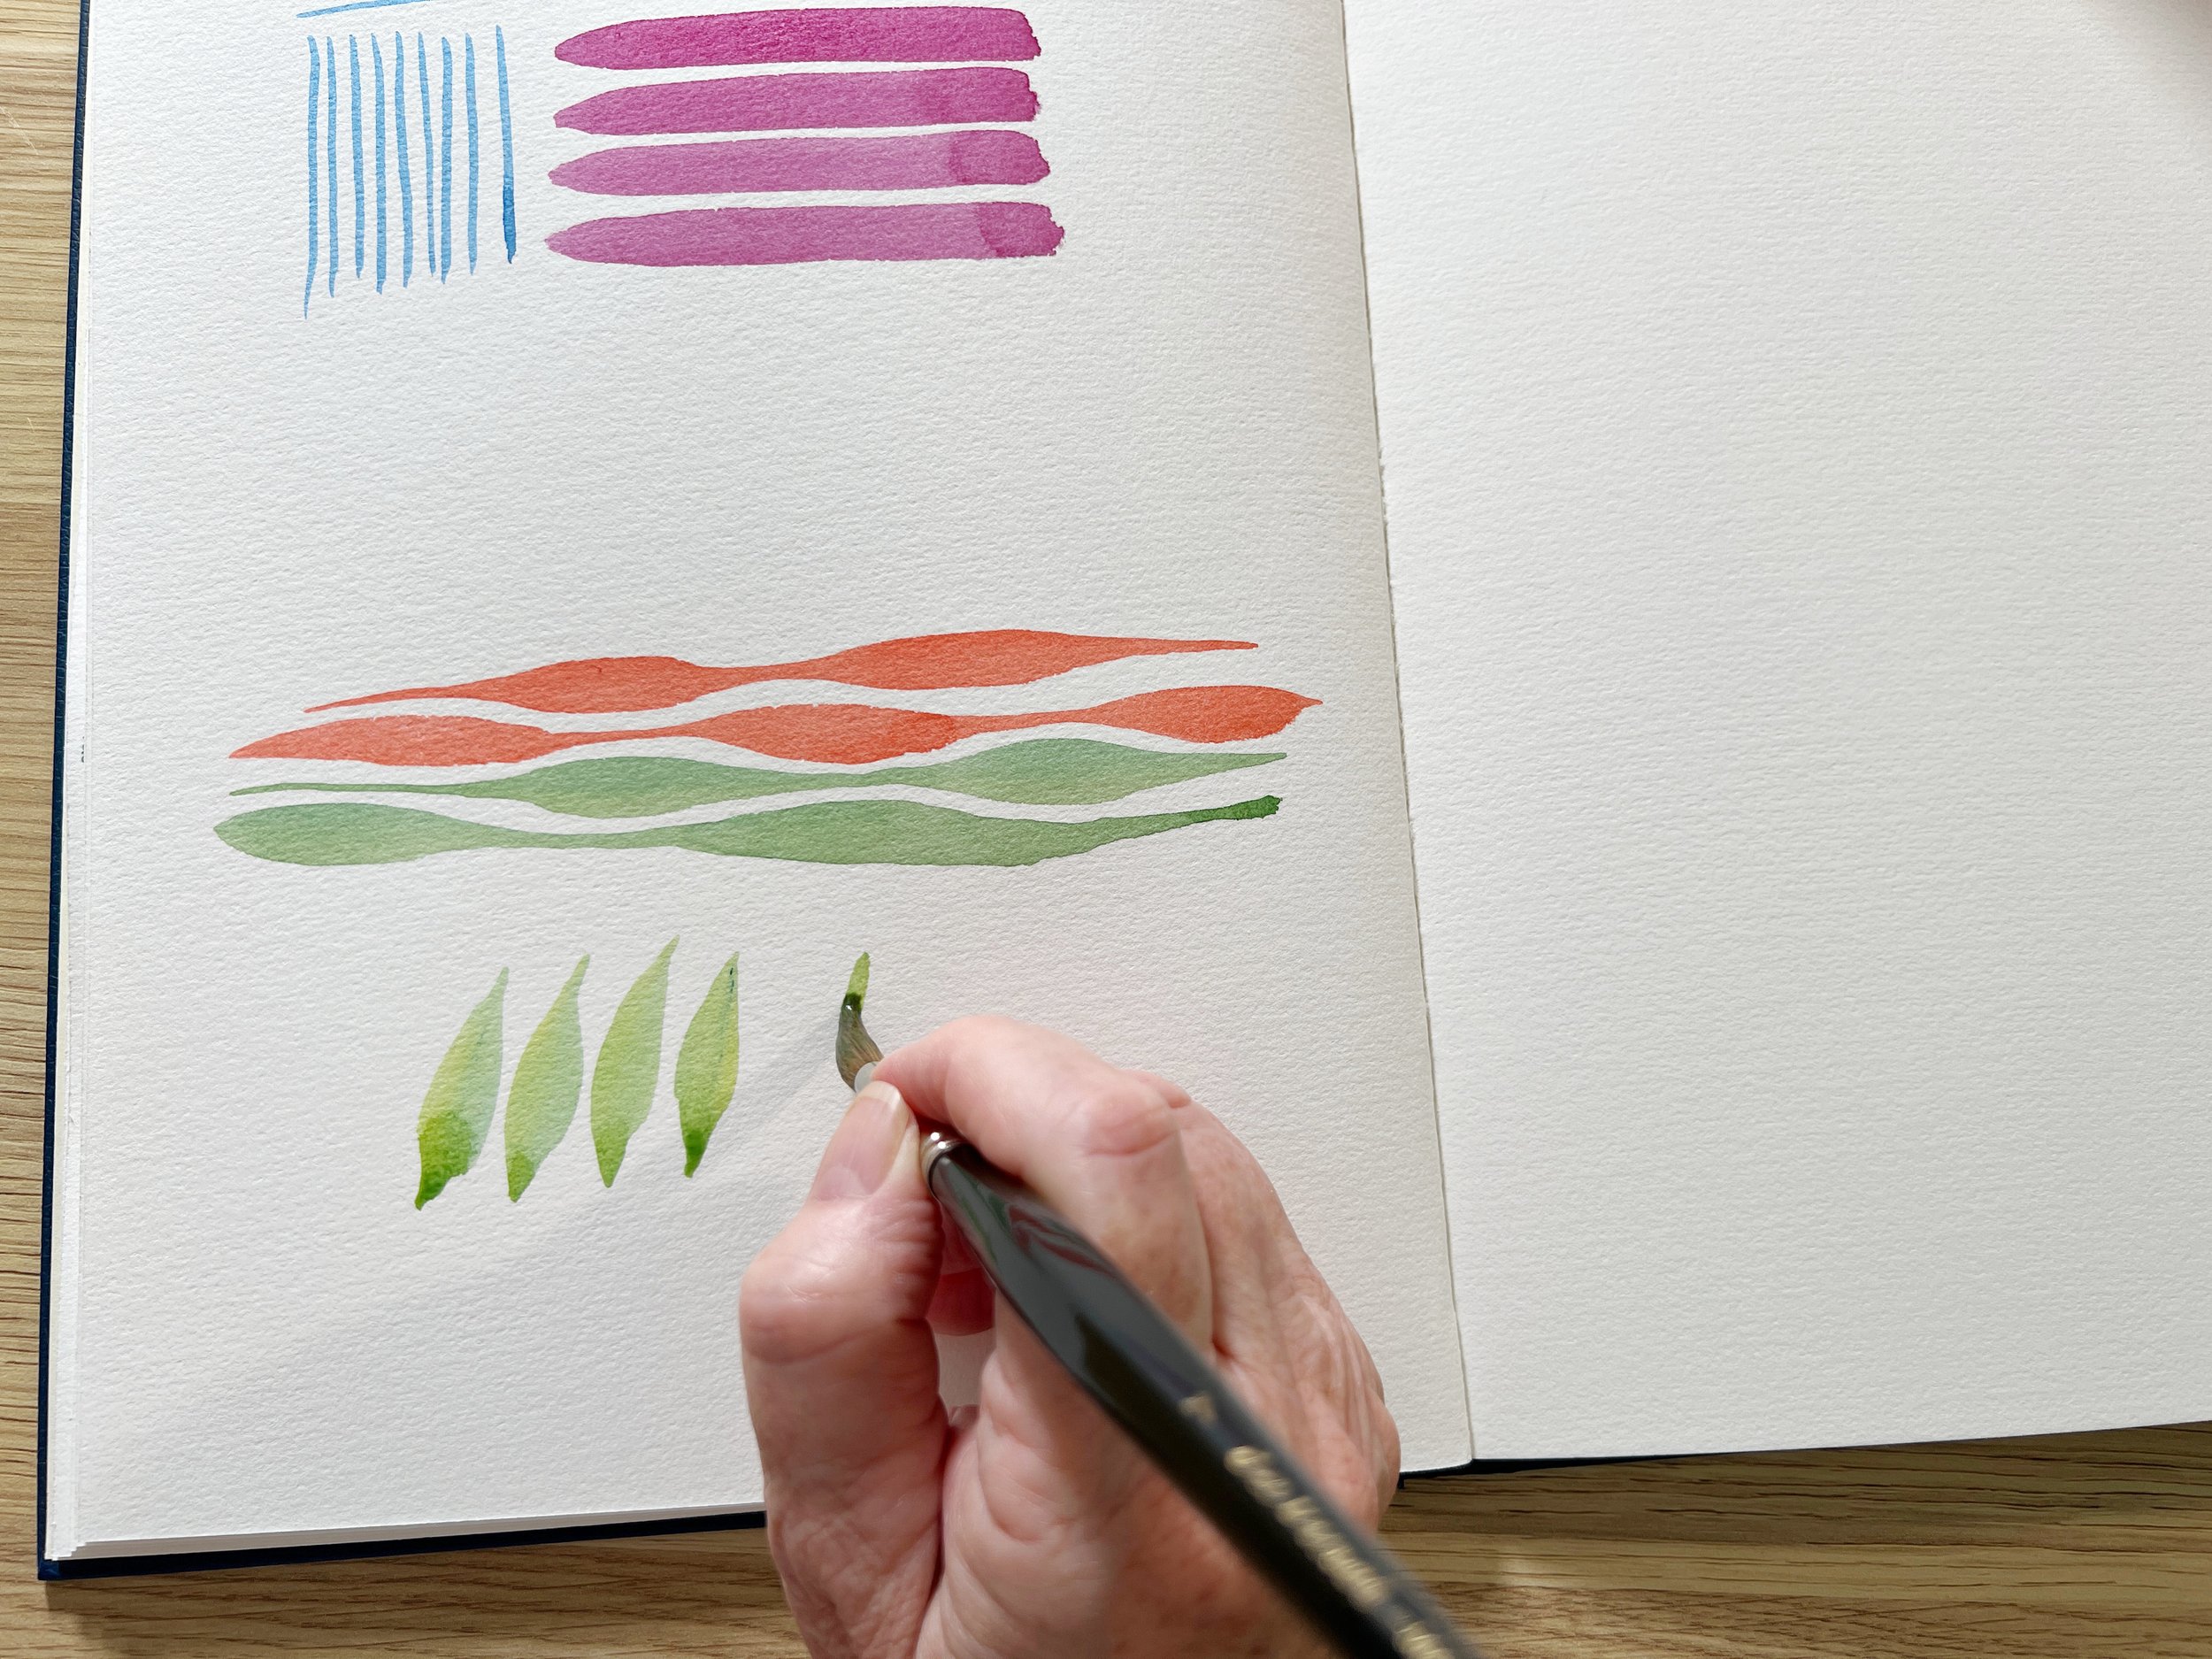
Demonstrating how to vary the watercolour brush for making simple leaf shapes

Start on the tip of the brush.
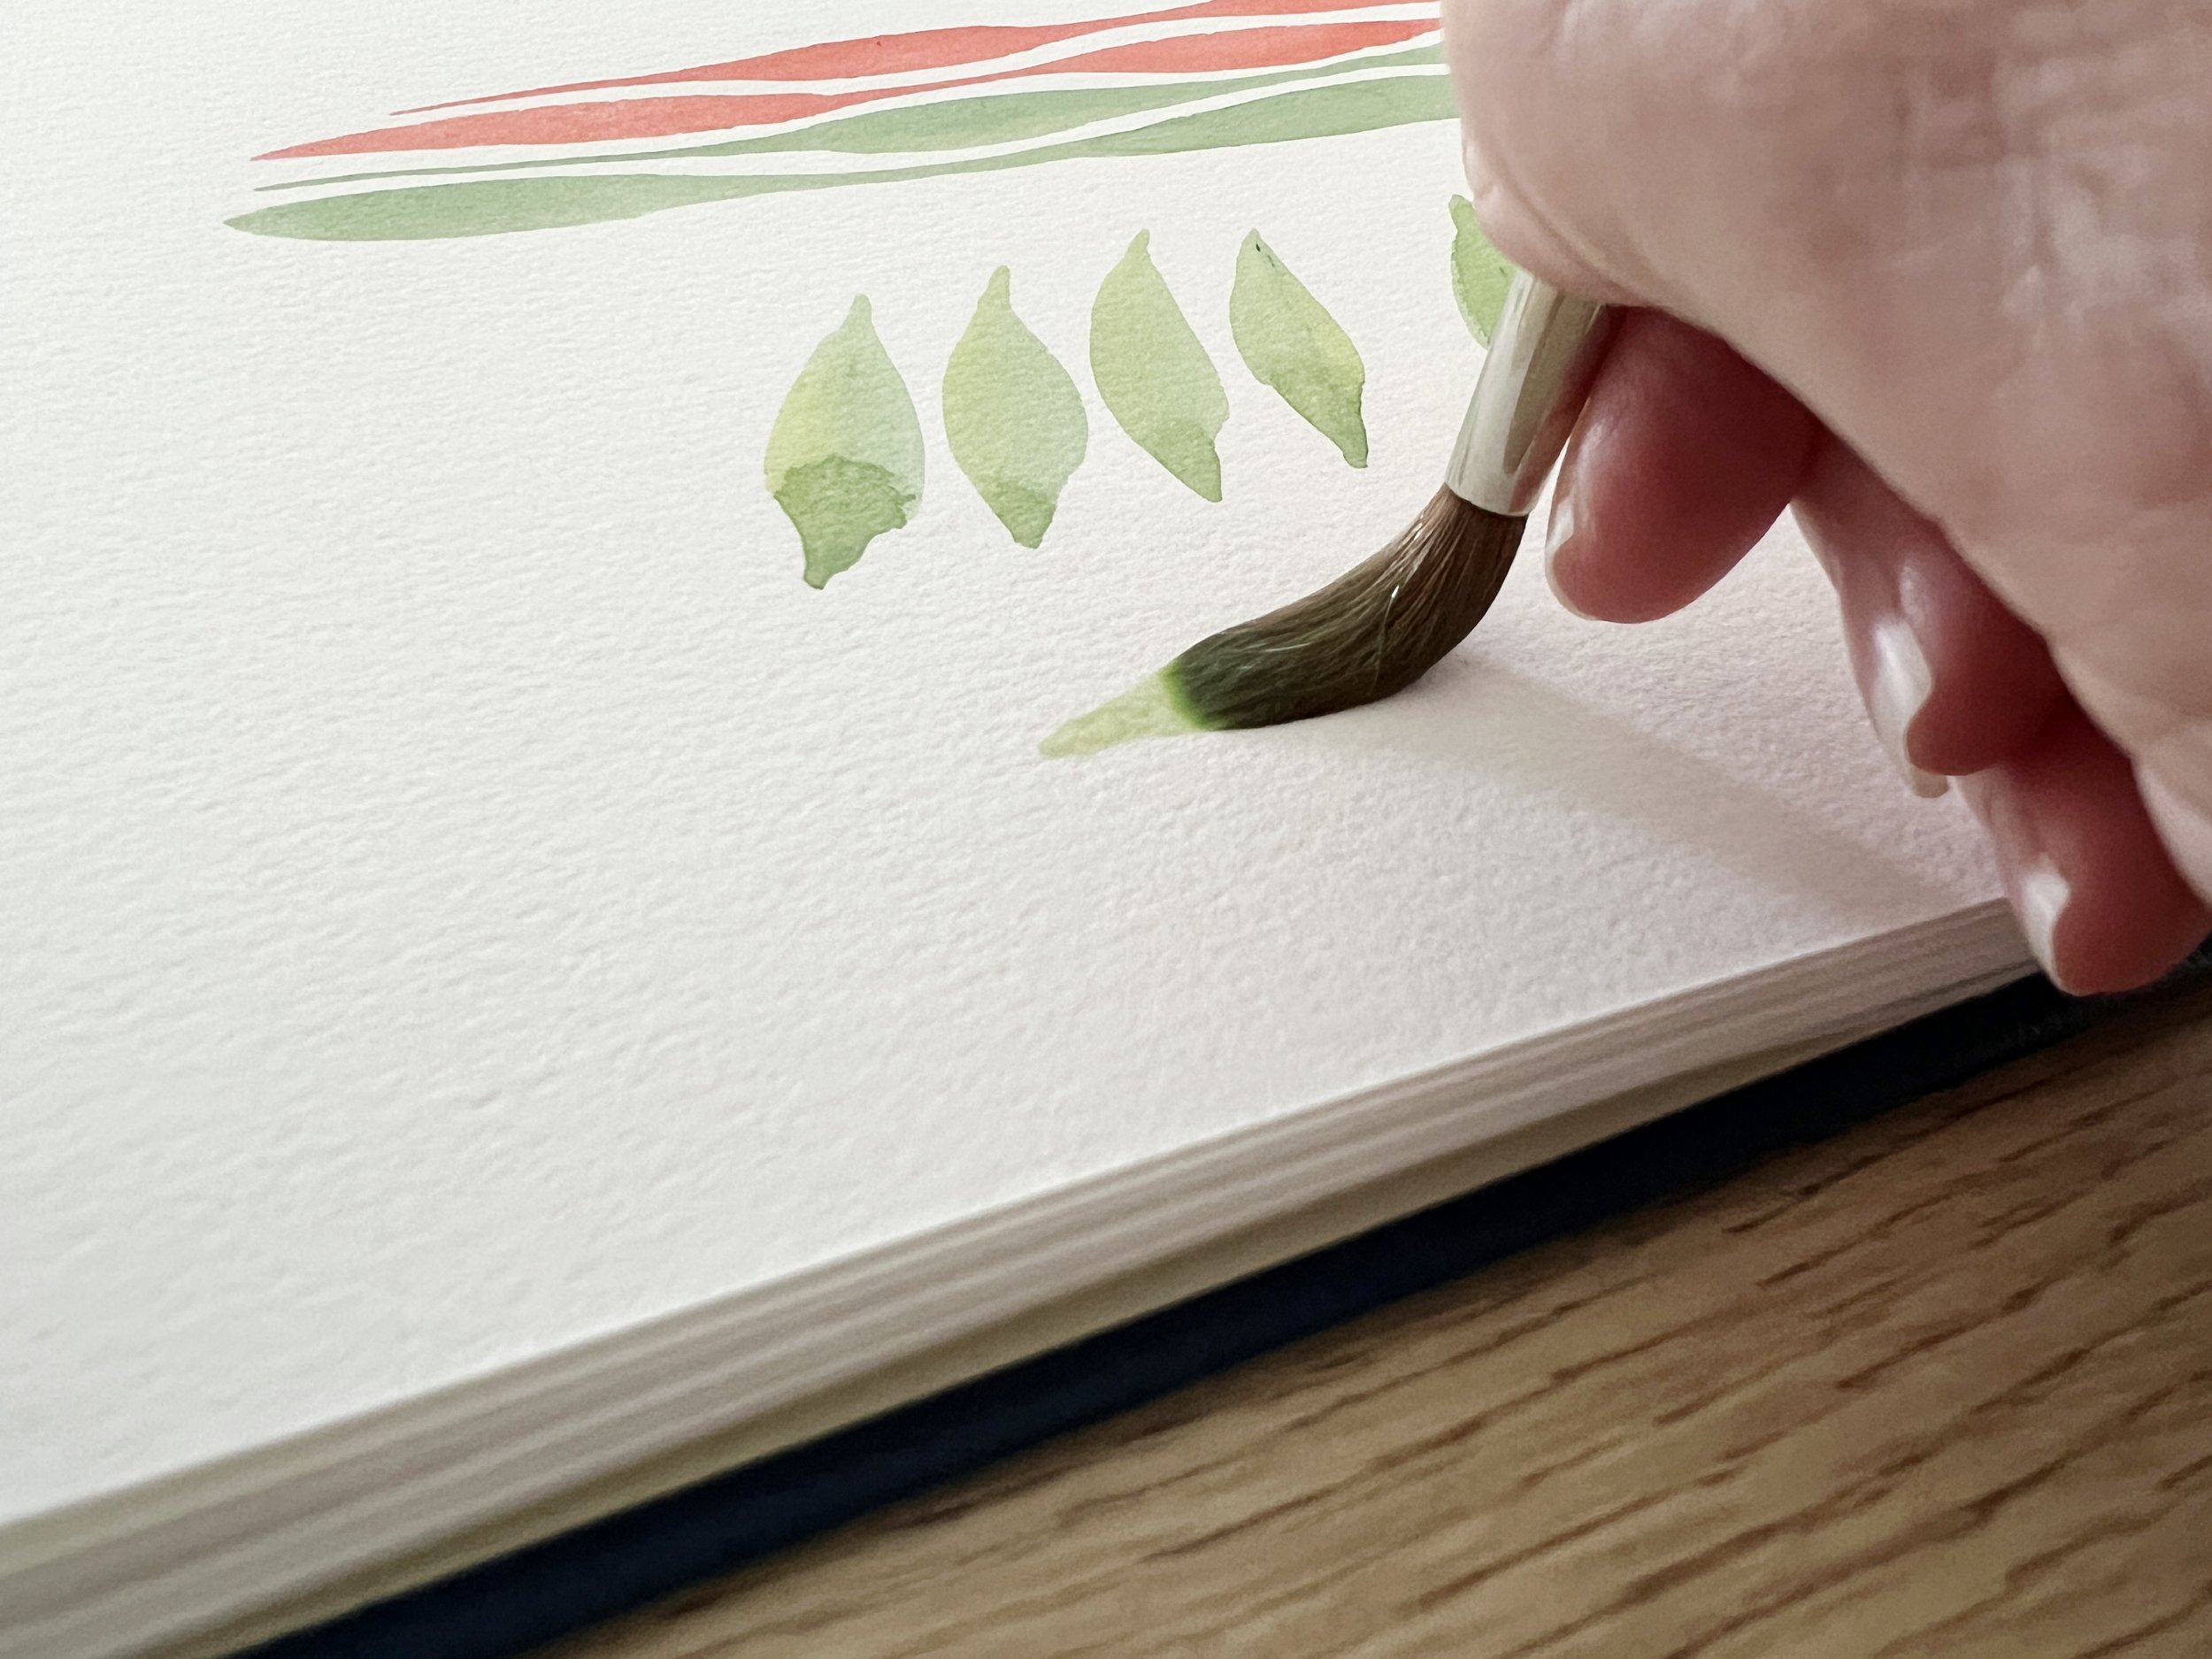
Push down to flatten the bristles as you move the brush across the paper. So you are putting more pressure on the bristles to flatten them.

Finish the stroke on the tip of the brush.
Comma Strokes
This is similar to painting leaf shapes but this time you can start with the bristles flattened on the paper - pull the brush in the shape of a comma (so curve it towards yourself) and finish off the mark using the tip of the bristles.
This is more difficult so don't worry if it takes you a while to form a shape you are happy with.

Pull the brush in the shape of a comma (so curve it towards yourself)

Start with the bristles flattened out. Press down onto the belly of the brush.

Pull the brush in a curved direction towards yourself.

Finish the stroke up on the tip of the brush.
Geometric Shapes - Clean Sharp Edges
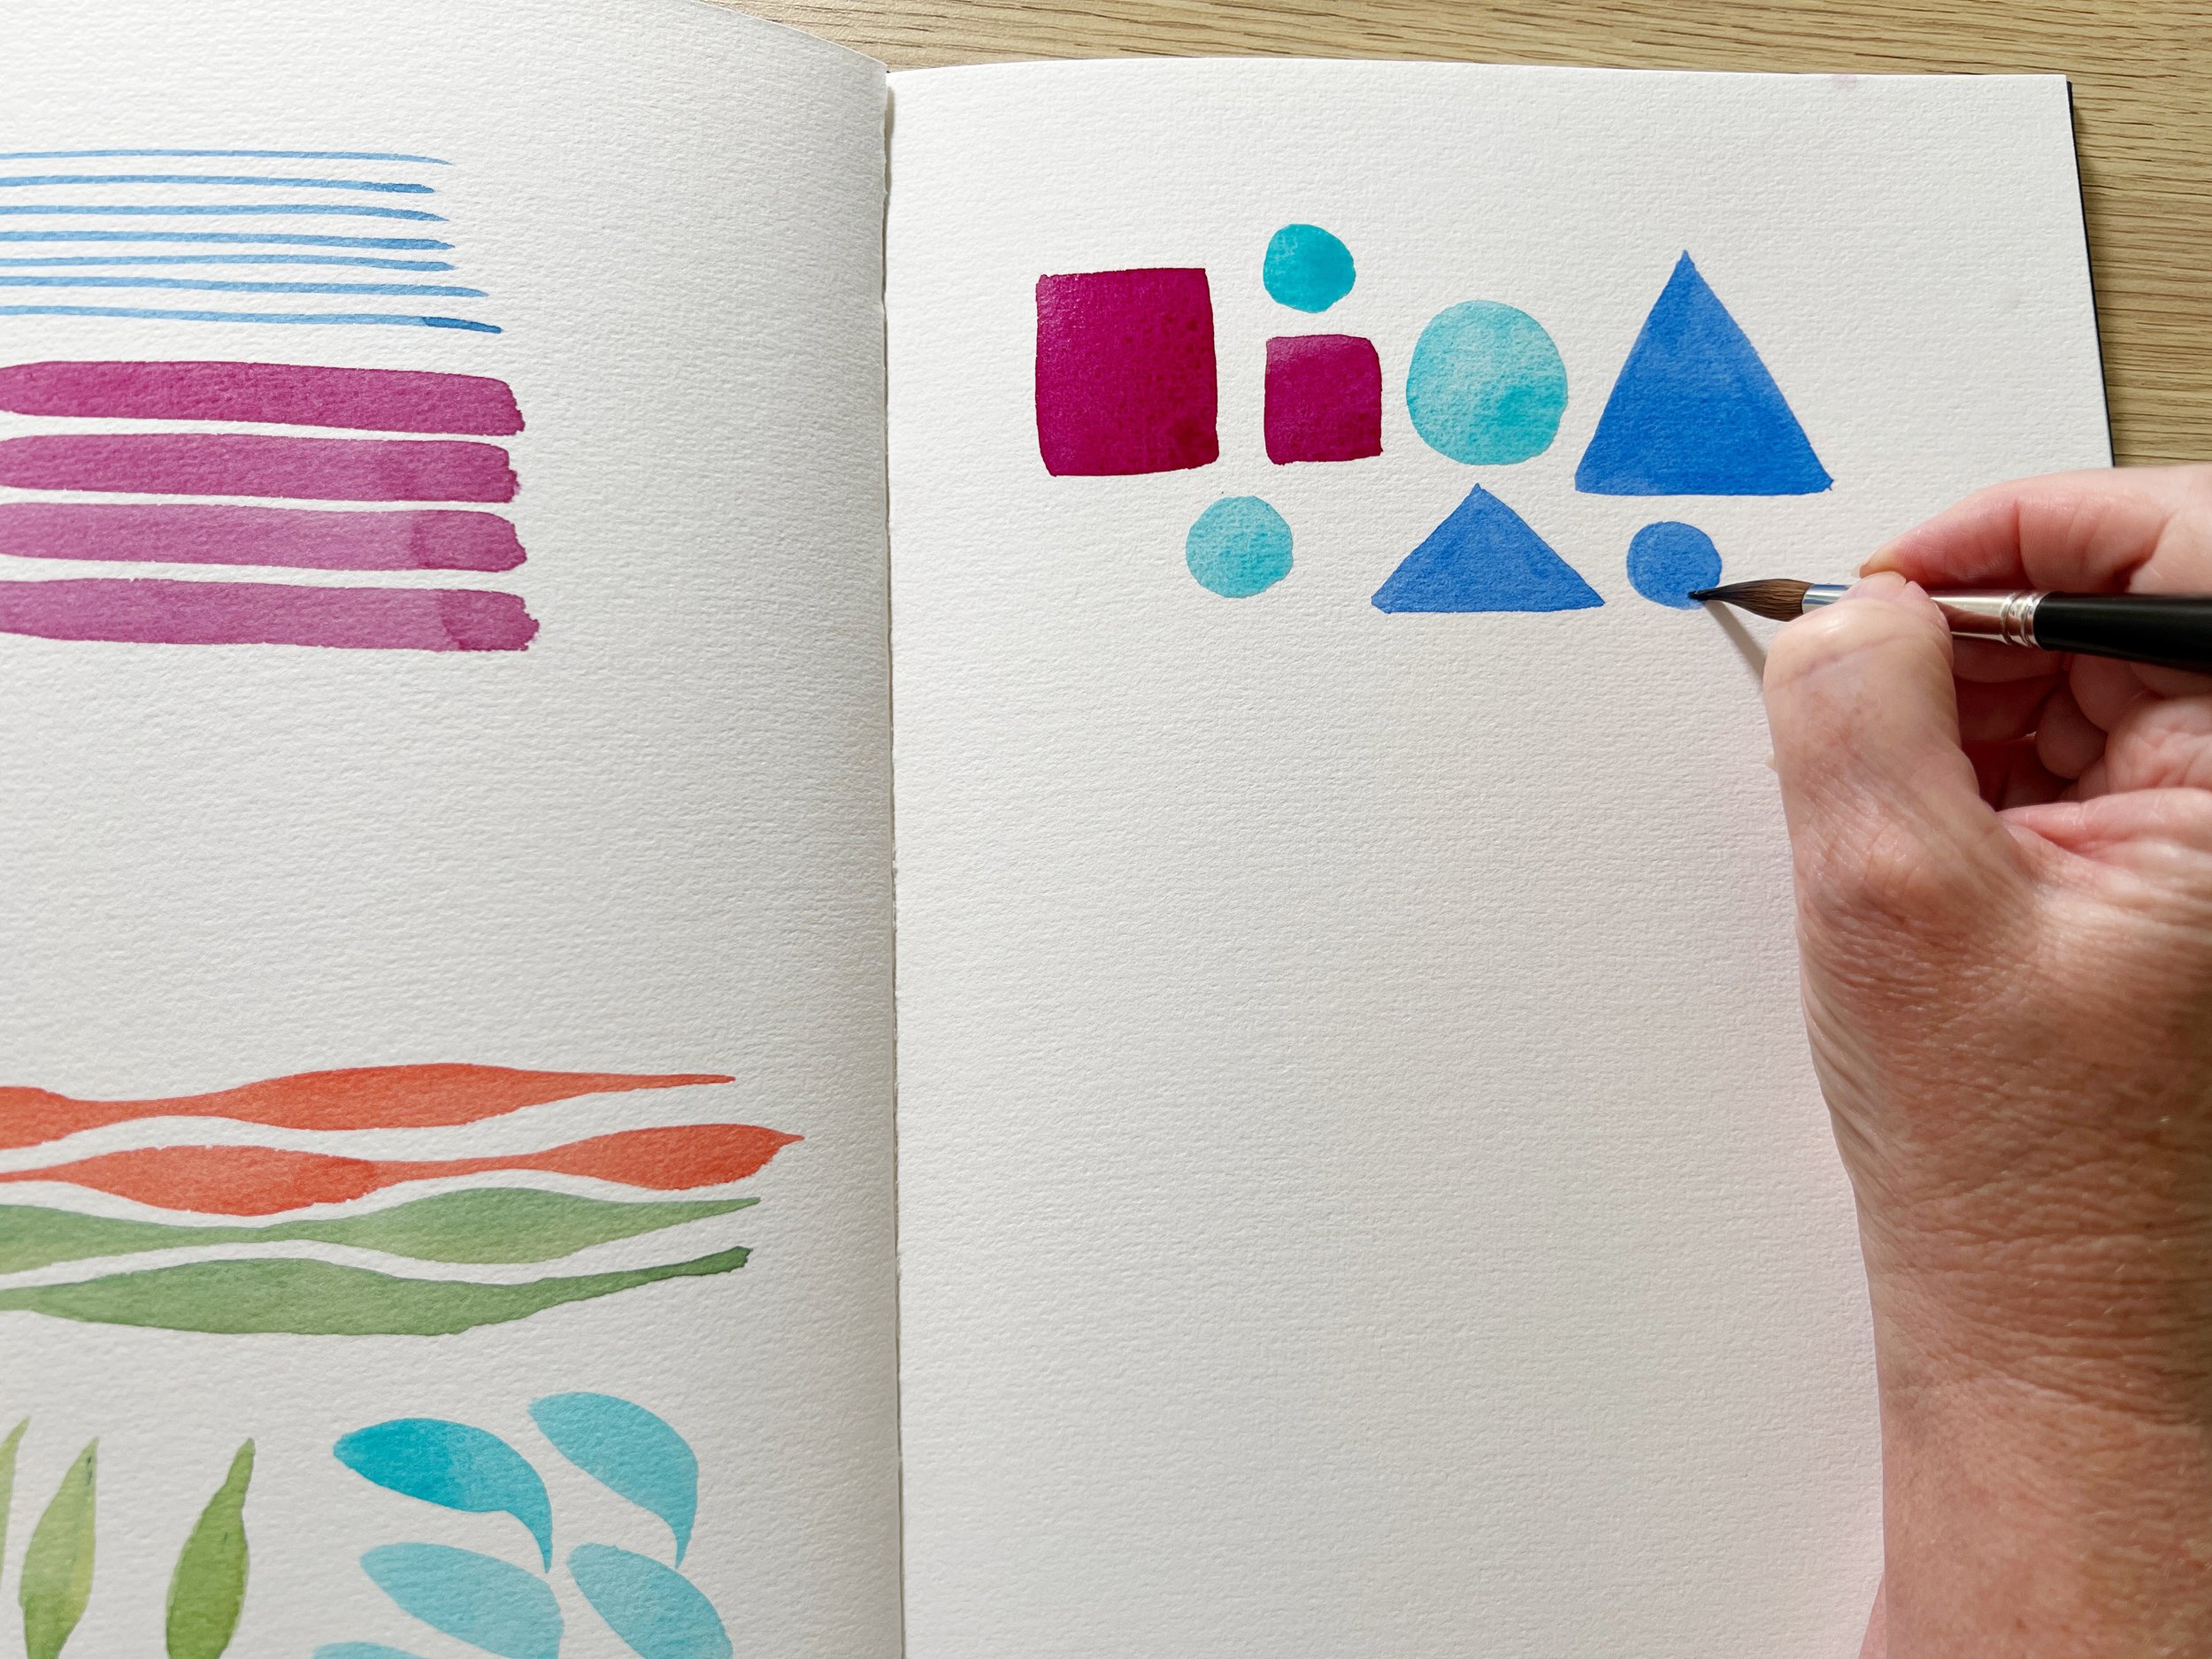
Try painting some simple shapes in different sizes. You will need to use both the tip of the brush and the belly of the brush. The belly is accessed when you push down on the bristles and flatten them. I tend to paint the edges with the tip and I use the belly of the brush to fill the shape in. You will find your own method of doing this but aim for clean sharp edges.
Precision Practice

Once you've practiced painting some simple geometric shapes now you can try painting shapes close together without touching. Start by painting a simple shape and then paint another shape beside it, as close as you can but leaving a little gap of white paper showing. Vary the shapes as you build on the practice.
Painting Grass
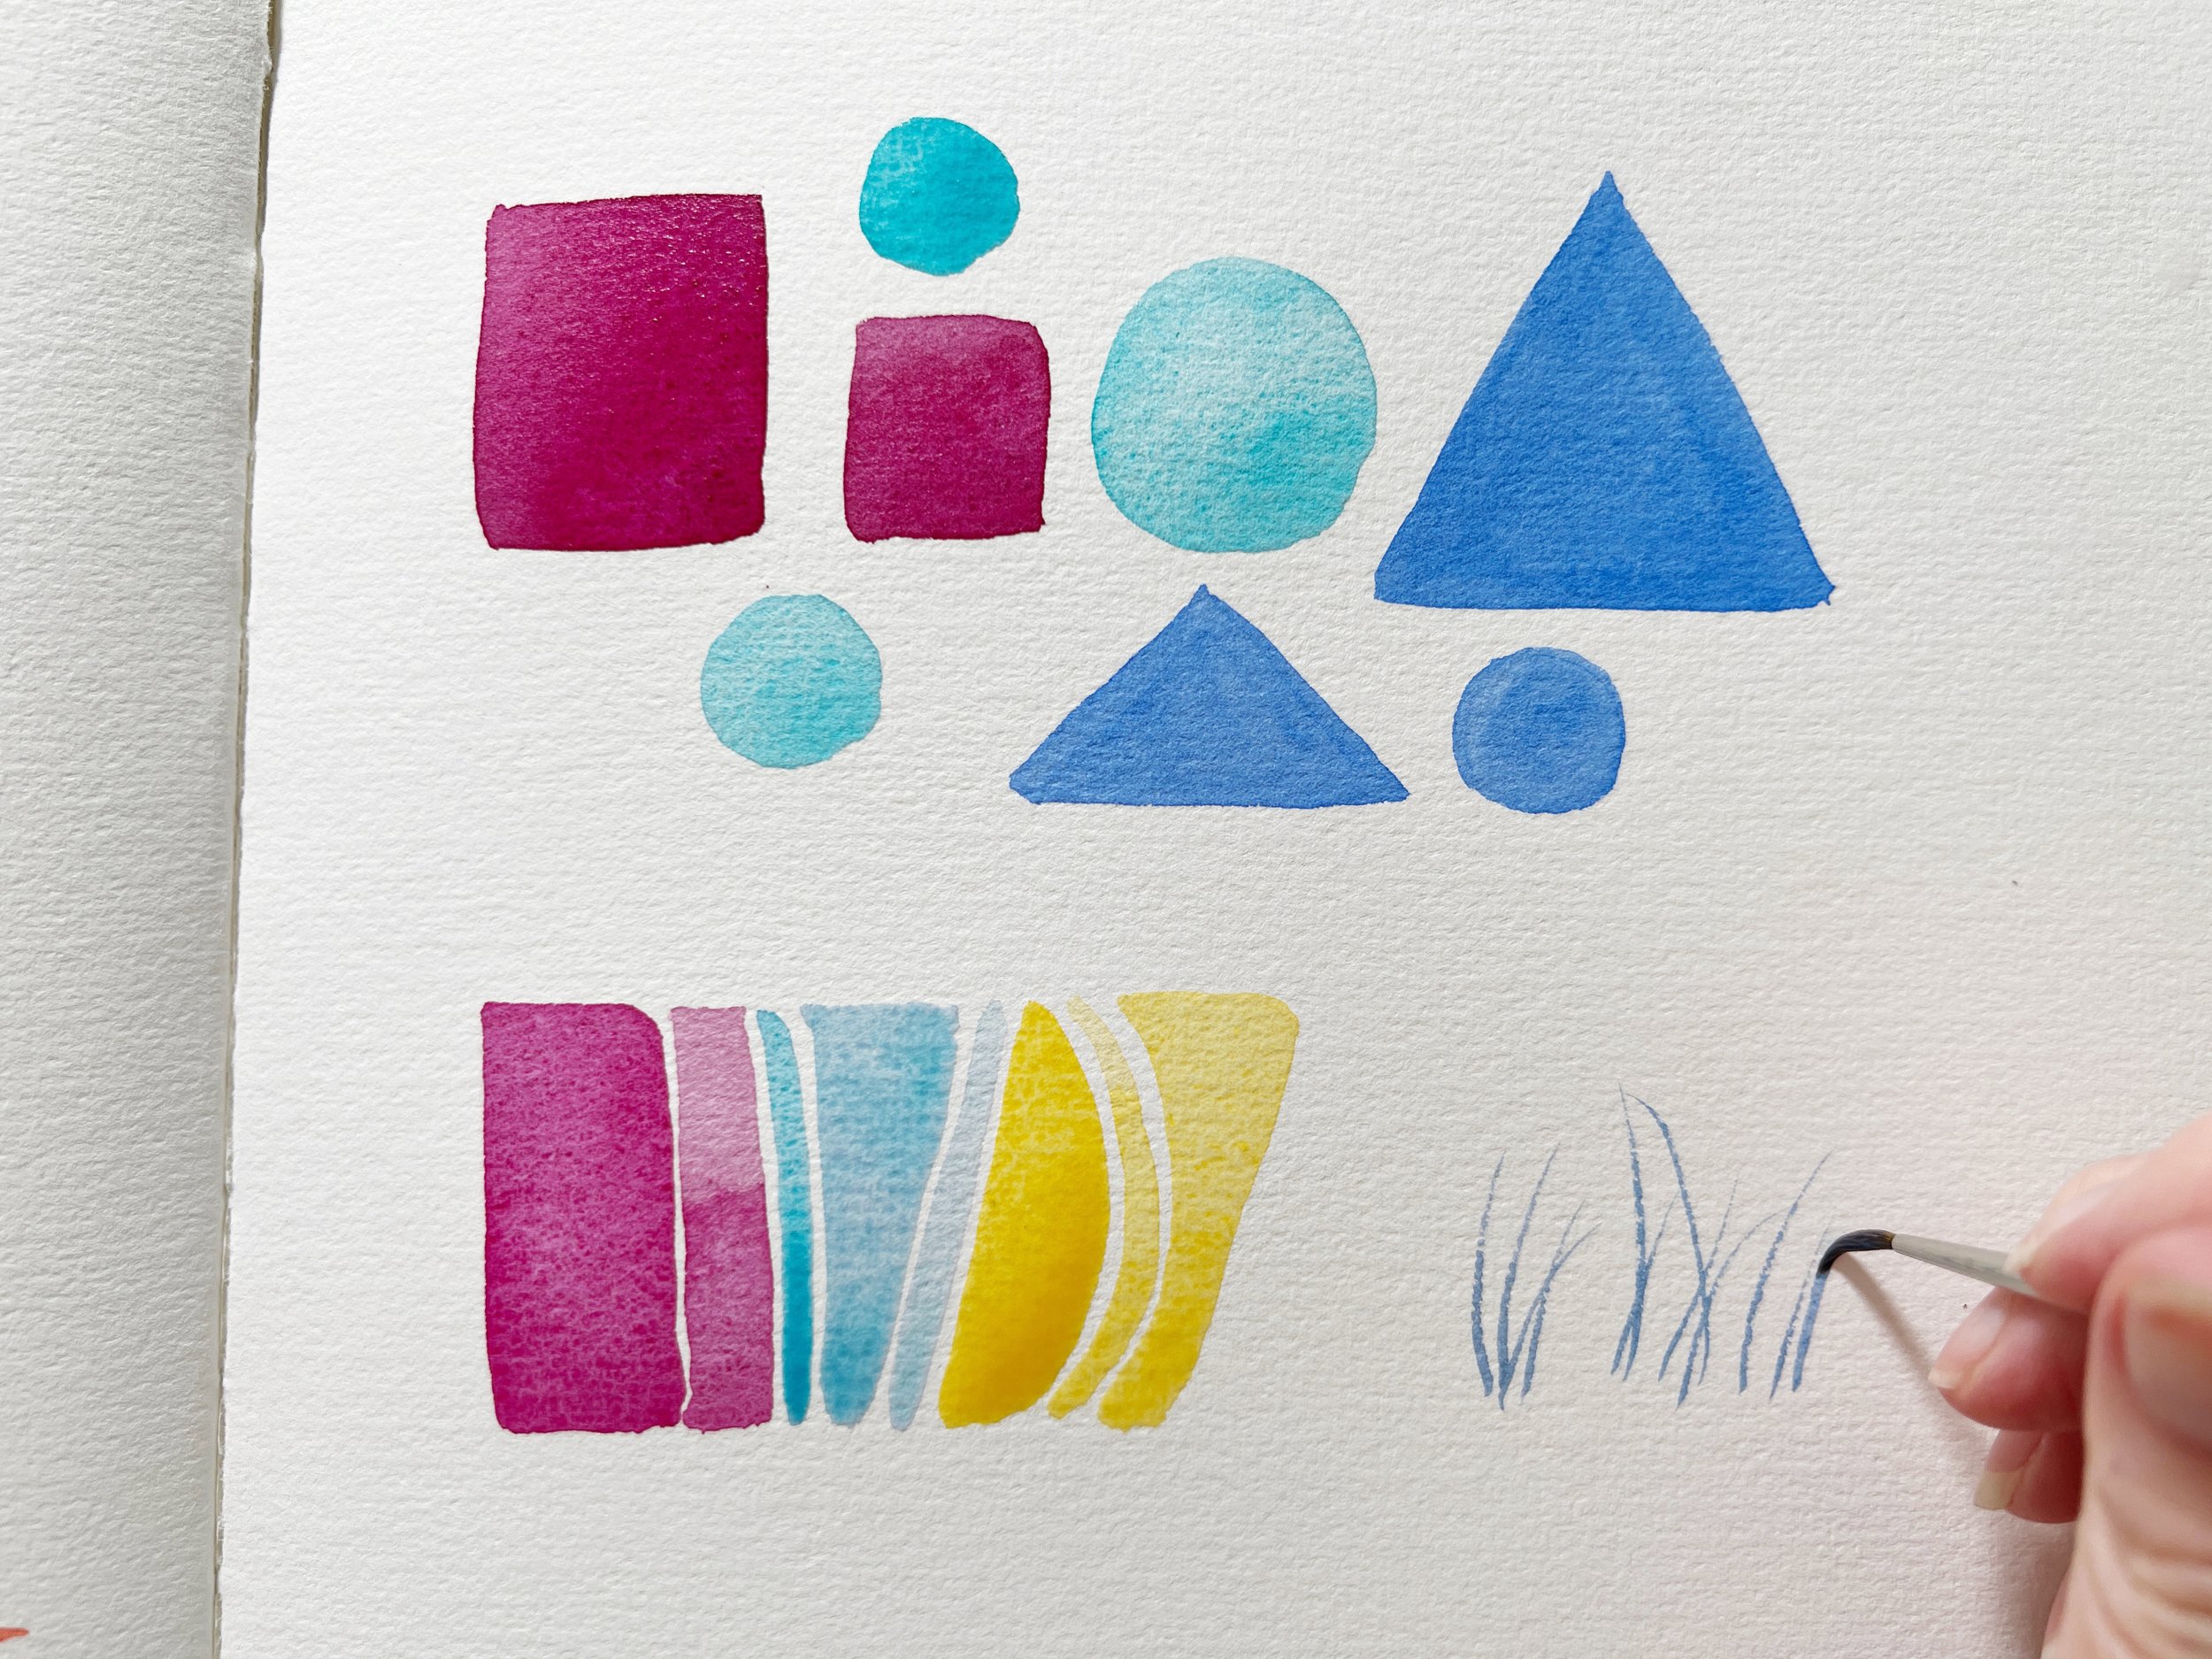
Here I switched to a smaller brush. I used a Da Vinci Maestro series 35 size #0 round brush to paint little blades of grass. I loaded the brush the same way as I loaded the larger brush.
Use the tip of the brush to paint quick overlapping fine lines that resemble grass. Try flicking the brush away from yourself first. Relax, and paint them without thinking about it. Quick is best. Flick, flick, flick.
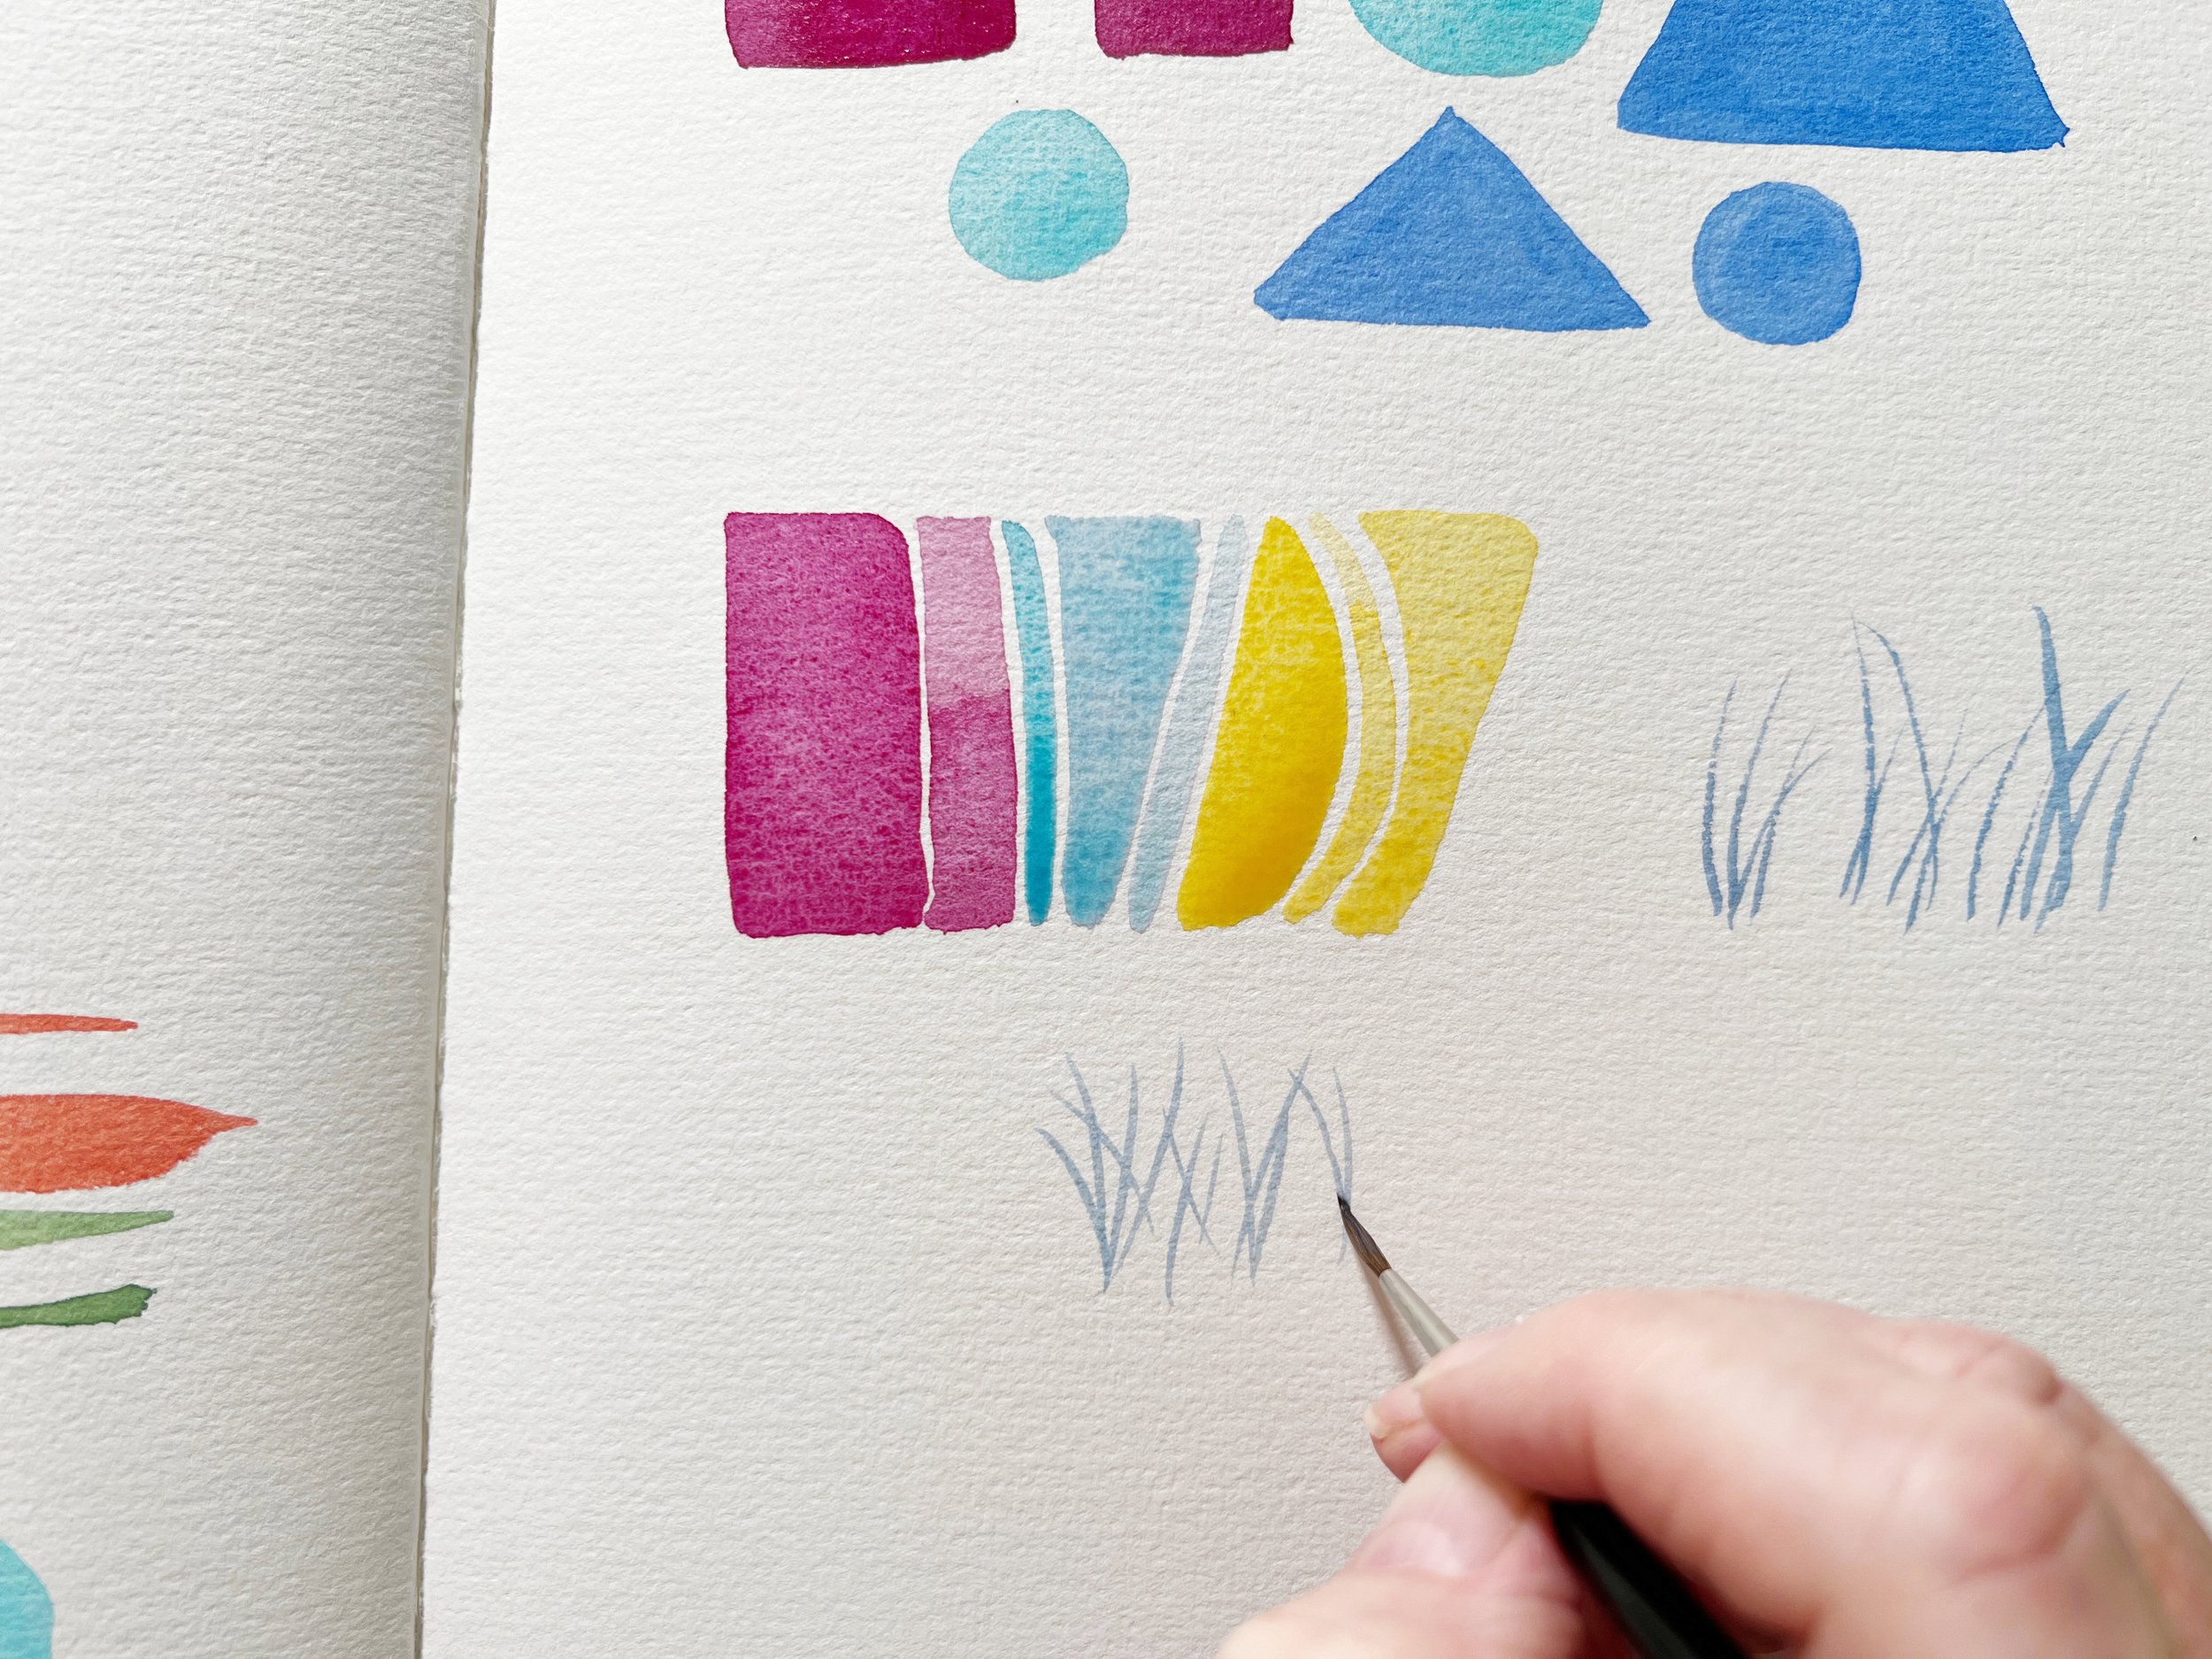
Now do the same thing, but try pulling the strokes in the other direction, towards yourself.
You will find that you will have a preference for which direction you pull the stroke. For grass shapes like this I prefer to flick them away from myself.

Try all of these exercises with different sized brushes until you have a better understanding of how to load your brush and how to manoeuvre it over the paper with ease. Loose, confident expressive marks will come easily after you have gained control of your brush.
Make sure you relax your hands and wrists when you paint in order to achieve better brush control. Don’t hold the brush too tightly or you will end up with a sore hand. This comes with experience and practice.
Mastering brush control is a journey that unfolds through dedication and persistent practice. As you embrace these exercises and witness the evolution of your brushwork, remember that each stroke contributes to your artistic growth. Celebrate your progress, both subtle and significant, and recognise that the journey itself is the fulfilling part.
If you are interested in learning to paint in watercolour, I have over 170 online, voiced over watercolour tutorials for all skill levels.
For Patreon members this is available as a tutorial video - Brush Control - Journal Exercises - beginners.
The black cockatoo print is available to purchase as a print in the shop.
Disclosure: This post contains affiliate links to Jackson’s Art, which means I may earn a commission if you make a purchase through my links at no extra cost to you.


