How to simplify a reference photo to make a line drawing for a painting.
A line drawing is important when painting in watercolour, but its significance can vary depending on your style and approach to watercolour painting.
From drawings to watercolour painting
Each artist has their unique approach to painting. Some prefer to work with highly detailed drawings, while others opt for minimal lines, that will allow their paintings to flow freely and loosely. I find myself somewhere in between. My aim is to capture realism, yet I also love watercolour's distinctive look. So, I strive to strike a balance, giving my drawing a degree of freedom while maintaining the essence of a watercolour painting.
Many times I have been asked about the process of simplifying a reference photo and creating a line drawing suitable for watercolour painting so in this guide, I will share some insights on how I decide which details to include and which to omit. As well as that, I will walk you through my own thought process as I created line drawings for several of my watercolour paintings.
Steps for simplifying a reference photo
When working with reference photos, like I do, you may encounter lots of unnecessary detail that can initially be daunting when you want to create a drawing you can use for your painting. As you create your drawing, which acts as the framework for your painting, it's important to remember that not every detail from the reference photo needs to be included. Fortunately, there are several helpful tips I can offer you that will simplify the process of creating your drawing.
Plan your painting before you start drawing
When creating drawings for watercolour paintings, you need to select and include essential information while omitting unnecessary details. Planning plays a crucial role in guiding these decisions, it serves as a roadmap, allowing you to make informed decisions about what to emphasise in your line drawing.
Begin your painting process by carefully choosing your reference material, prioritising clear focal points and well-defined shapes that will translate effectively into your drawing.
Identify a focal point, as it anchors your composition and delivers your intended message. Emphasise the focal point in your line drawing while simplifying or omitting less crucial areas.
Consider your painting approach and areas suitable for wet-on-wet techniques. Use guide lines sparingly in those areas where you will mainly work wet on wet, or leave them out where you can. When dealing with intricate details, decide whether to paint them freehand or include them in your drawing but try to leave space for your creativity to flow naturally when you start painting.
Remember the importance of negative space for visual balance and viewer engagement. Break down complex areas into manageable components and simplify shapes in your drawing. Avoid overcrowding your composition with unnecessary details from the reference photo.

Identify Key Shapes
With the drawing process, try to break the reference photo into key shapes. Key shapes form the foundation of your composition. They serve as the structural framework upon which you'll build your entire painting. By identifying and drawing these shapes on your paper, you create a solid structure that helps maintain the overall balance and proportions of your artwork.
To see them more clearly, squint your eyes to eliminate unnecessary detail.
Pay attention to the negative space, which is the area around the main subjects or objects in the composition. Sometimes, the negative space itself forms key shapes that are equally important.
Use a sketchbook or journal to do some quick thumbnail sketches that identify the key shapes before you do your drawing for your painting.
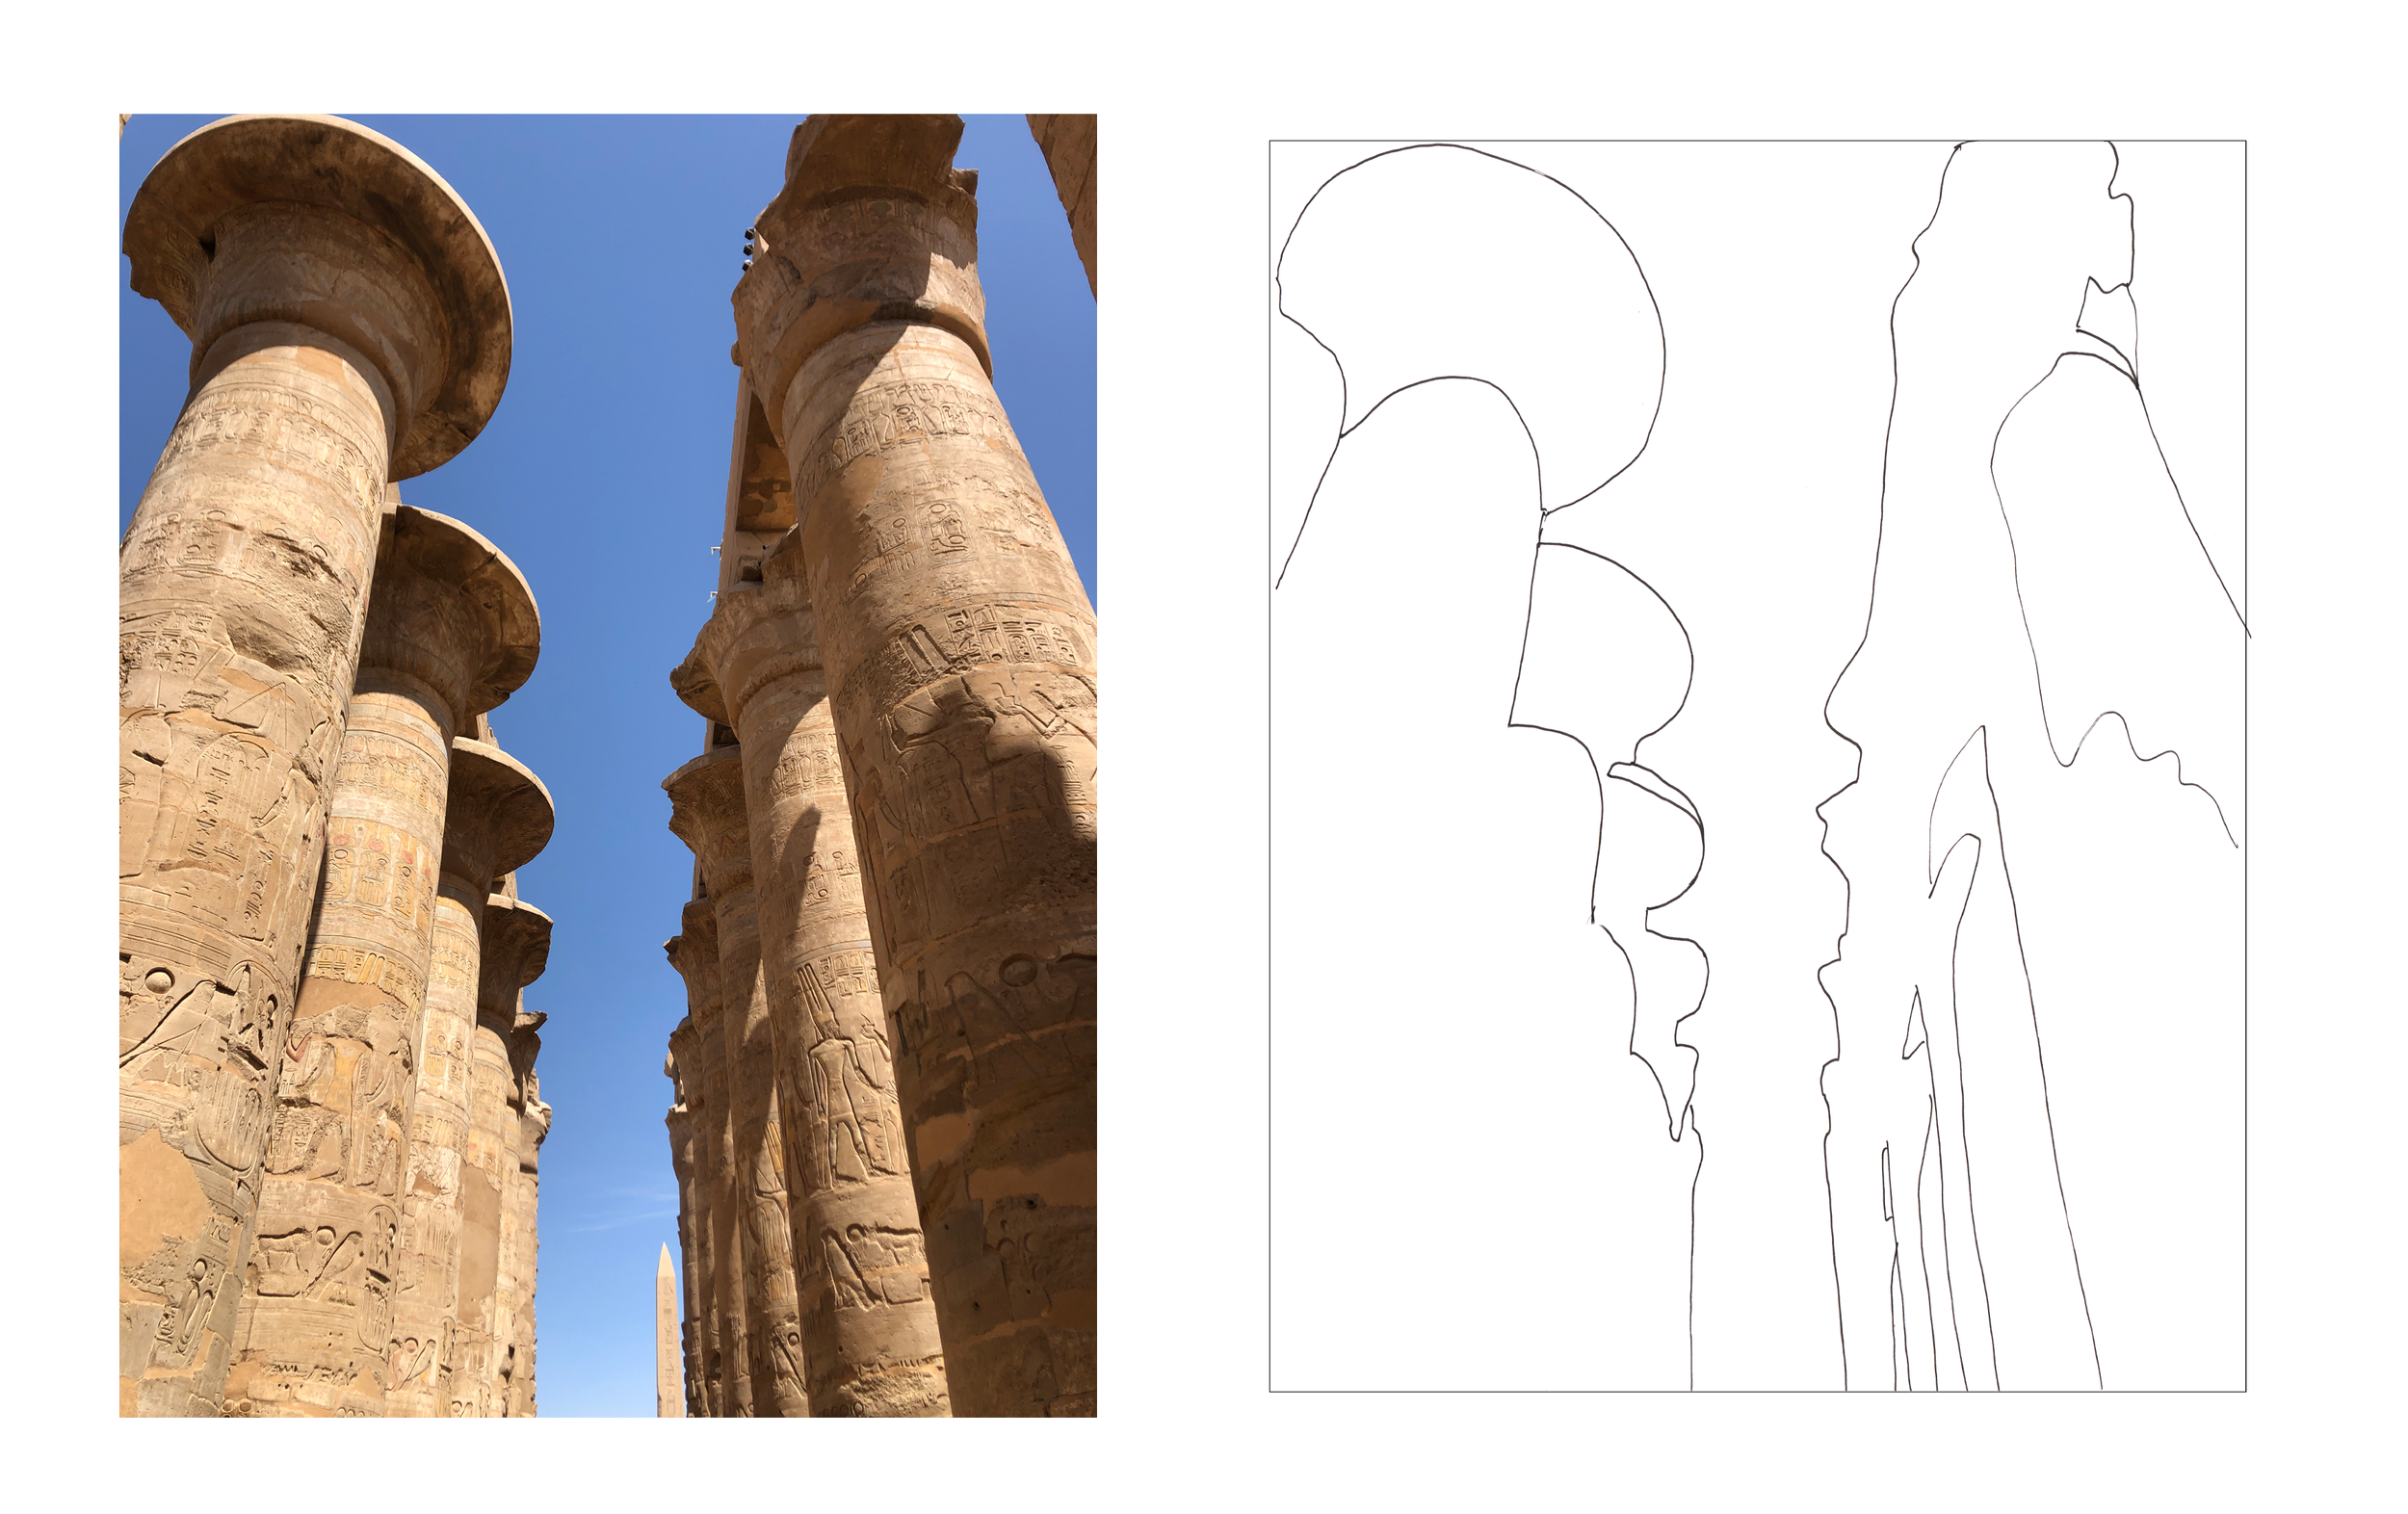
My son snapped this photo in Egypt, and it's a great example to illustrate the concept of recognizing key shapes. The columns and their cast shadows have been simplified into basic shapes, making them easier to paint. Even the negative sky space forms straightforward key shapes.
Duck Painting
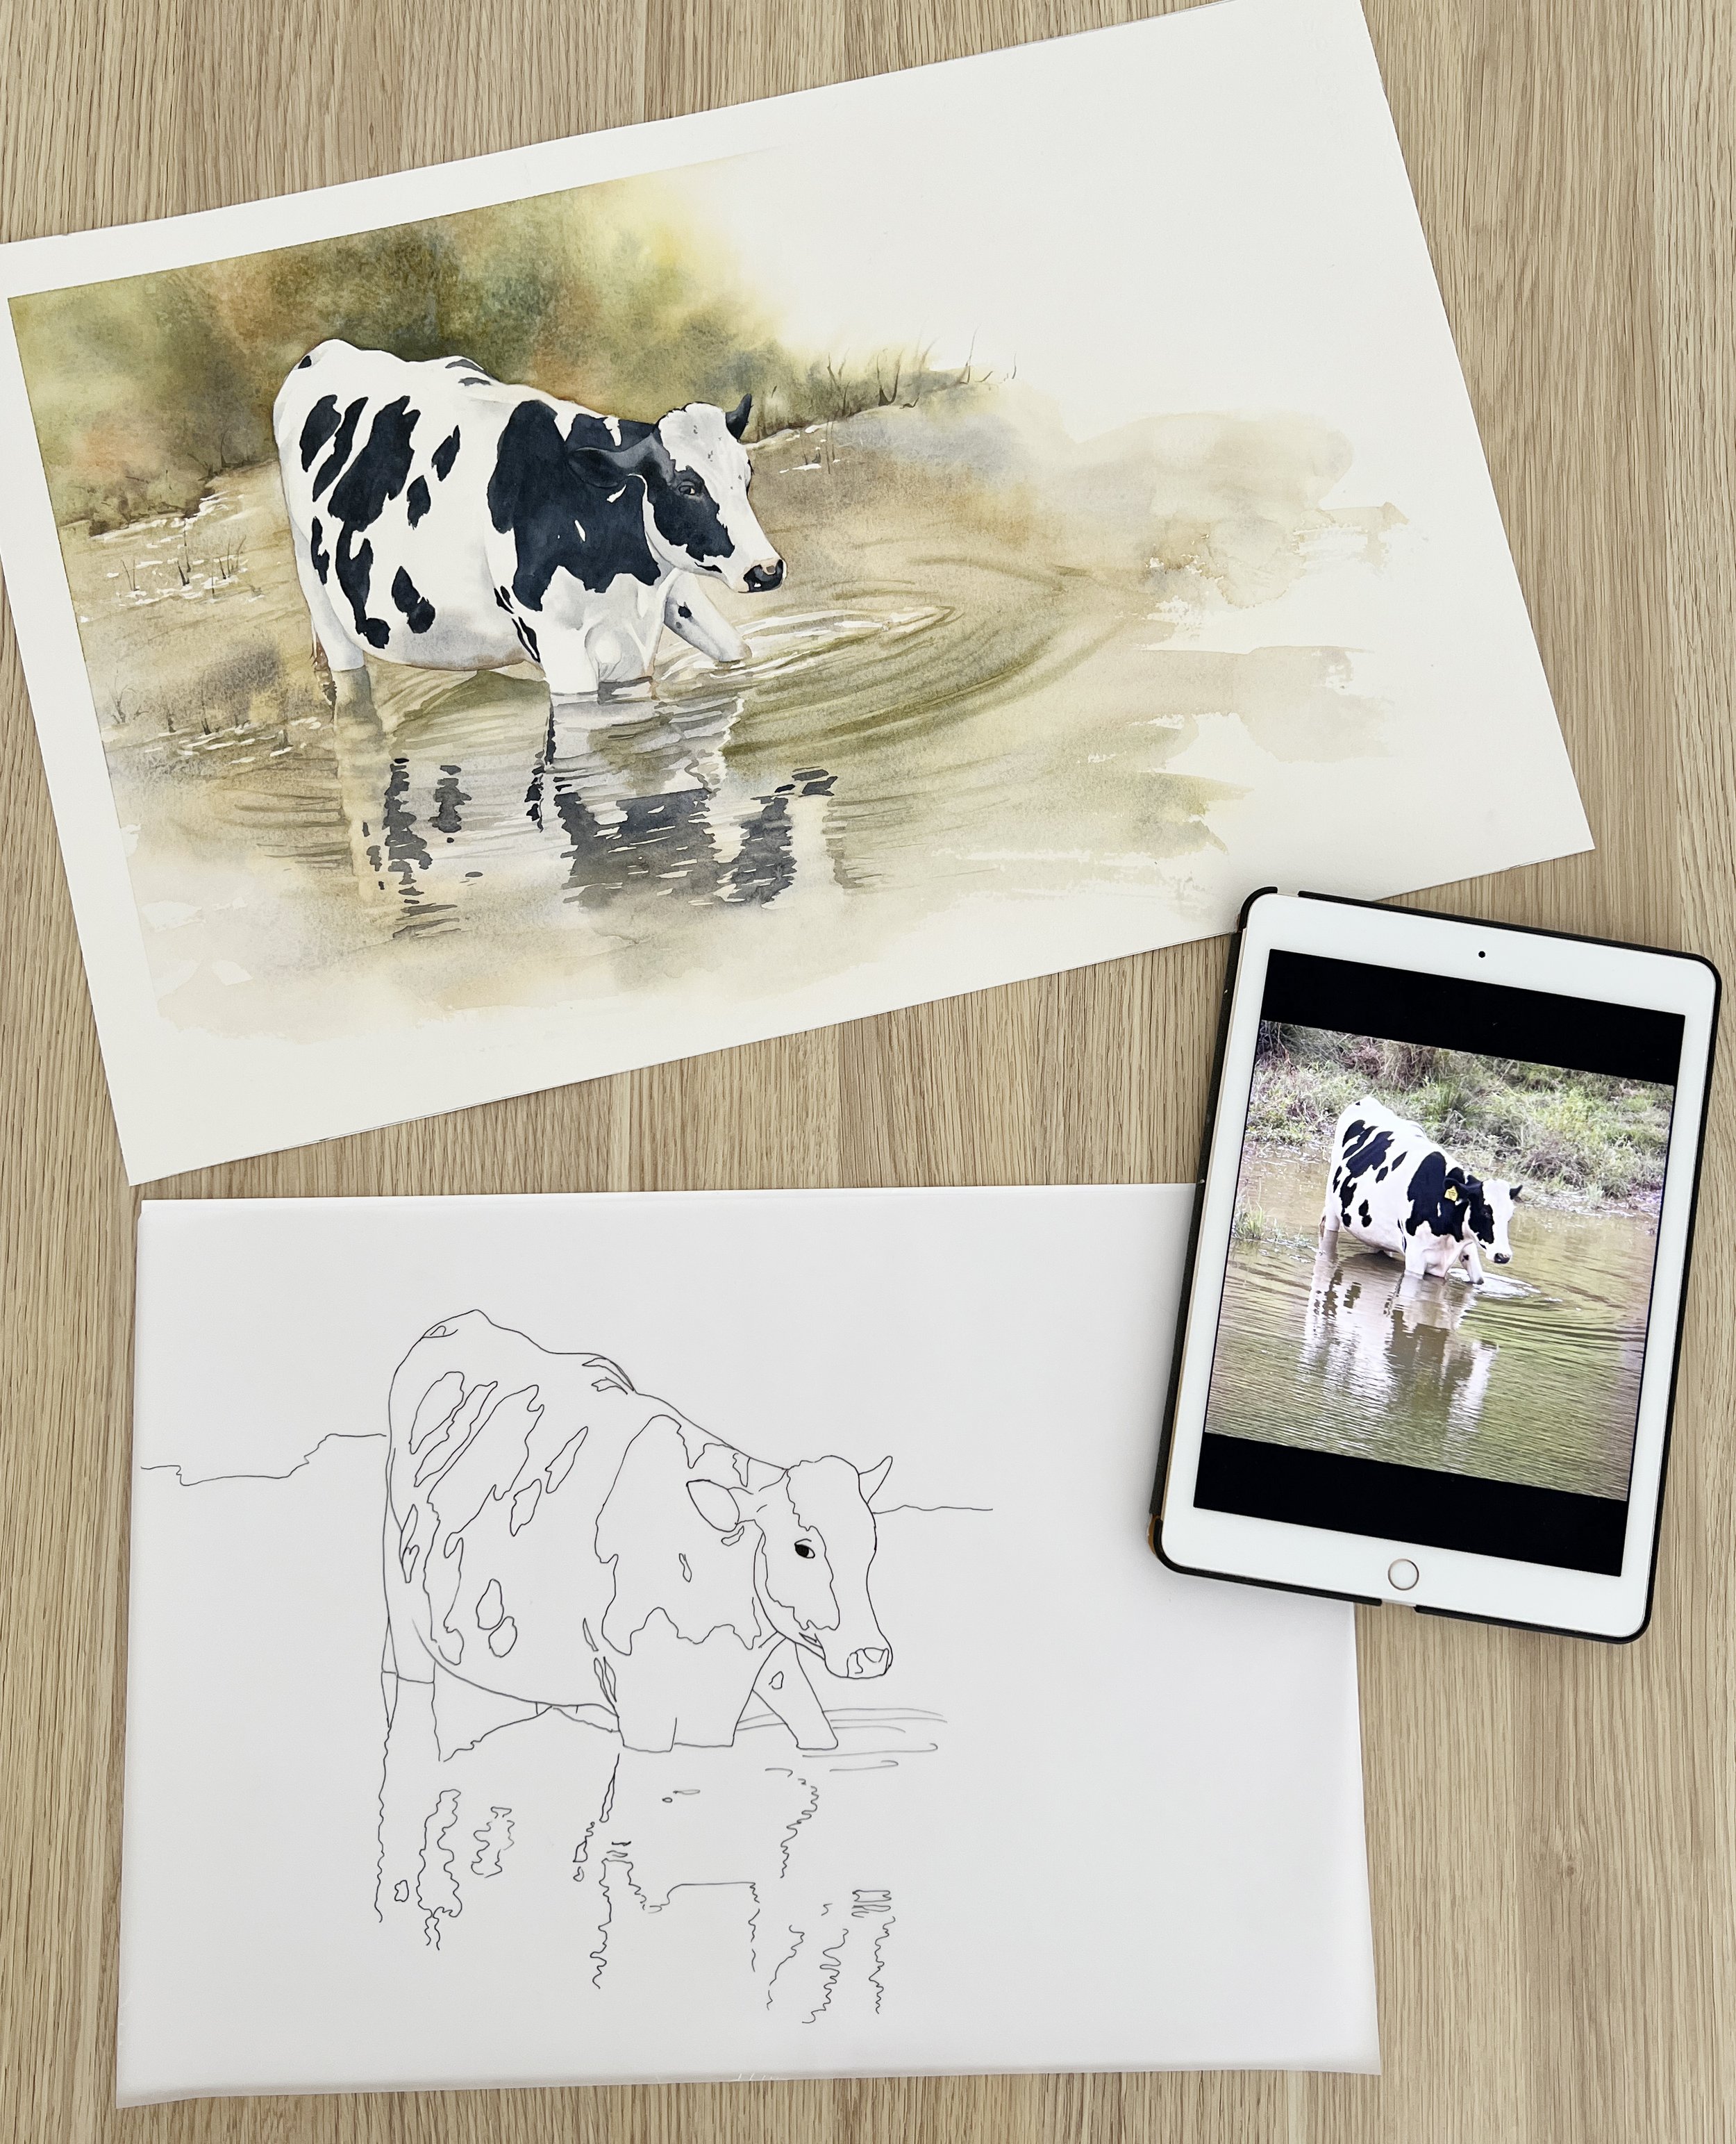
When I did the drawing for the duck painting, I simplified the reflection to one large shape because I thought about how I would paint that area. I decided that I didn't need all of the feather detail in the reflection because I knew I would work wet on wet in that area and any detail I included on the drawing would have hindered the flow of the wet on wet work.
When you work wet on wet you won't have precise control. The paint flows over the wet paper creating beautiful and sometimes unpredictable shapes so it's helpful to not have pencil lines showing that might inhibit that freedom.

I also didn't include any of the feather detail on the side of the duck. I decided that I would add detail on the wing feathers so I knew that area should be simpler. I also wanted the side of the duck to look soft which meant I wouldn't need too many hard edges there. To give the illusion of softness I worked the watercolour paint wet on wet and any pencil lines rendered there would have hindered the spontaneous flow of wet on wet work.

Select important details
Decide what details are essential to convey the subject or mood of your watercolour painting, focus on capturing the essence.
Think about your inspiration. What inspired you to choose a particular reference photo? What do you want to express or convey through your artwork? Think about what techniques you are going to employ. Understanding your artistic intentions will guide your choices regarding important details. While the goal might be to simplify, certain details within the subject may still require emphasis. Form and outline lines allow you to highlight these details and draw attention to specific areas of interest, even within a simplified context.
For example, with the painting of this Eastern Rosella I was drawn to the contrast and detail of the black markings on the wing feathers. When I did the drawing I made sure I included those details so that I would have something to follow when I started using the black paint.
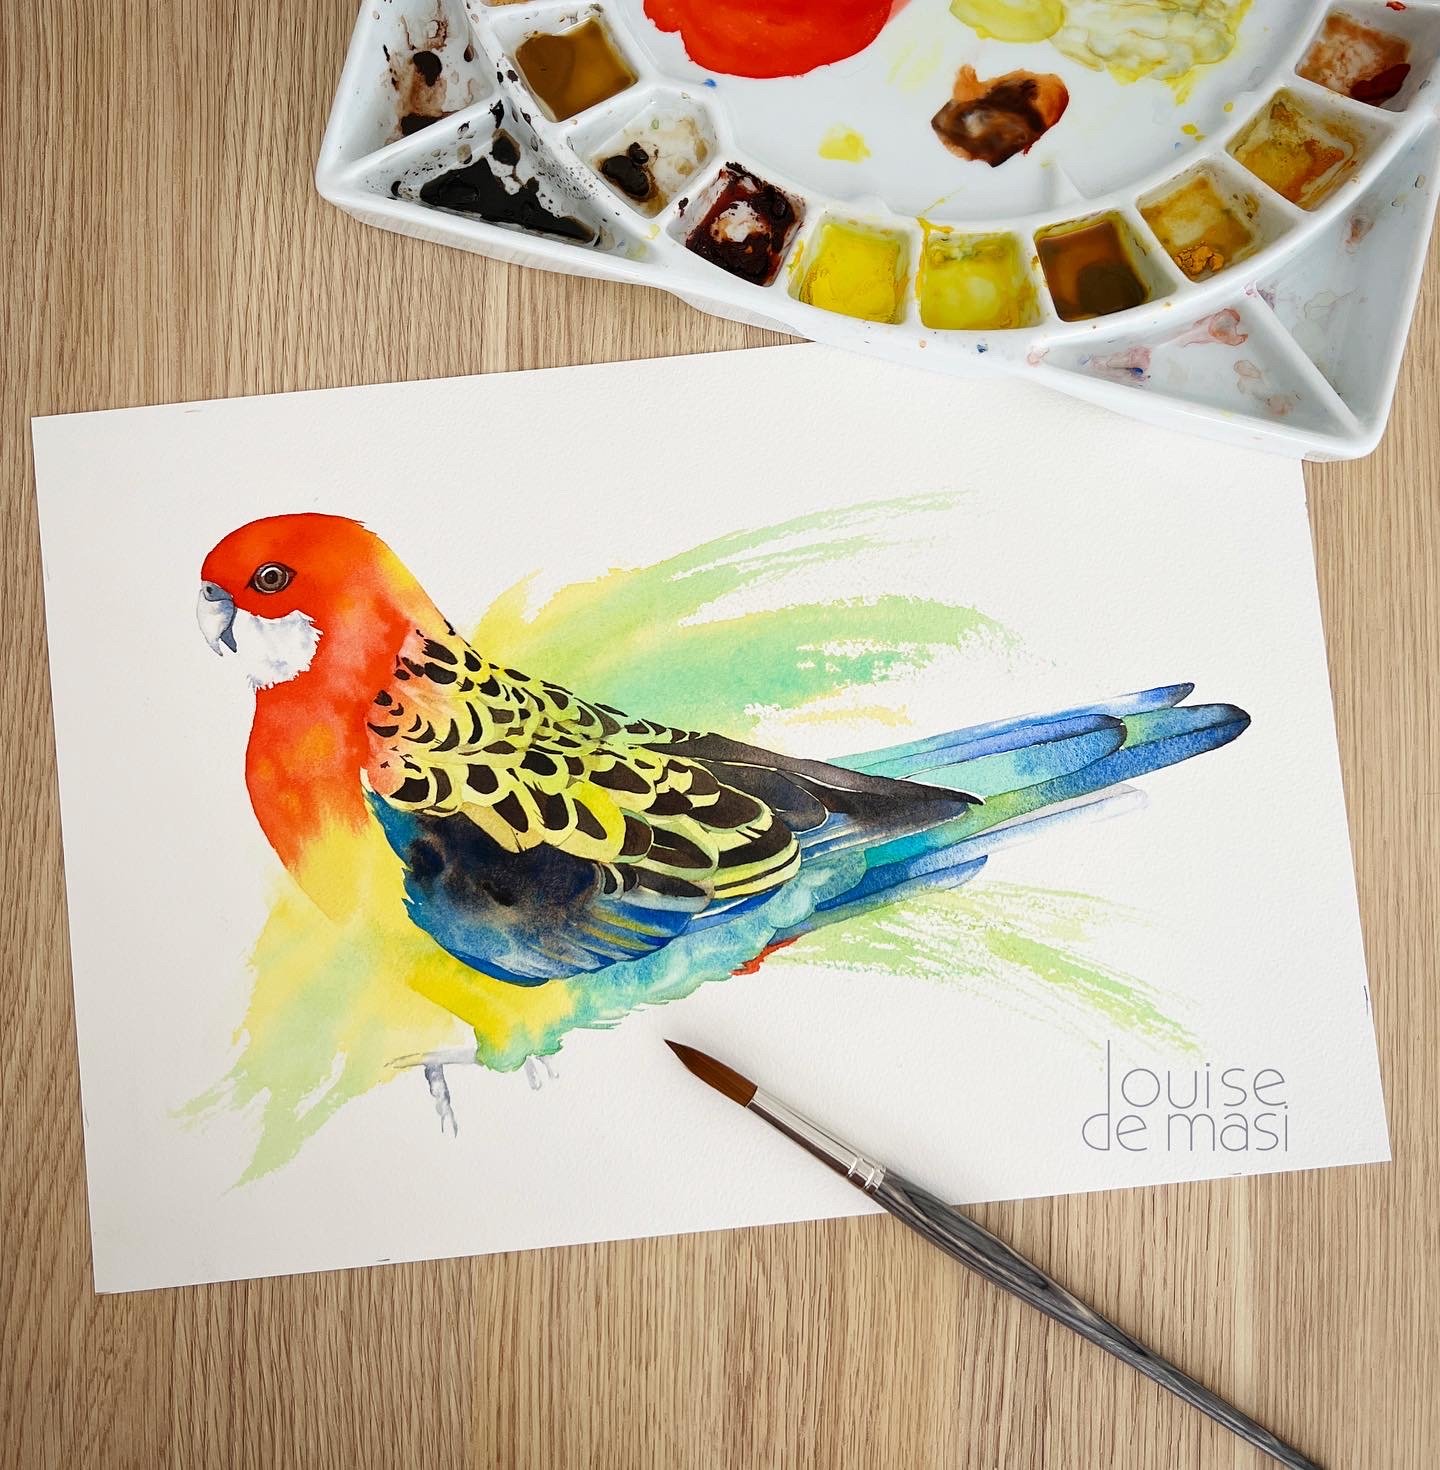

Other important details are the form or outline of the subject. These lines, often referred to as contour lines, play a fundamental role in defining the shape and structure of your subject. Without these lines, it can be challenging for viewers to identify and interpret the subject correctly.
Try to use lines sparingly
If you can, try to minimise the amount of lines you use when you create line drawings for your watercolour paintings. Use lines mainly for defining major forms and guiding the viewer's eye. You can use lines to outline major shapes and elements, but avoid overdoing it.
For example, in my orchid painting below, I deliberately refrained from including all the directional lines on the lateral sepals and petals. Instead, I opted to sketch just a select few as initial guides to ensure the accuracy of the markings' direction. I painted the remaining details without the need for additional guidelines.

As well as that, I chose not to indicate the speckled markings on the labellum on my drawing. These intricate details were painted freehand on wet paper, allowing for a more organic and expressive representation.

Additionally, the orchids had beautiful cast shadows that added dimension to the composition. These shadows were painted without the aid of guidelines over the top of previous washes.
When working with watercolours, it's important to know that pencil lines become permanent once painted over and they will remain visible under lighter colours. So, plan your lines carefully. I didn't draw in the cast shadow lines on the petals because I was concerned that they would remain visible after I painted the shadows.
That's not to say that all pencil lines need to be covered with dark paint or removed altogether. There's a certain charm in watercolour paintings where artists incorporate the drawing as a suggestive and integral part of the composition.

Some more examples of the line drawings I created for my watercolour paintings.
Sheep watercolour painting

For my sheep painting, I focused solely on the external contour lines to accurately capture the sheep's form and shape. I deliberately avoided drawing all the intricate lines within the wool because I knew they could become distracting during the painting process.
I decided that attempting to replicate every crease in the wool as seen in the reference photo would lead to excessive detail and overworking the painting. So, I limited my drawing to include only the outer edges, the eye, nose, mouth, and the head's edge merging into the neck. On the chest area, I added a few small directional lines for guidance. That allowed me to paint the wool freely, uninhibited by lines that I had to follow.
I decided not to depict the feet in detail. Instead, I gently faded the colour in that area, allowing the viewer's focus to remain on the essential elements of the painting.

Guinea Fowl watercolour painting
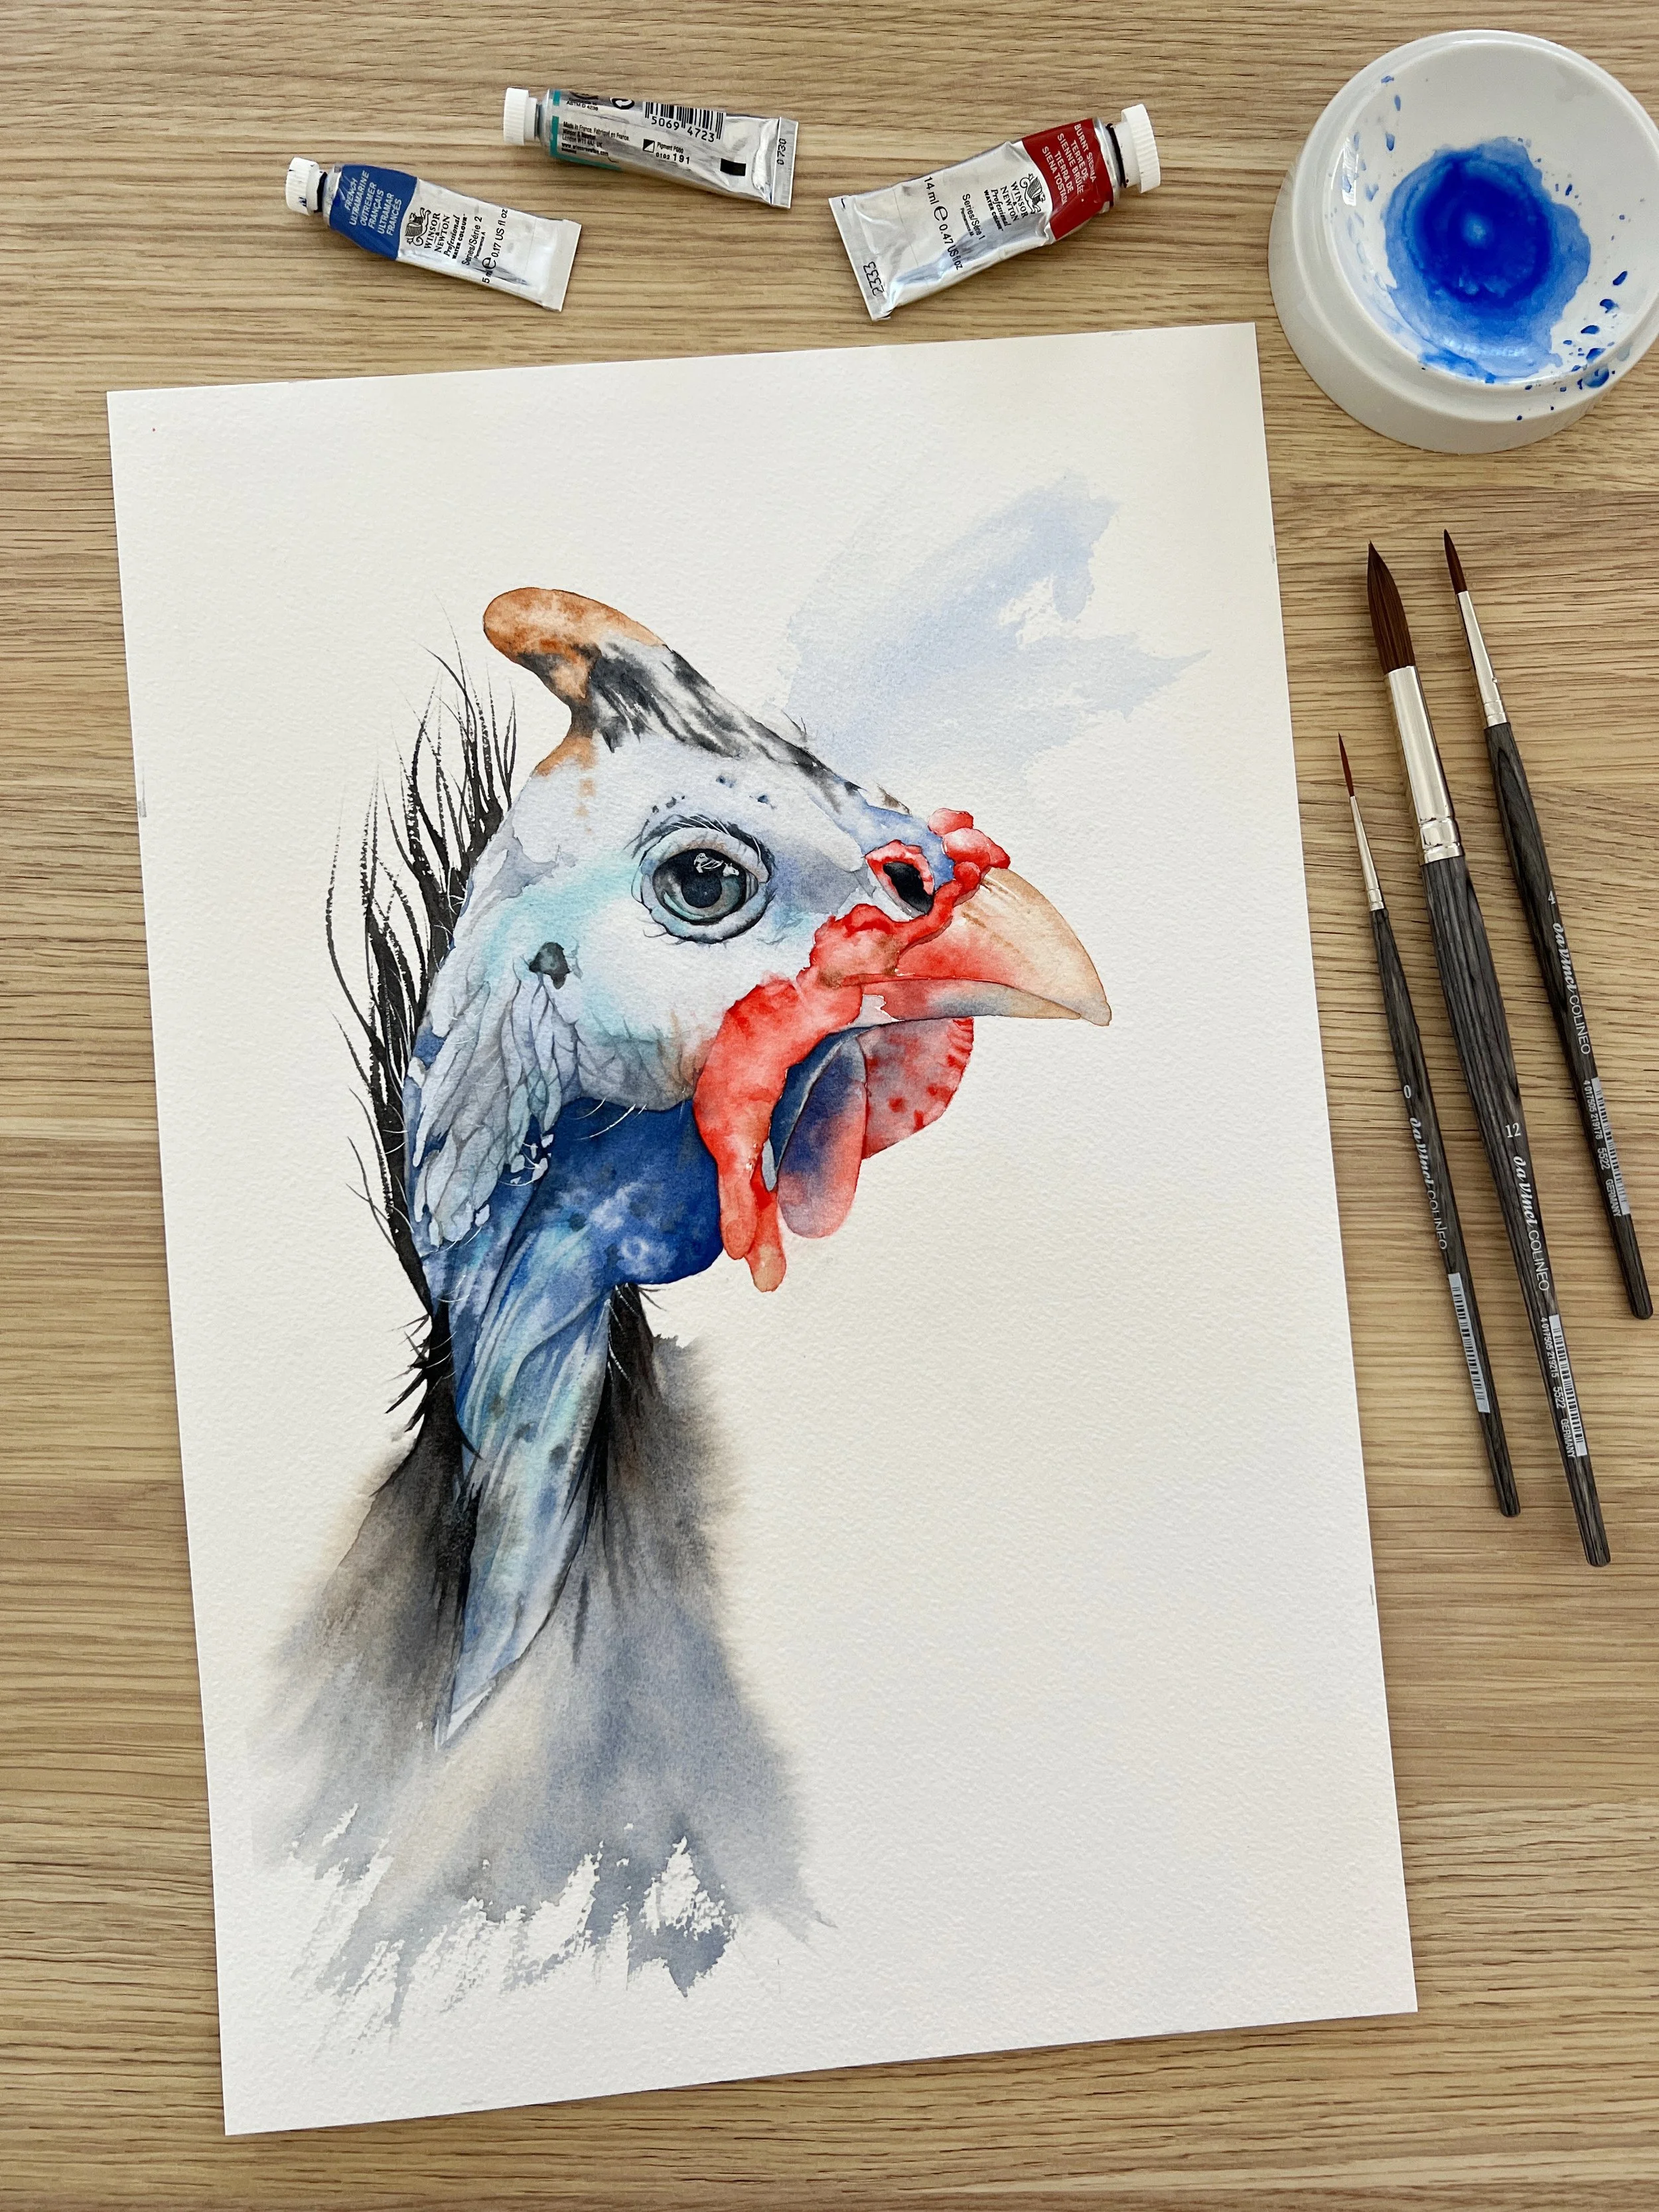
For my Guinea Fowl painting, I found it necessary to incorporate more detail into the drawing compared to my sheep painting. I began by outlining the external edges. Then, I wondered what additional information was essential for my painting.
I focused on identifying key shapes, such as the red wattle area, the juncture of the horn and the head, the dark blue skin under the head and neck, the eye, and the surrounding rim of skin. These elements were crucial to capture the essence of the Guinea Fowl.
As for the intricate wrinkles in the two blue skin areas, I made a practical decision. I initially drew a few of the main wrinkle shapes as guidelines to start with. This allowed me the flexibility to paint the rest without the constraints of predefined lines. I also left the decision of how many wrinkles to include for later in the painting process, giving me the freedom to assess the composition's progress.
In contrast, I didn't draw the feathers on the body. I aimed to keep this area loose and expressive during the painting phase. This would provide a sense of visual relief from the detailed areas of the head. I also left out the spiky feathers on the back of the head, because they were best suited for freehand painting without the limitations of pencil lines.

Photo to Sketch Apps
Drawing is a fundamental skill that every artist should cultivate, especially for watercolour artists due to the medium's transparent nature. While I won't suggest bypassing this crucial skill, some artists make use of free apps that speed up the line drawing process.
I tried one myself out of curiosity. I uploaded my Guinea Fowl photo to an app called 'Outline' and within a fraction of a second I had the line drawing below.
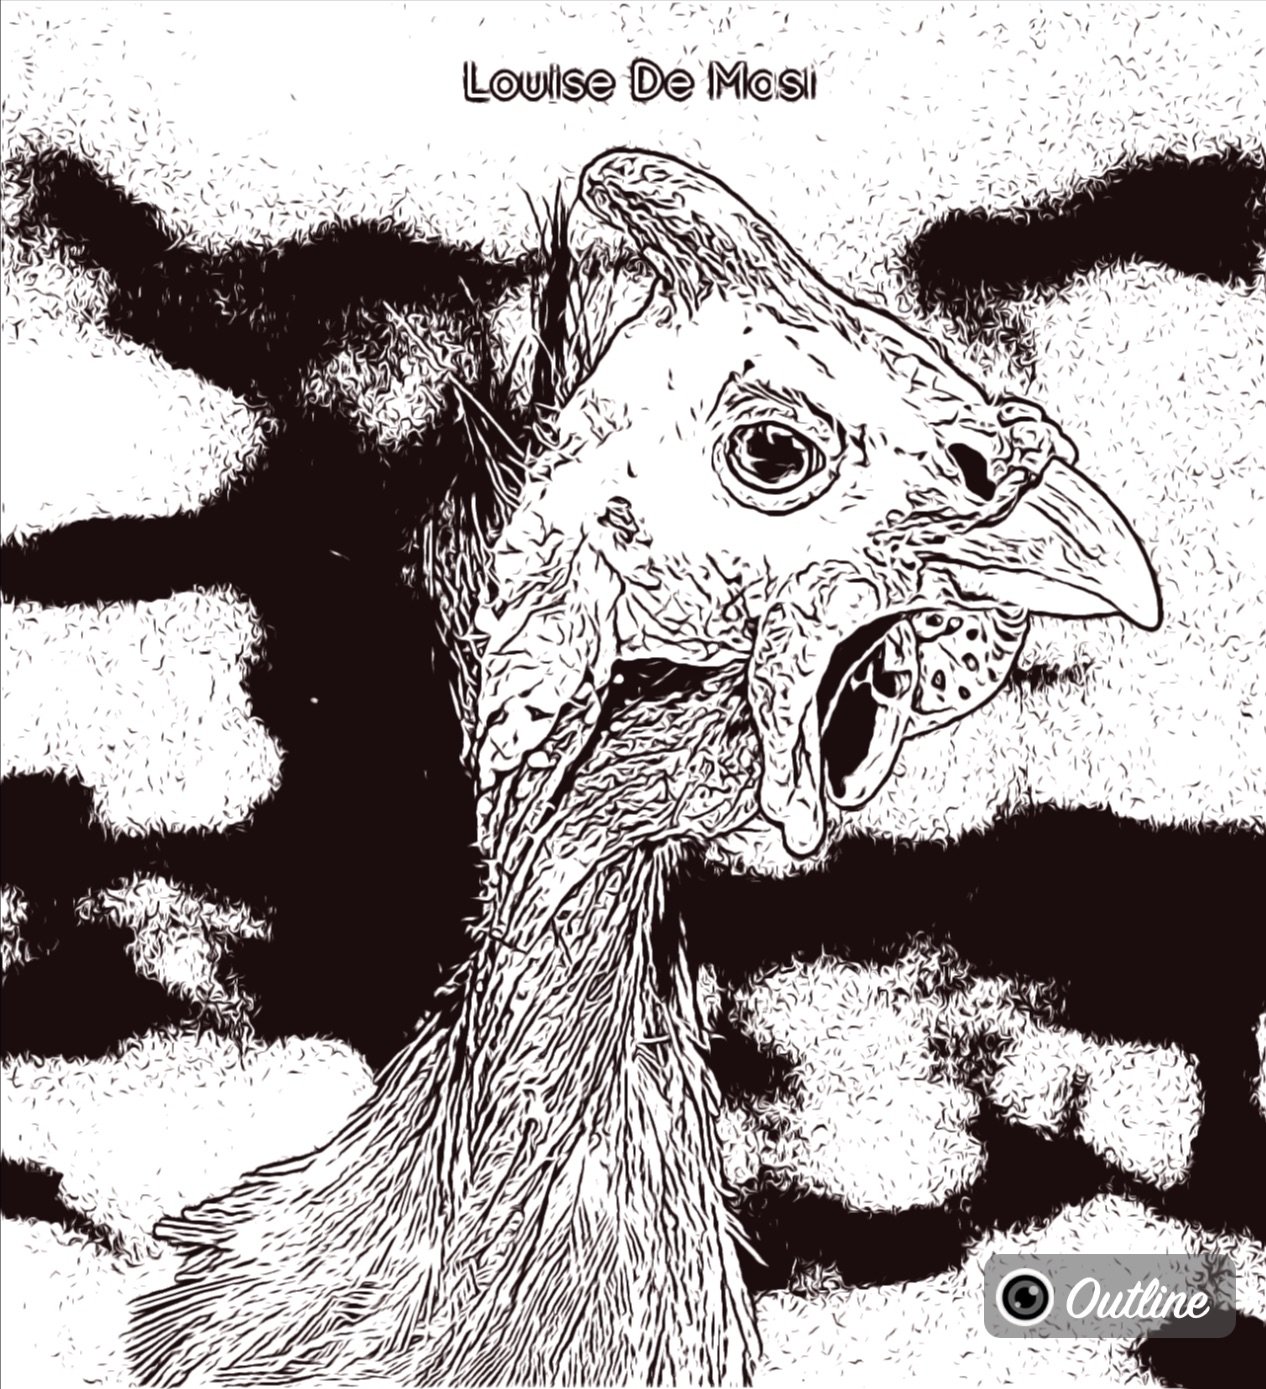
I'm sure you can see how confusing it is in comparison to the line drawing I created myself. Nevertheless, if you are short on time, apps like this may help to get you started with your drawing. However, a lot of simplification is required in order to get it ready to be a useable drawing that you could transfer to your watercolour paper.
Final words
In summary, before starting your line drawing, thoughtful planning is key. Decide how you will paint it. Determine which lines are essential and which can be omitted. Reflect on what initially drew you to your subject – that area likely requires guidelines. Identify your focal point; drawing it is important. Include the outer edges and defining features, but feel free to exclude less crucial elements. Avoid constraining your creative flow with rigid lines that must be adhered to.
Remember that watercolour painting is a blend of technique and creativity. Your line drawing sets the structure, but it's your artistic interpretation that brings it to life. Embrace the balance between structure and freedom, and don't be afraid to experiment. With practice, you'll refine your skills and develop a unique style that truly reflects your artistic vision. Happy painting!
If you are interested in learning to paint in watercolour, I have over 170 online, voiced over watercolour tutorials for all skill levels.
The “Cow in water” is available to purchase as a print in the shop.
Further reading: 9 Watercolour Texture Techniques


