Painting a Watercolour Rose
One of my favourite roses is called 'Heaven Scent.' It's a Hybrid Tea rose known for its big, beautiful flowers and amazing scent. It's got that classic rose look, perfect for painting with watercolours.
I painted this rose once a long time ago, then kind of forgot about it because our rose garden got really weedy and wild. It hadn't bloomed in years. But the other day, I was out in the garden and something pink caught my eye. There it was – a gorgeous 'Heaven Scent' rose, just asking to be painted again.
In this blog post, I'm going to tell you all about how I tried to capture the beauty of this rose on paper with watercolours.

A watercolour rose inspired by a rose from my garden.
My Weed Filled Rose Garden

A beautiful flower bloomed through the choking weeds....my inspiration for the watercolour painting.
Working as a full-time artist leaves me with hardly any time for other activities, which is why my rose garden has become a jungle of weeds 😬. The few roses that survive are struggling to find space to breathe among all the overgrowth. Despite this, my 'Heaven Scent' rose miraculously managed to produce this little gem.
I cut it free from the weeds that were smothering it and left it in a vase to open slightly before I painted it.
My Colour Choices for the Rose Painting
I challenge myself these days to use a limited palette as much as possible. For the painting I used three Schmincke colours: Ruby Red (PV19), Phthalo Blue (PB15:1) and Transparent Yellow (PY150). I mixed all the colours I needed from those three. Schmincke's Ruby Red is similar to Winsor & Newton's Permanent Rose, which I love.

Schmincke's Ruby Red, Phthalo Blue and Transparent Yellow
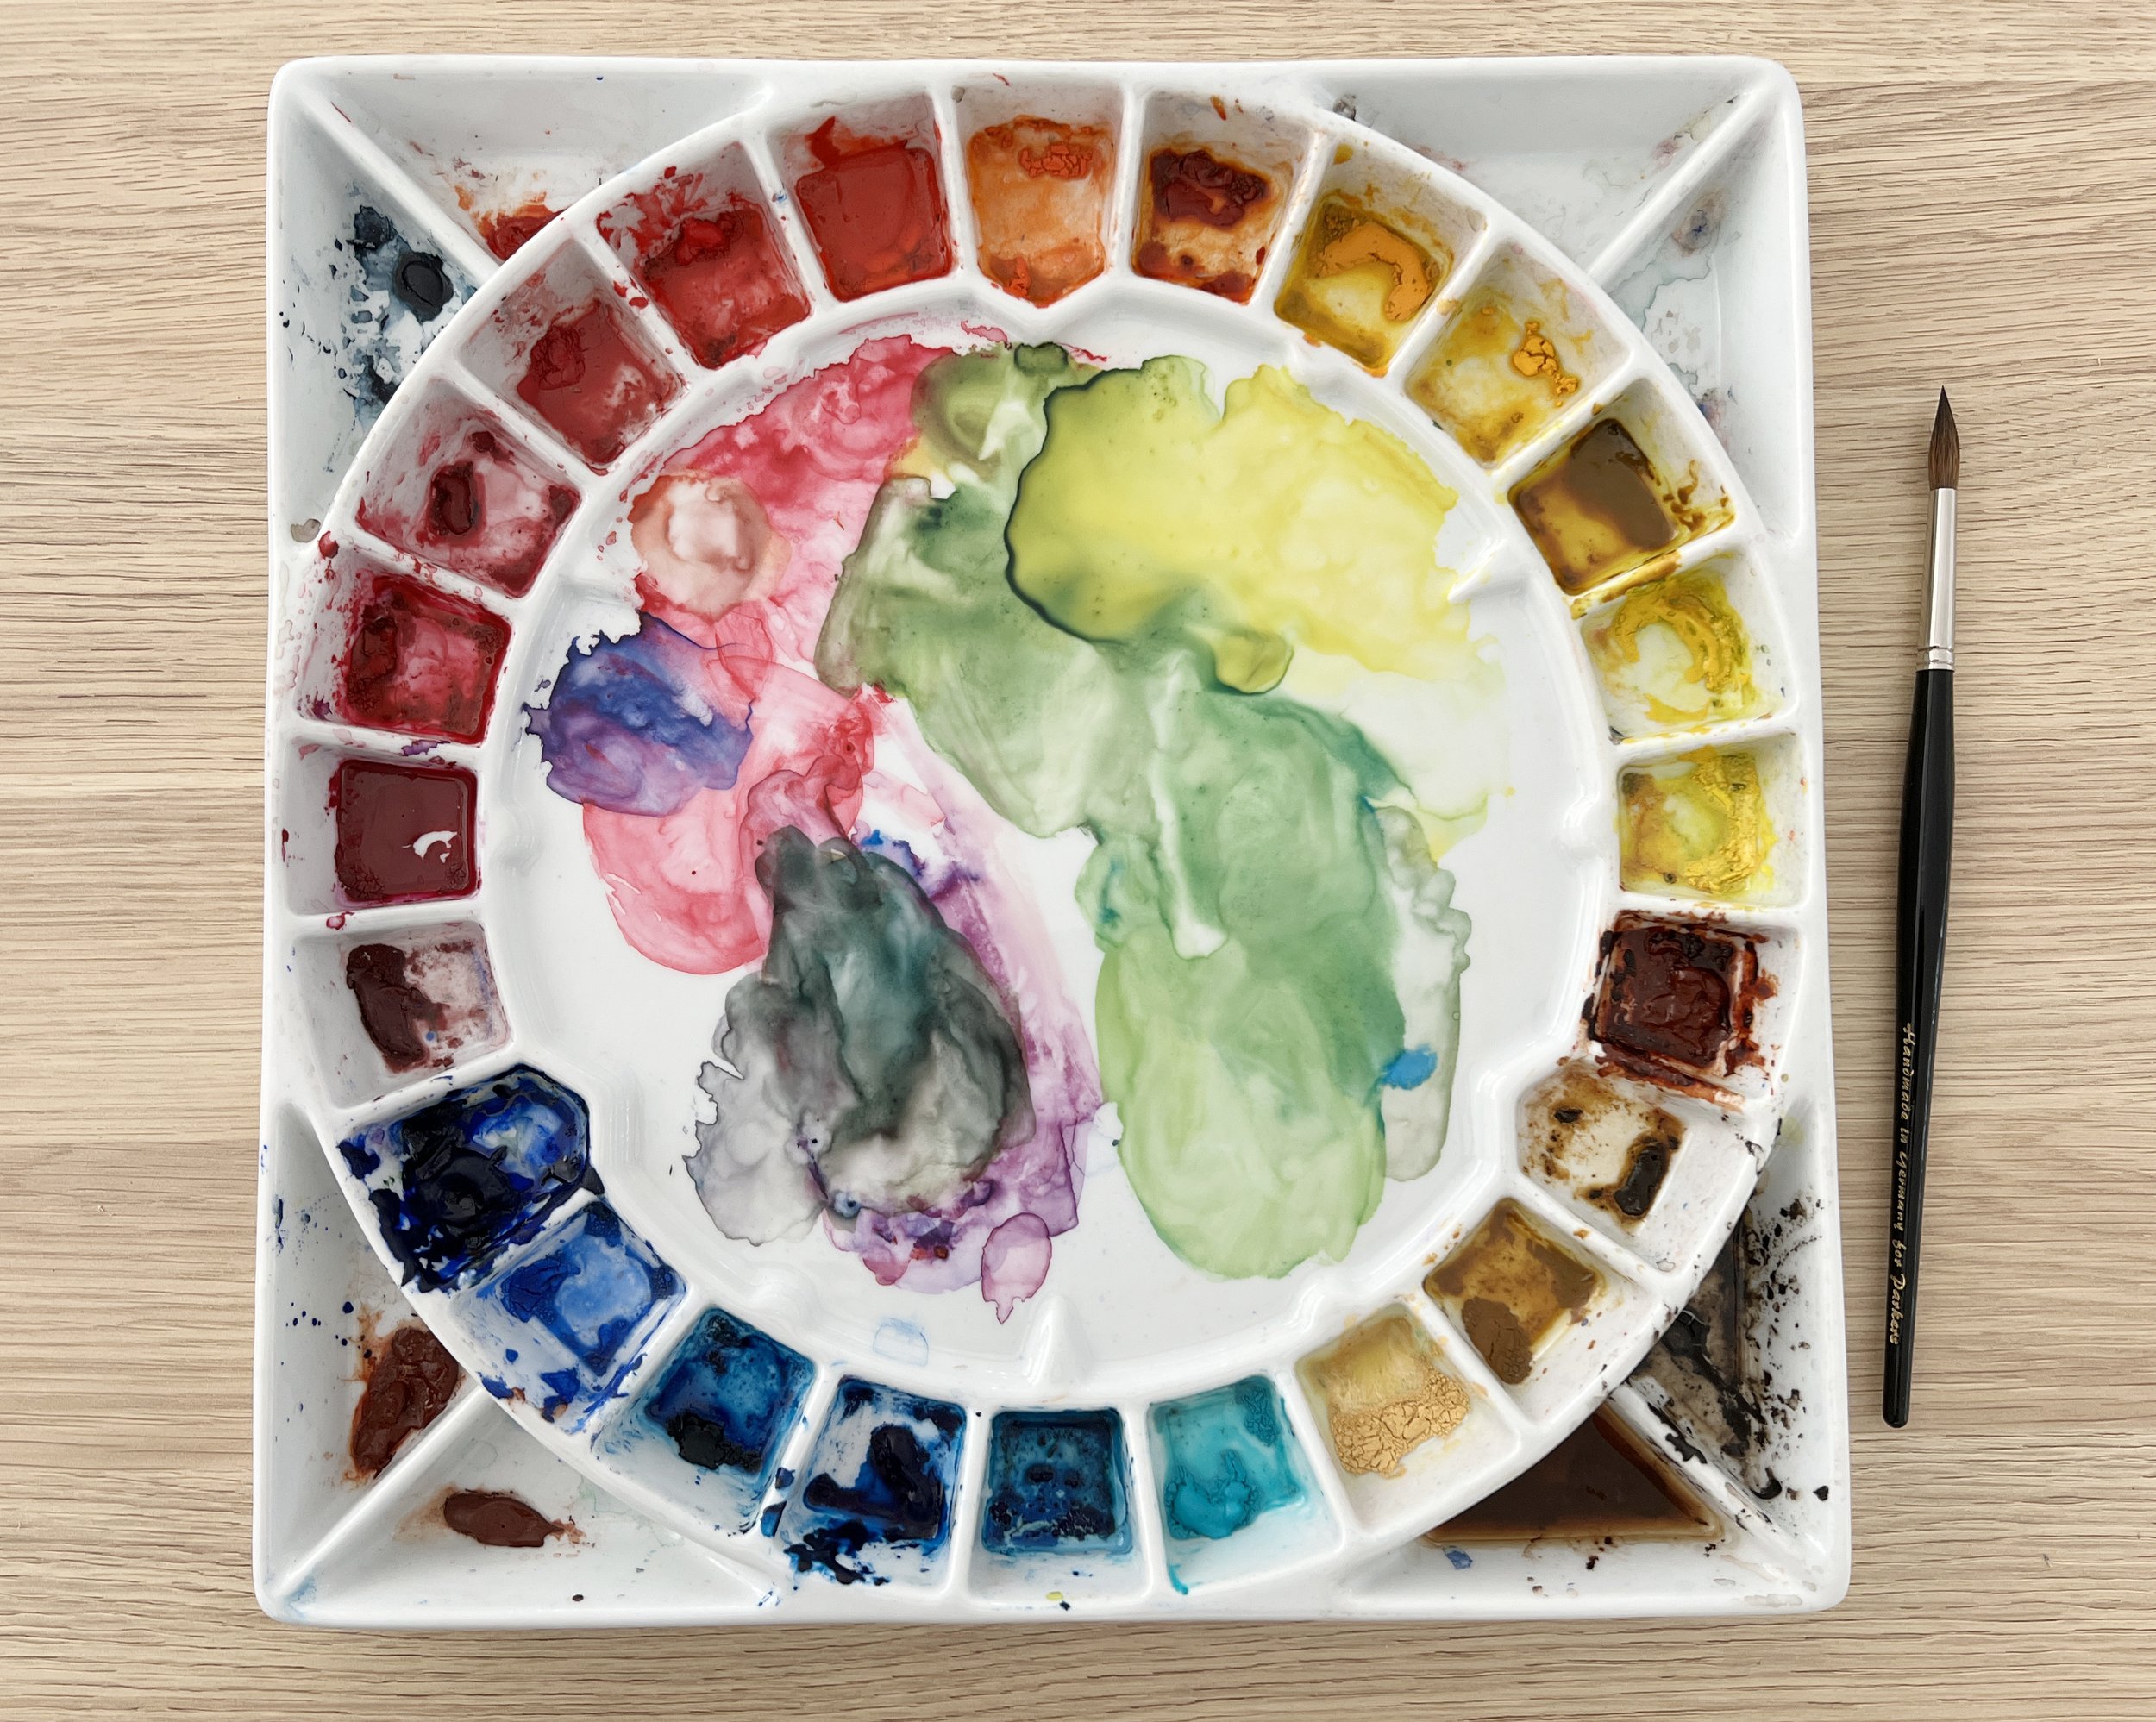
I mixed all the colours I needed from three colours. I used my Da Vinci Maestro brushes because I love round brushes to have a pointed tip.
First Steps in Painting a Watercolour Rose

The first stages of the watercolour rose painting where I used the wet on wet technique to paint the background splash.
I took a sheet of Arches cold press watercolour paper and I cut it in half. After transferring my line drawing onto the paper, I applied masking fluid to the stamens. I often steer clear of masking fluid, but for this piece, I knew it would simplify painting the centre without the hassle of navigating around the stamens.
For my palette, I blended Phthalo Blue with Ruby Red to create a violet, and Phthalo Blue with Transparent Yellow for a green. I then prepped the background by dampening it with water before applying these colours to achieve a splash effect, tilting the paper to let the colours flow. To ensure colour harmony, I mixed these same colours in anticipation of their use on the rose itself.
Once the background had thoroughly dried, I took some Ruby Red and laid down the first layer on the large petal behind the stamens, marking the beginning of bringing the rose to life. I worked on wet paper to keep my paint edges soft and make blending values easier.
More Petals
I adopted a wet on wet approach for most of the painting, which required me to hop between different petals while waiting for sections to dry. For the large petal at the top right, I used the same mix of Phthalo Blue and Ruby Red that I had prepared for the background splash, ensuring a cohesive colour scheme throughout the painting.

The watercolour rose is beginning to take shape, petal by petal. I used a mixture of Phthalo Blue and Ruby Red for the petal - top right.

I continued painting petals using the wet-on-wet technique and added a cast shadow to one of them.
I continued painting petals using the wet-on-wet technique and added a cast shadow to one of them. My goal was to complete each petal in a single layer while the paper was still wet. However, there were instances when I couldn't finish in time, so I had to let them dry and then re-wet the first layer to apply additional colour. I used Ruby Red as the main colour and I applied it thinly to begin with. While it was wet, I painted darker areas with more concentrated Ruby Red. There were a few areas where I used the violet mixture as well.
Removing Masking Fluid & Painting Stamens
When I had finished painting the petals around the stamens I used an eraser to remove the masking fluid.

Removing masking fluid with an eraser.

White paper is revealed after removing masking fluid.
Instead of painting the stamens individually I decided to wash them all in together. So I mixed some Ruby Red with Transparent Yellow to make an orange and I used my brush to wash it over the stamens on dry paper.

Washing all the stamens in at once with a mix of Ruby Red and Transparent Yellow.

The stamens at the front appear closer than the stamens further back.
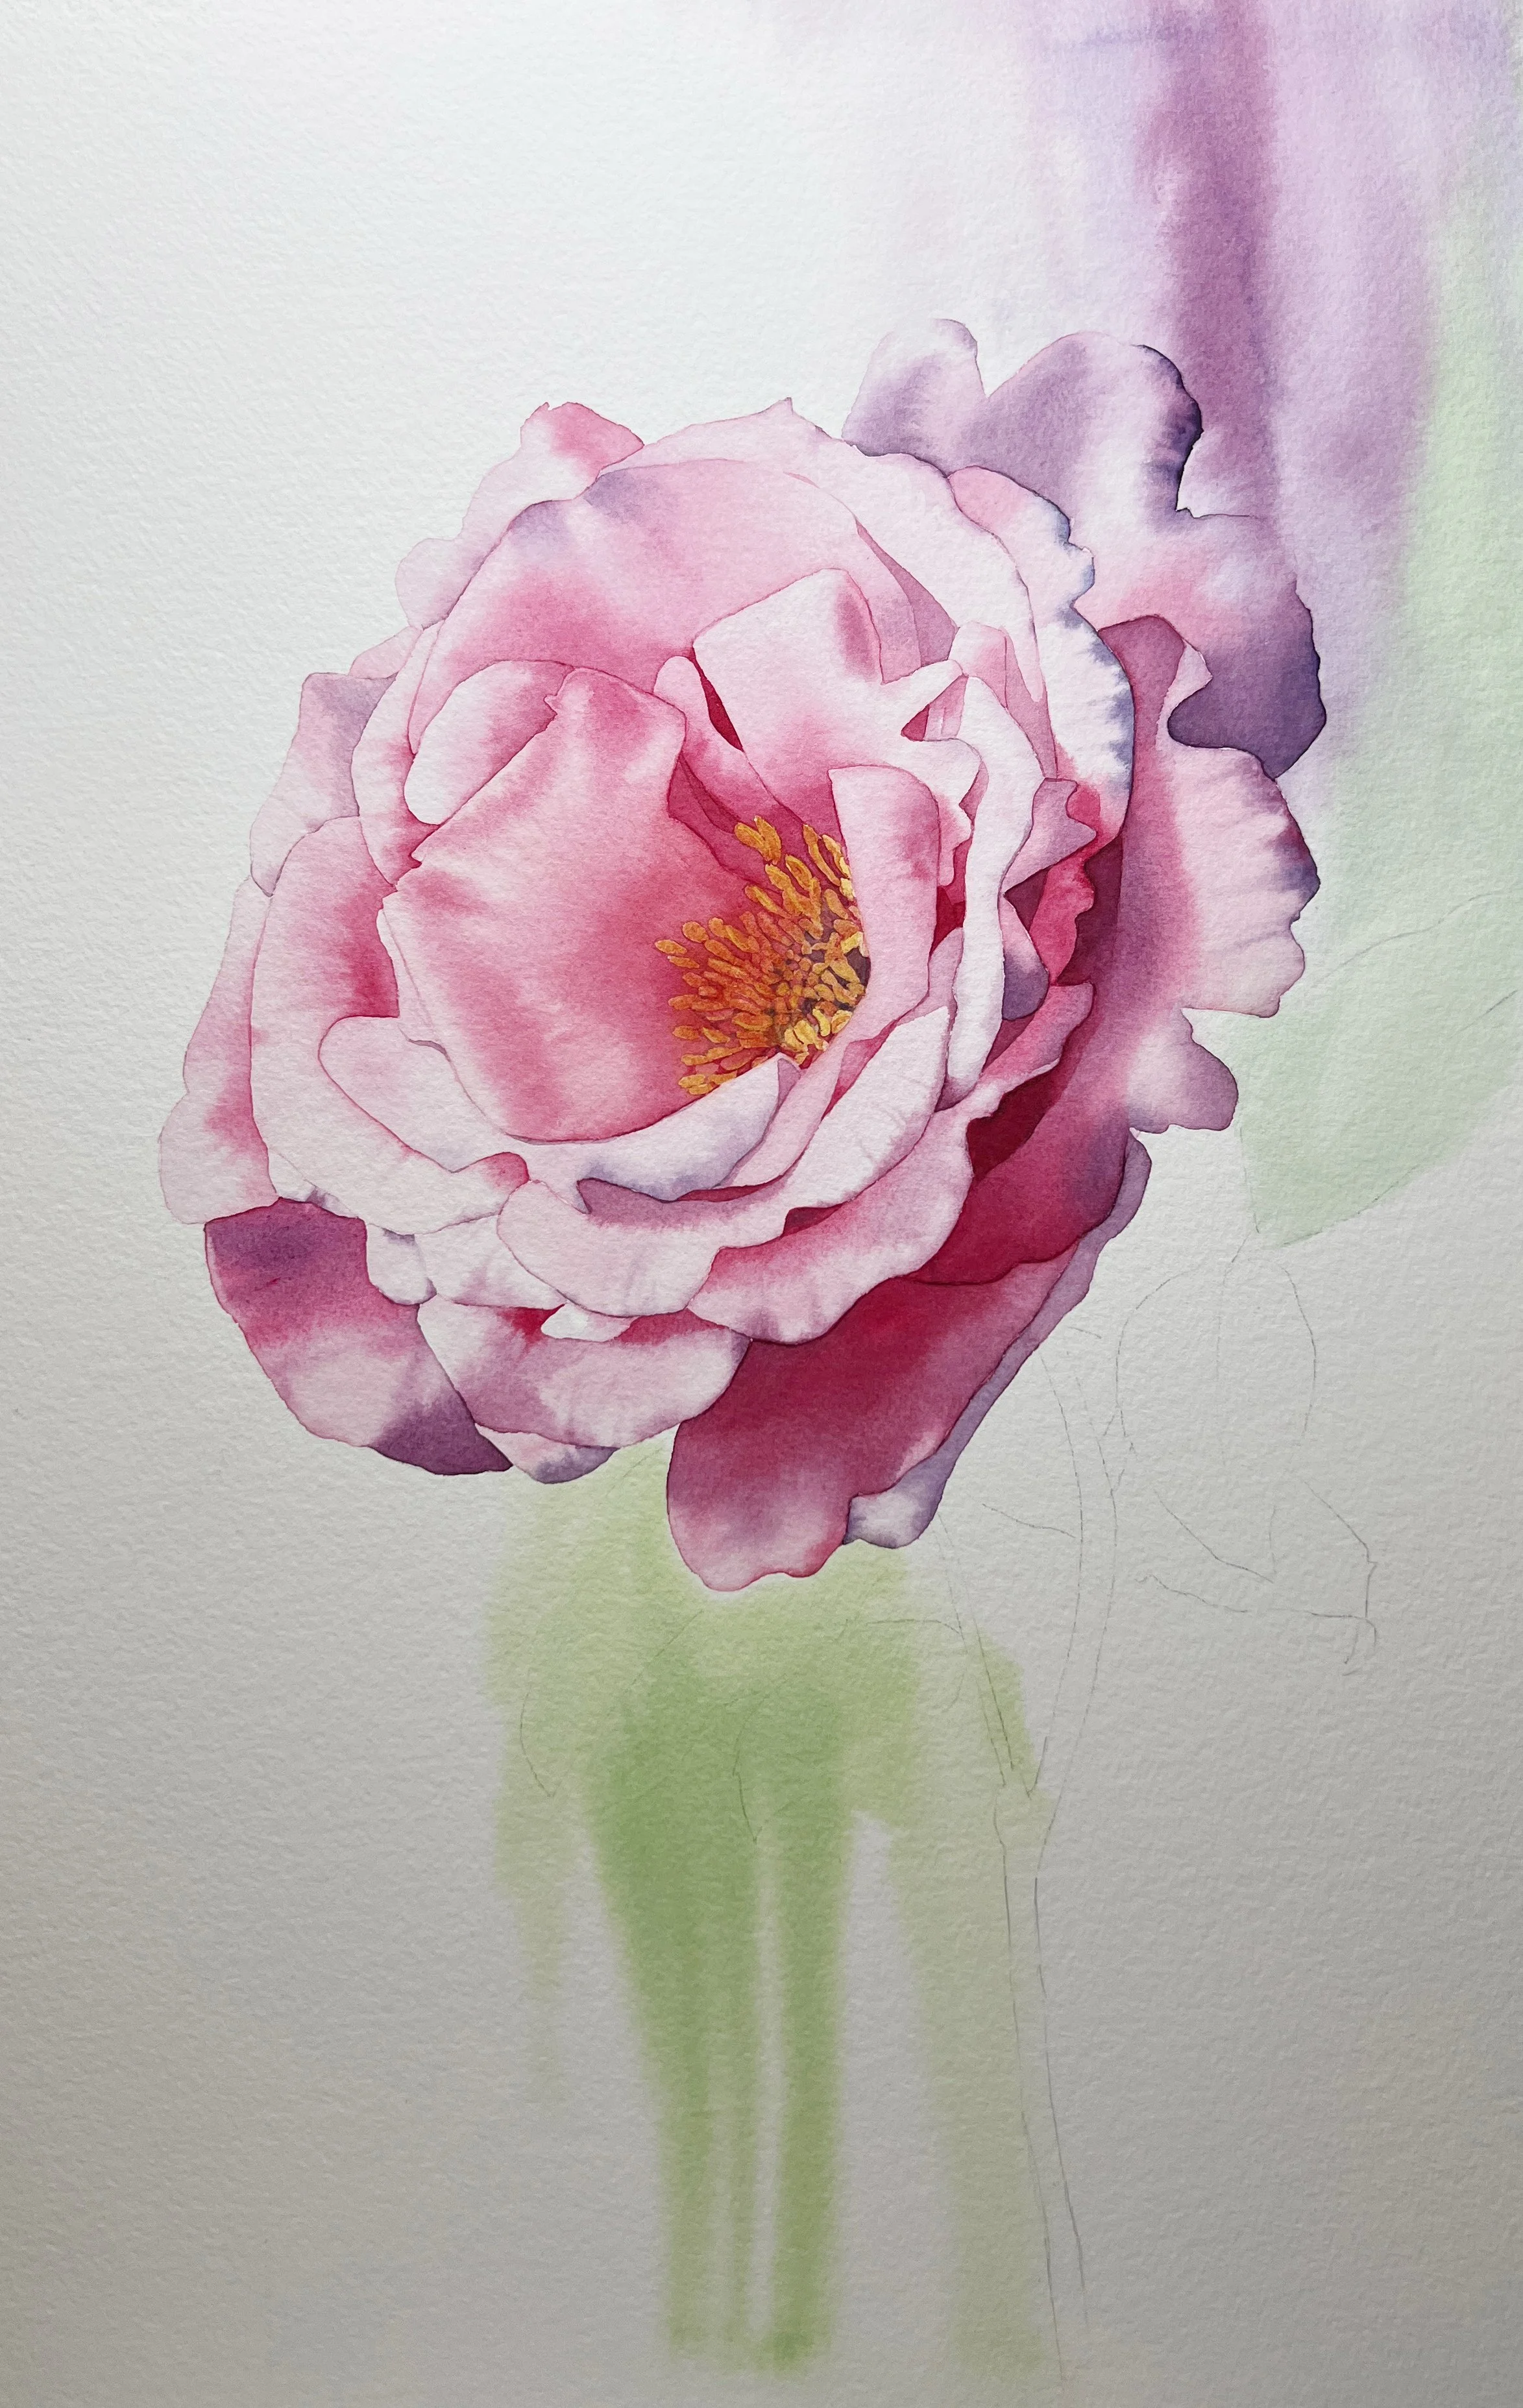
Once the stamens had dried, I chose to set some of them back further into the flower by applying another layer of colour over them. This time, I mixed Ruby Red with Transparent Yellow again, using less water to achieve a slightly darker shade. I applied this on dry paper, deliberately leaving a few of the front stamens untouched by this darker layer, which helped to make them stand out and appear closer.
A Beautiful Rose Starting to Take Shape.
I added depth to the rose by painting the darker petals at the front that were in shadow. In this step, I used Ruby Red at its full intensity to capture that rich, deep colour. For this part of the process, I also used the wet-on-wet technique.
A few times I had to re-wet the previous layers and add some more detail to the edges of the petals to help make them look more curved. The paint bled softly along the edges of the wet petals creating beautiful effects.

The rose watercolor painting with just a few more petals to paint. I used Ruby Red at it's full intensity on those front, outer petals.
All of the bigger petals are painted in now.
The rose is finished. Now I have to start on the leaves. All of the petals were painted wet on wet.
Painting the Rose Leaves
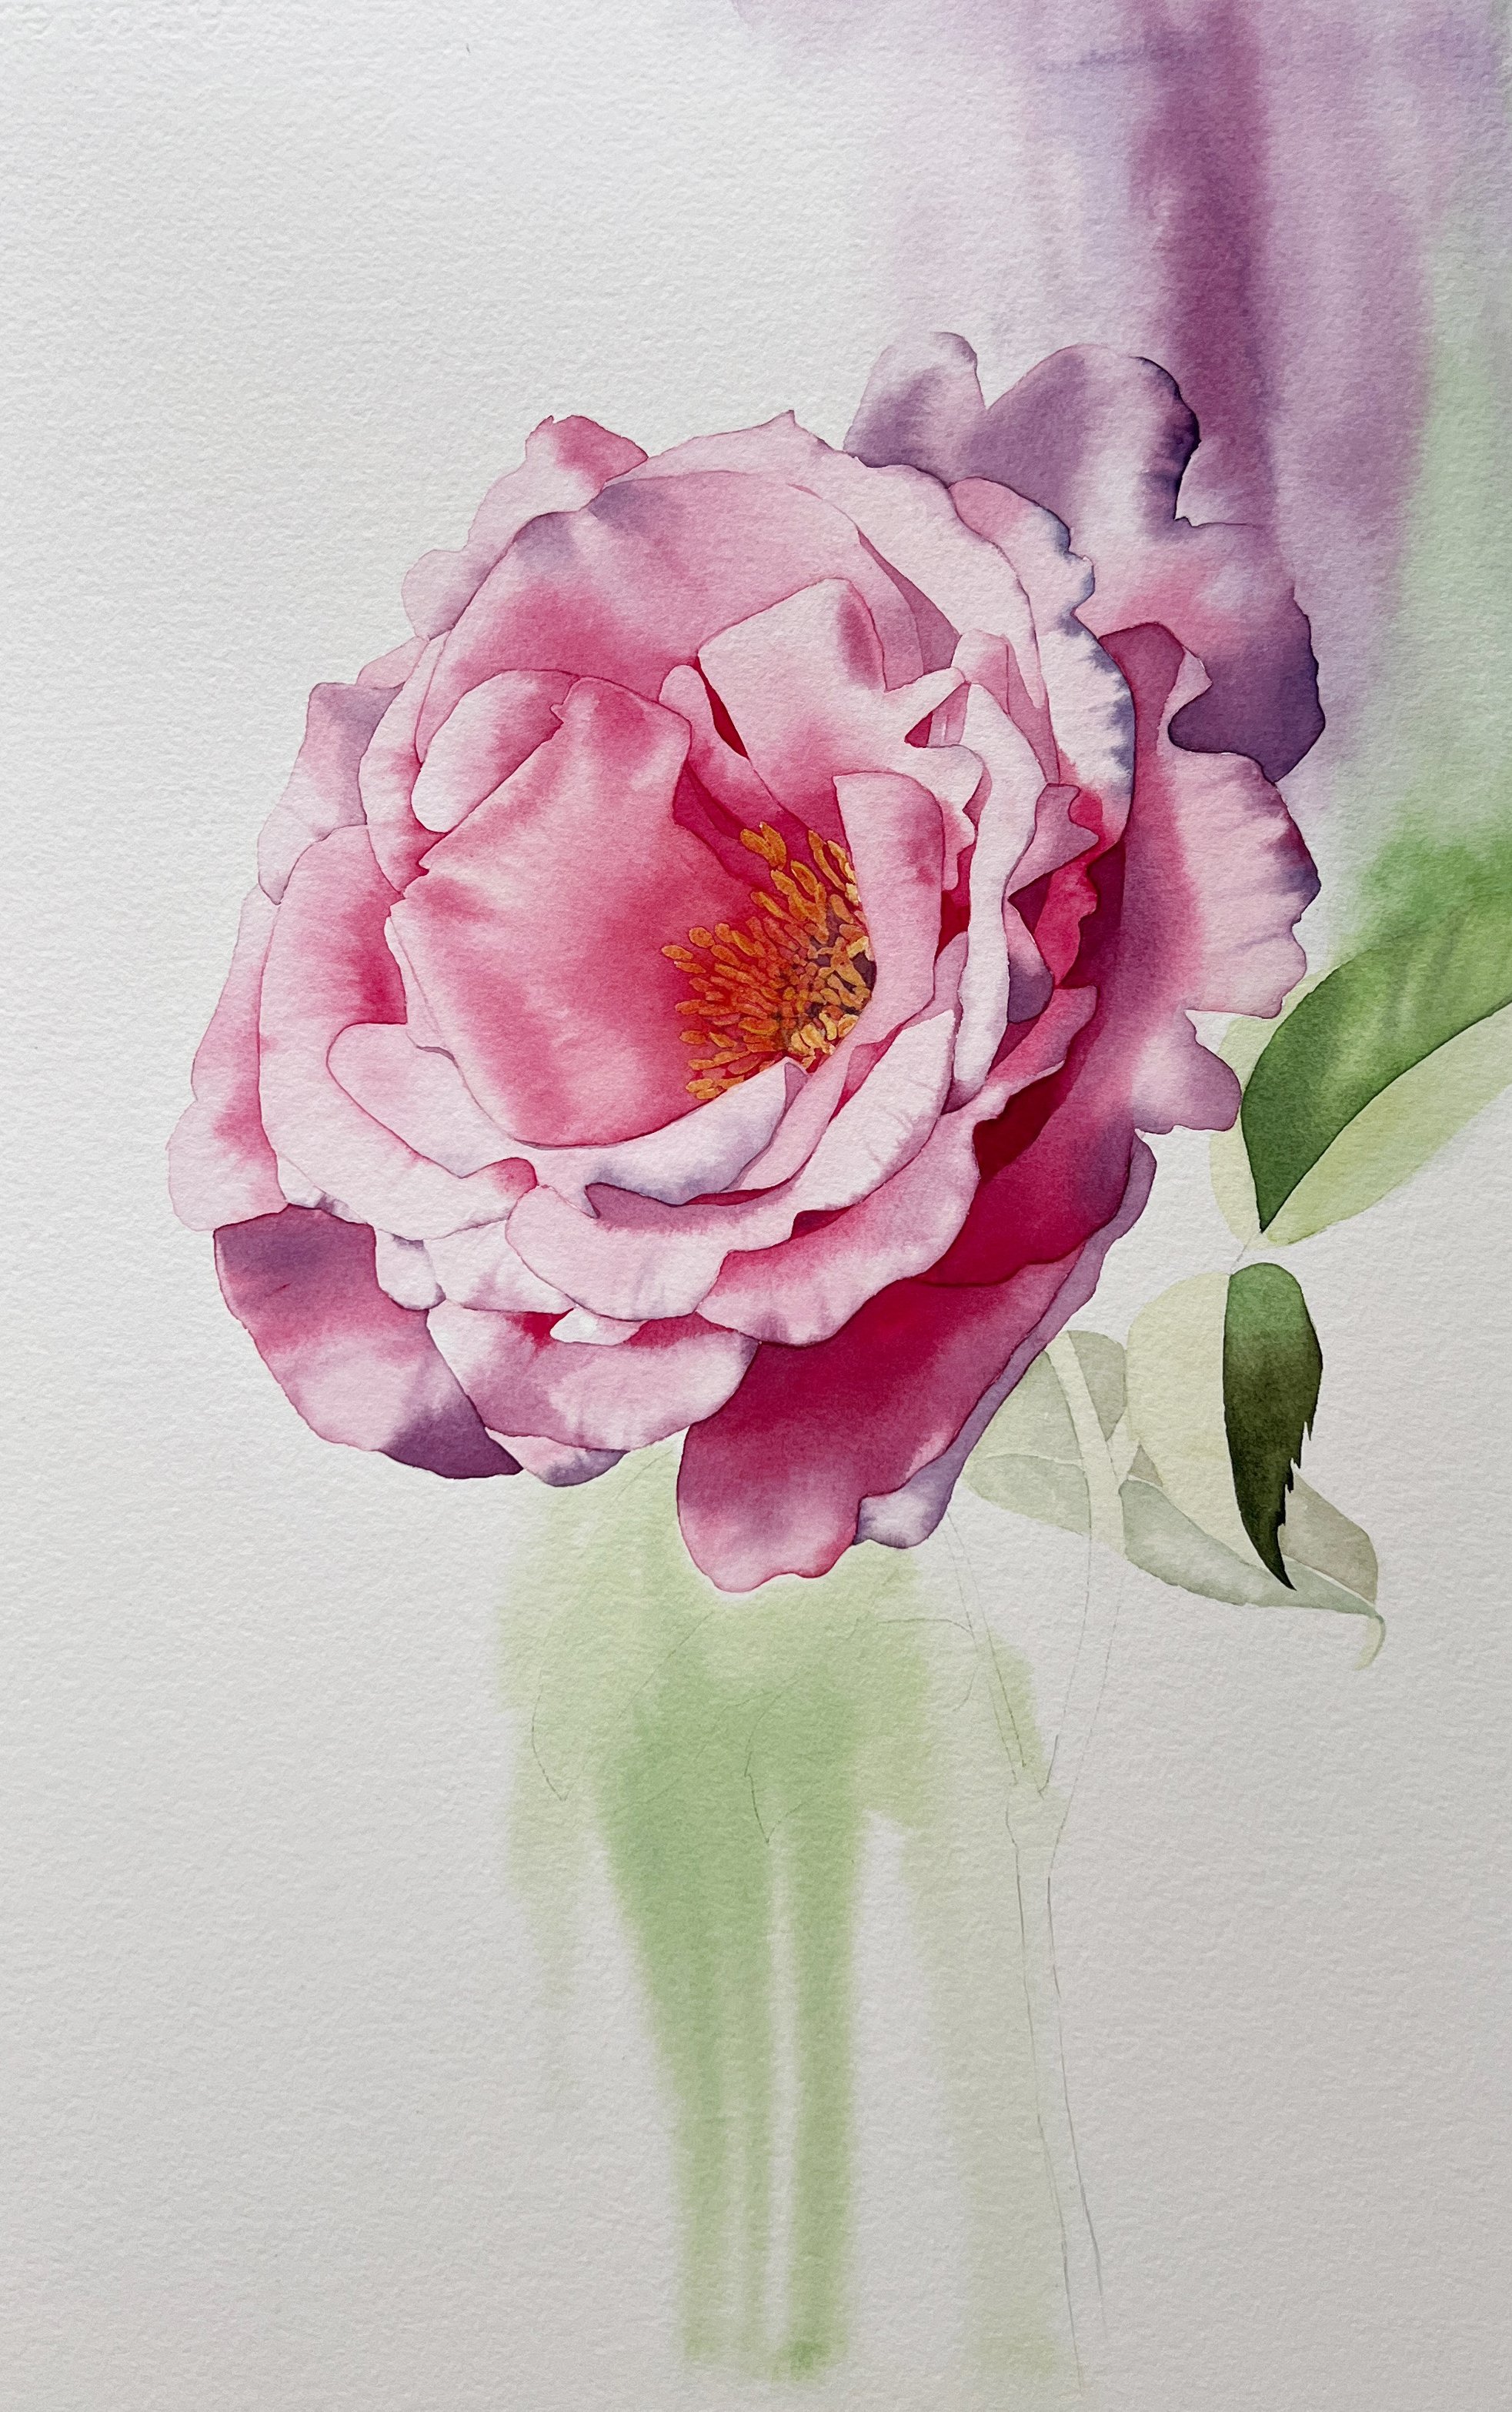
The rose leaves were painted in layers using both the wet on wet technique and the wet on dry technique.
I started by creating a pale green, mixing Transparent Yellow with a hint of Phthalo Blue, which is known for its strong staining properties, so I used it sparingly. This mixture was applied to the leaves on dry paper.

Beginning to paint the leaves with a pale green.
I painted a second layer on each leaf, one side at a time.
Once that layer had dried, I intensified the green by adding more pigment to the mix and introduced a touch of Ruby Red. The addition of Ruby Red slightly neutralised the green, giving it a more realistic hue. On a background leaf, I then applied another layer using a very pale version of this three-colour mix, adopting a wet-on-wet approach for a softer effect.
For the darker leaves, I tackled one side at a time to maintain control over the shading. I painted these with a richer mixture of the colours and continued with a wet-on-wet method for the second layer, enhancing the depth and realism of each leaf.
I painted one side at a time so that I could leave a lighter vein showing down the middle of the leaf.

I painted in the other side of each leaf leaving a centre vein showing.

The last two leaves painted along with the stem.
I approached the final two leaves in the same manner, painting each side individually with the wet-on-wet technique for a cohesive look. The stem was straightforward to paint. I started with a wash of the lighter green all over it, then applied the deeper shade along the right side to create a shadow that subtly spread across the paper, emphasising a natural shadow effect. I gradually faded this deeper colour as it moved away from the flower, shifting focus back to the flower and away from the lower part of the painting.

The finished rose painting.
This project not only reconnected me with the beauty hidden in my overgrown garden but also reminded me of the patience and attention to detail that painting requires. I spent two full days completing this painting (about 16 hours).
I hope sharing this process inspires you to look at the natural world around you with fresh eyes. Whether you're an experienced artist or someone just beginning to explore the world of watercolours, remember that every stroke is a step on a path of discovery, where each creation is a celebration of the beauty that surrounds us.
Learn how to paint roses in watercolour
Watercolour roses are one of my favourite subjects to paint. If you want to learn to paint a rose in watercolour I have lots of rose painting tutorials available where I demonstrate my process step by step from start to finish. Head to my online classes page to find out more.

Some of the roses I have painted for my online watercolor classes.


